Apply clean engine oil to the cam lobe of each camshaft, journals of the camshaft housing sub-assembly and No. 1 valve rocker arm sub-assemblies.
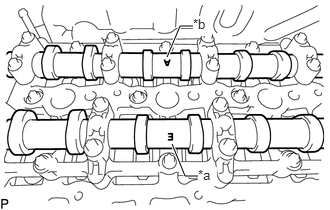
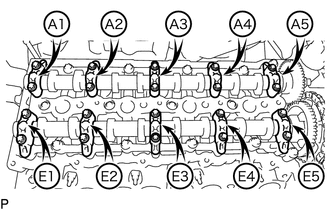
Place the camshaft and No. 2 camshaft on the camshaft housing sub-assembly as shown in the illustration so that mark E and mark A face upward.
Table 1. Text in Illustration
*a
Mark E (Intake Side)
*b
Mark A (Exhaust Side)
Note:
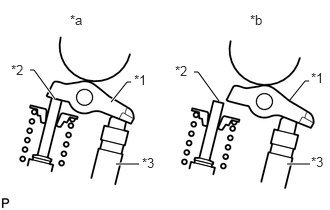
Before and after setting the camshaft and No. 2 camshaft on the camshaft housing sub-assembly, check that the No. 1 valve rocker arm sub-assembly is firmly set to the valve lash adjuster assembly.
Table 2. Text in Illustration
*1
No. 1 Valve Rocker Arm Sub-assembly
*2
Valve Stem
*3
Valve Lash Adjuster Assembly
*a
CORRECT
*b
INCORRECT
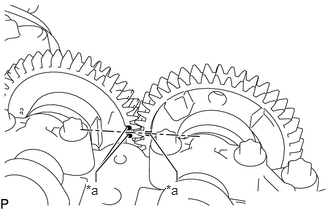
Align the camshaft and No. 2 camshaft timing marks.
Table 3. Text in Illustration
*a
Timing Mark
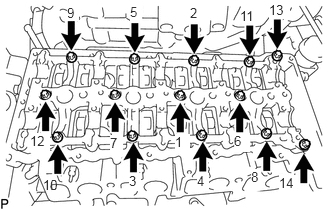
Set the 5 intake camshaft bearing caps and 5 exhaust camshaft bearing caps on the camshaft and No. 2 camshaft as shown in the illustration.
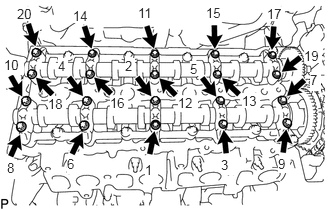
Using an E8 "TORX" socket wrench, partially tighten the 20 bolts.
Uniformly tighten the 20 bolts in several steps in the sequence shown in the illustration.
10 N*m
102 kgf*cm
7 ft.*lbf
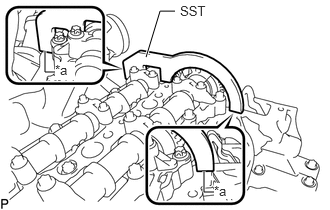
Using SST, hold the camshaft and No. 2 camshaft.
SST
PZ4TB-04961-12
Table 4. Text in Illustration
*a
No clearance
Note:
Make sure there is no clearance between SST and the camshaft housing sub-assembly.
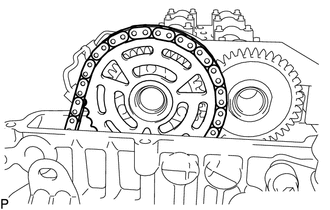
Using an E10 "TORX" socket wrench, temporarily install the camshaft timing sprocket with No. 2 chain sub-assembly to the camshaft with the 3 bolts.
Step 1:
Tighten the 3 bolts.
10 N*m
102 kgf*cm
7 ft.*lbf
Step 2:
Loosen the 3 bolts 90°.
Using a T45 "TORX" socket wrench, install the No. 2 timing chain guide with the bolt.
20 N*m
204 kgf*cm
15 ft.*lbf
Using a 24 mm socket wrench, install the No. 2 chain tensioner assembly.
70 N*m
714 kgf*cm
52 ft.*lbf
Using an E10 "TORX" socket wrench, install the camshaft timing sprocket with the 3 bolts.