FUEL INJECTOR REMOVAL
PROCEDURE
DISCHARGE FUEL SYSTEM PRESSURE
w/ Canister Pump Module
w/o Canister Pump Module
PRECAUTION
Note:After turning the ignition switch off, waiting time may be required before disconnecting the cable from the battery terminal. Therefore, make sure to read the disconnecting the cable from the battery terminal notice before proceeding with work.
DISCONNECT CABLE FROM NEGATIVE BATTERY TERMINAL
Note:When disconnecting the cable, some systems need to be initialized after the cable is reconnected.
REMOVE NO. 1 ENGINE COVER SUB-ASSEMBLY
REMOVE AIR CLEANER CAP SUB-ASSEMBLY
DISCONNECT FUEL HOSE BRACKET
-
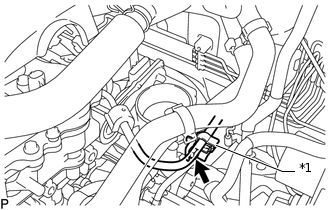
*1
Clamp
Remove the bolt and disconnect the fuel hose bracket.
Note:If the fuel hose is detached from the clamp shown in the illustration, the clamp cannot be reused.
-
DISCONNECT FUEL TUBE SUB-ASSEMBLY
Note:Do not forcibly bend, kink or twist the fuel tube sub-assembly.
Remove the No. 2 fuel pipe clamp and disconnect the fuel tube sub-assembly.
DISCONNECT WIRE HARNESS
-
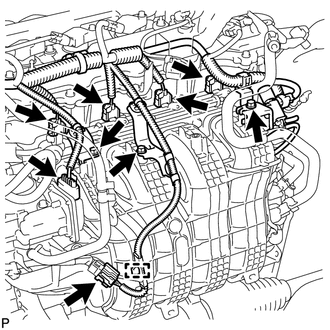
Disconnect the 4 fuel injector connectors.
Disconnect the 2 connectors.
Remove the 3 bolts and 3 wire harness brackets.
Detach the clamp and disconnect the wire harness.
-
REMOVE FUEL DELIVERY PIPE
-
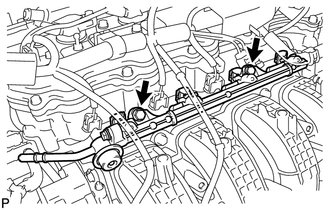
Remove the 2 bolts, and then remove the fuel delivery pipe together with the 4 fuel injector assemblies.
Note:Be careful not to drop the fuel injectors when removing the fuel delivery pipe.
-
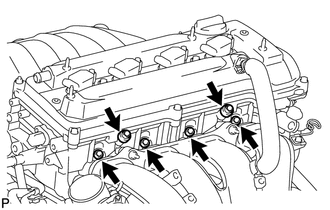
Remove the 2 fuel delivery spacers from the cylinder head.
Remove the 4 injector vibration insulators from the cylinder head.
-
REMOVE FUEL INJECTOR ASSEMBLY
-
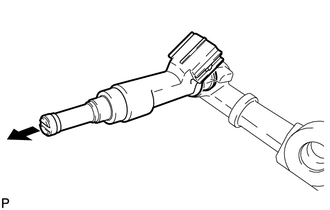

Pull Out
Pull the 4 fuel injector assemblies out of the fuel delivery pipe.
Remove the O-ring.
-