ENGINE UNIT DISASSEMBLY
PROCEDURE
REMOVE WATER BY-PASS PIPE
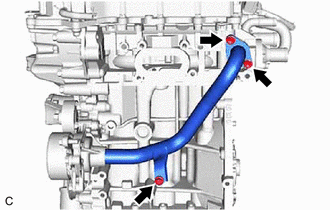
Remove the 3 bolts and water by-pass pipe.
-
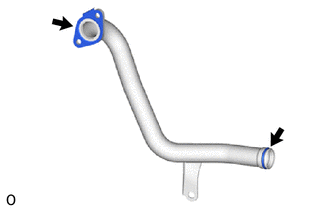
Remove the 2 water by-pass pipe gaskets from the water by-pass pipe.
REMOVE ENGINE OIL LEVEL DIPSTICK
Remove the engine oil level dipstick.
REMOVE ENGINE OIL LEVEL DIPSTICK GUIDE
-
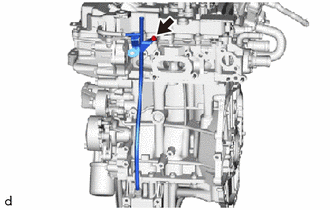
Remove the bolt and engine oil level dipstick guide from the cylinder head sub-assembly.
-
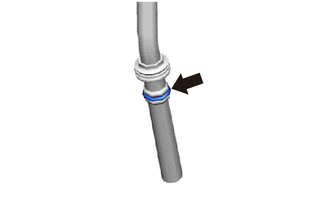
Remove the O-ring from the engine oil level dipstick guide.
-
REMOVE SPARK PLUG
REMOVE CAMSHAFT POSITION SENSOR (for Intake Side)
REMOVE CAMSHAFT POSITION SENSOR (for Exhaust Side)
REMOVE ENGINE COOLANT TEMPERATURE SENSOR
REMOVE CAMSHAFT TIMING OIL CONTROL VALVE ASSEMBLY (for Intake Side)
REMOVE CAMSHAFT TIMING OIL CONTROL VALVE ASSEMBLY (for Exhaust Side)
REMOVE CRANKSHAFT POSITION SENSOR
REMOVE KNOCK CONTROL SENSOR
REMOVE ENGINE OIL PRESSURE SWITCH ASSEMBLY
REMOVE OIL CONTROL VALVE FILTER
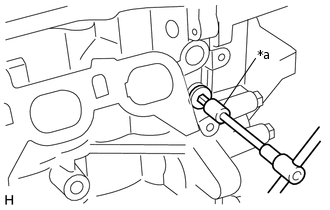
*a
8 mm Hexagon Socket Wrench
Using an 8 mm hexagon socket wrench, remove the head taper screw plug.
-
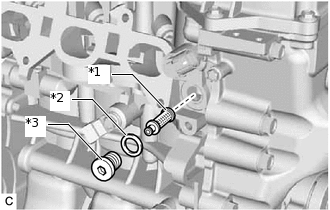
*1
Oil Control Valve Filter
*2
Gasket
*3
Head Taper Screw Plug
Remove the oil control valve filter and gasket.
REMOVE OIL FILLER CAP SUB-ASSEMBLY
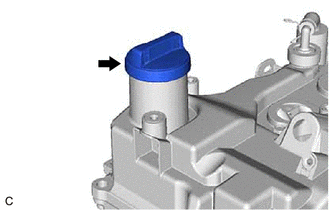
Remove the oil filler cap sub-assembly.
-
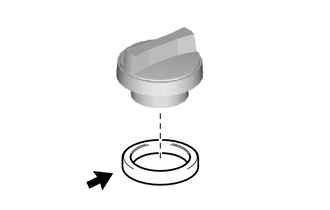
Remove the oil filler cap gasket from the oil filler cap sub-assembly.
REMOVE CYLINDER HEAD COVER SUB-ASSEMBLY
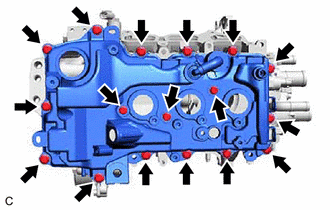
Remove the 17 bolts and cylinder head cover sub-assembly.
-
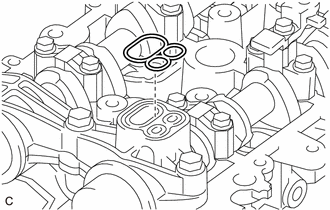
Remove the camshaft bearing cap oil hole gasket.
REMOVE CYLINDER HEAD COVER GASKET
-
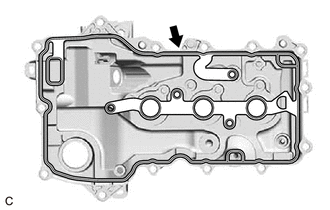
Remove the cylinder head cover gasket from the cylinder head cover sub-assembly.
-
REMOVE VENTILATION HOSE
REMOVE PCV VALVE (VENTILATION VALVE SUB-ASSEMBLY)
REMOVE VENTILATION SYSTEM GROMMET
REMOVE GROMMET
-
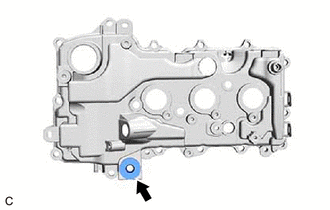
Remove the grommet from the cylinder head cover sub-assembly.
-
REMOVE OIL PAN DRAIN PLUG
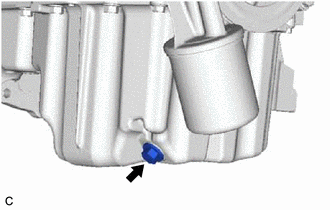
Remove the oil pan drain plug.
Remove the oil pan drain plug gasket.
REMOVE OIL PAN SUB-ASSEMBLY
REMOVE NO. 1 OIL PAN BAFFLE PLATE
-
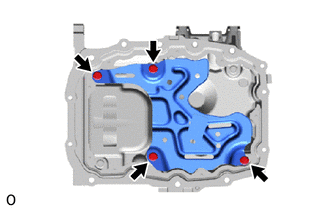
Remove the 4 bolts and No. 1 oil pan baffle plate from the No. 2 oil pan sub-assembly.
-
REMOVE NO. 2 OIL PAN SUB-ASSEMBLY
-
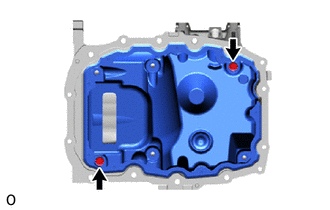
Remove the 2 bolts and No. 2 oil pan sub-assembly from the oil pan sub-assembly.
-
REMOVE RING PIN
Tip:Perform this procedure only when replacement of the ring pin is necessary.
-
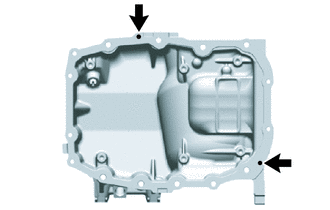
Remove the 2 ring pins.
-
REMOVE OIL STRAINER SUB-ASSEMBLY
-
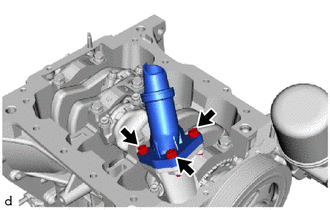
Remove the 3 bolts and oil strainer sub-assembly from the timing chain cover sub-assembly.
-
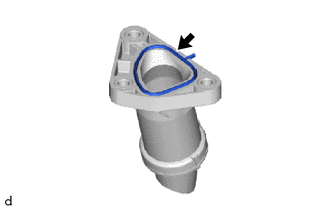
Remove the oil strainer gasket from the oil strainer sub-assembly.
-
REMOVE WATER INLET
REMOVE THERMOSTAT
REMOVE ENGINE WATER PUMP ASSEMBLY
REMOVE OIL FILTER SUB-ASSEMBLY
REMOVE OIL FILTER BRACKET
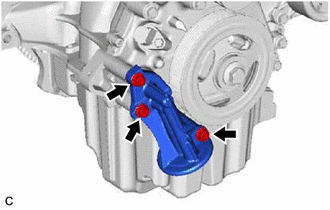
Remove the 3 bolts and oil filter bracket.
-
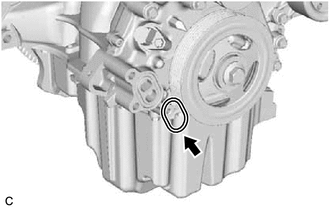
Remove the oil filter bracket gasket from the timing chain cover sub-assembly.
REMOVE TIMING GEAR COVER TIGHT PLUG
SET NO. 1 CYLINDER TO TDC/EXHAUST
REMOVE CRANKSHAFT PULLEY
REMOVE CYLINDER BLOCK DRAIN COCK PLUG
-
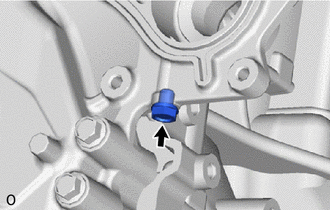
Remove the cylinder block drain cock plug and gasket.
-
REMOVE TIMING CHAIN COVER SUB-ASSEMBLY
REMOVE VENTILATION CASE SUB-ASSEMBLY
-
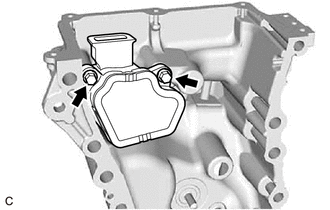
Remove the 2 bolts and ventilation case sub-assembly from the timing chain cover sub-assembly.
-
REMOVE STUD BOLT
Tip:Perform this procedure only when replacement of the stud bolt is necessary.
-
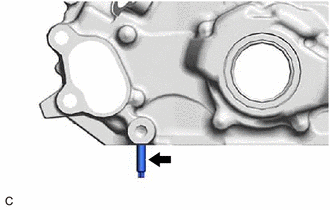
Remove the stud bolt from the timing chain cover sub-assembly.
-
REMOVE TIMING CHAIN COVER OIL SEAL
-
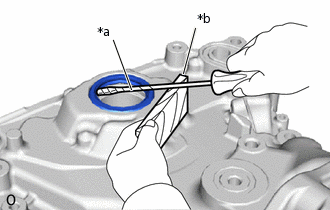
*a
Protective Tape
*b
Wooden Block
Using a wooden block and a screwdriver with its tip wrapped with protective tape, pry out the timing chain cover oil seal.
-
REMOVE NO. 1 CHAIN TENSIONER ASSEMBLY
-
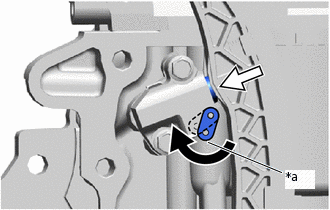
*a
Stopper Plate
Turn the stopper plate of the No. 1 chain tensioner assembly clockwise to release the lock and push in the plunger.
-
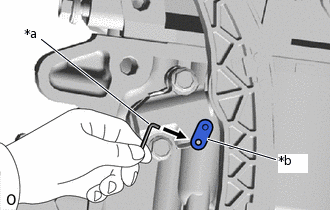
*a
Hexagon Wrench
*b
Stopper Plate
Turn the stopper plate counterclockwise to set the lock, and insert a hexagon wrench into the stopper plate hole.
-
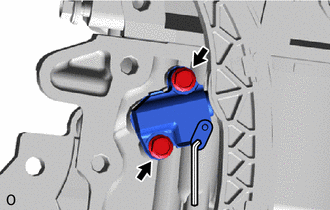
Remove the 2 bolts and No. 1 chain tensioner assembly.
-
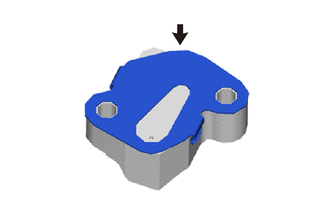
Remove the chain tensioner gasket from the No. 1 chain tensioner assembly.
-
REMOVE TIMING CHAIN TENSION ARM
-
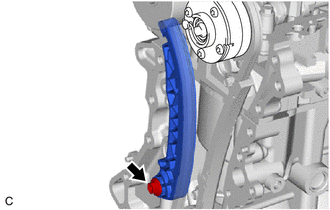
Remove the bolt and timing chain tensioner arm.
-
REMOVE CHAIN SUB-ASSEMBLY
Remove the chain sub-assembly.
REMOVE TIMING CHAIN GUIDE
-
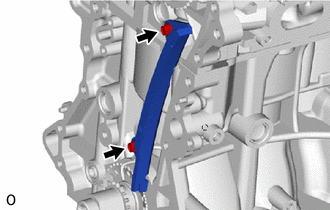
Remove the 2 bolts and timing chain guide.
-
REMOVE CRANKSHAFT TIMING SPROCKET
-
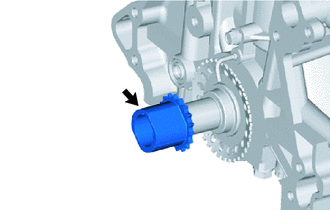
Remove the crankshaft timing sprocket from the crankshaft.
-
REMOVE CRANKSHAFT STRAIGHT PIN
-
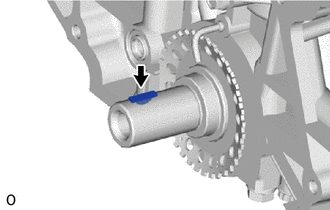
Remove the crankshaft straight pin from the crankshaft groove.
-
REMOVE BRACKET
-
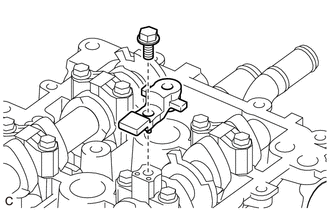
Remove the bolt and bracket from the No. 3 camshaft bearing cap.
-
REMOVE CAMSHAFT TIMING SPROCKET ASSEMBLY
-
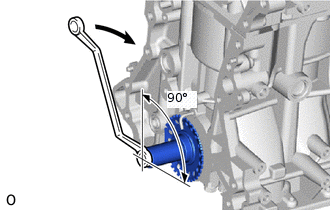

Turn
Rotate the crankshaft 90° clockwise.
Note:Do not allow a lifted valve and piston to come into contact with each other when removing the camshaft.
-
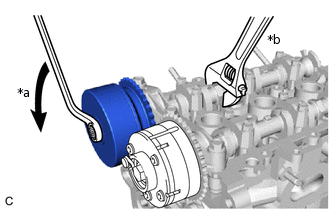
*a
Turn
*b
Hold
Using a wrench to hold the hexagonal portion of the camshaft, remove the bolt from the camshaft.
Remove the camshaft timing sprocket assembly from the camshaft.
-
REMOVE CAMSHAFT TIMING EXHAUST GEAR ASSEMBLY
-
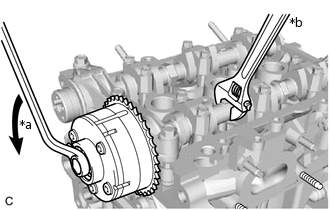
*a
Turn
*b
Hold
Using a wrench to hold the hexagonal portion of the No. 2 camshaft, remove the bolt from the No. 2 camshaft.
Remove the camshaft timing exhaust gear assembly from the No. 2 camshaft.
-
REMOVE CAMSHAFT BEARING CAP
-
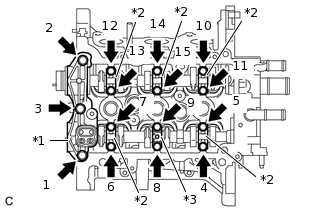
*1
No. 1 Camshaft Bearing Cap
*2
No. 2 Camshaft Bearing Cap
*3
No. 3 Camshaft Bearing Cap
Remove the 15 bolts in the order shown in the illustration.
Remove the No. 1 camshaft bearing cap, 5 No. 2 camshaft bearing caps and No. 3 camshaft bearing cap.
-
REMOVE OIL CONTROL VALVE FILTER
-
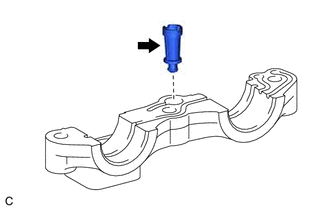
Remove the oil control valve filter from the No. 1 camshaft bearing cap.
-
REMOVE NO. 2 CAMSHAFT
-
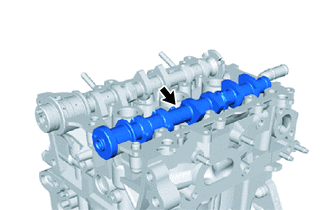
Remove the No. 2 camshaft from the cylinder head sub-assembly.
-
REMOVE CAMSHAFT
-
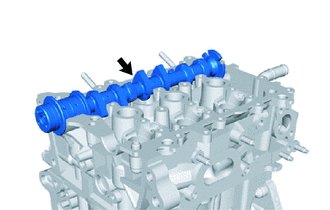
Remove the camshaft from the cylinder head sub-assembly.
-
REMOVE REAR ENGINE OIL SEAL RETAINER
-
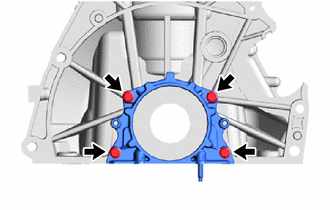
Remove the 4 bolts and rear engine oil seal retainer from the cylinder block sub-assembly.
-
REMOVE REAR ENGINE OIL SEAL
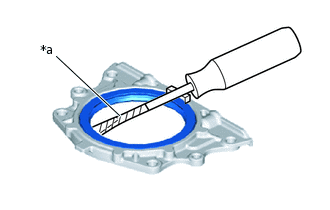
*a
Protective Tape
Using a screwdriver with its tip wrapped with protective tape, pry out the rear engine oil seal.
REMOVE STUD BOLT
Tip:Perform this procedure only when replacement of the stud bolt is necessary.
-
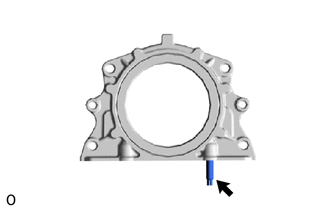
Using an E6 "TORX" socket wrench, remove the stud bolt from the rear engine oil seal retainer.
-
REMOVE VALVE LIFTER
-
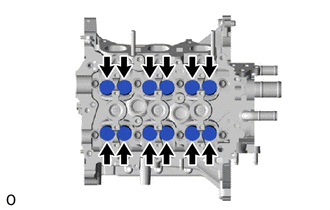
Remove the 12 valve lifters.
Note:Make a note of the inscribed mark on the valve lifters for each valve after removing them.
Arrange the valve lifters for each cylinder in the correct order.
-
REMOVE CYLINDER HEAD SUB-ASSEMBLY
REMOVE CYLINDER HEAD GASKET
REMOVE CYLINDER BLOCK WATER JACKET SPACER
-
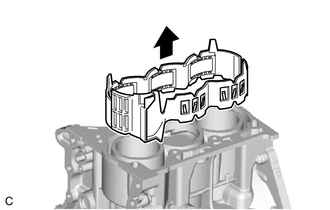
Remove the cylinder block water jacket spacer LH and cylinder block water jacket spacer RH from the cylinder block sub-assembly.
-