CANVAS TOP ROOF HOUSING REMOVAL
PROCEDURE
REMOVE ROOF HEADLINING ASSEMBLY (for 3 Door)
REMOVE ROOF HEADLINING ASSEMBLY (for 5 Door)
REMOVE CANVAS TOP WIRE HARNESS
-
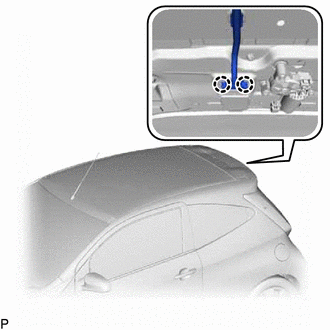
Disengage the 2 claws and disconnect the connector.
-
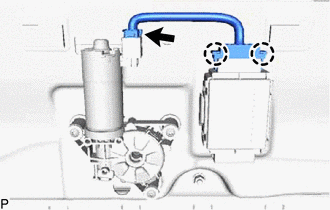
Disconnect the connector.
Disengage the 2 claws and remove the canvas top wire harness.
-
REMOVE SLIDING ROOF CONTROL ECU ASSEMBLY
-
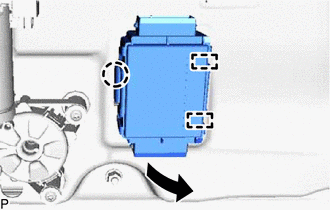
Disengage the claw and 2 guides as shown in the illustration to remove the sliding roof control ECU assembly .
-
REMOVE SLIDE ROOF MOTOR ASSEMBLY
-
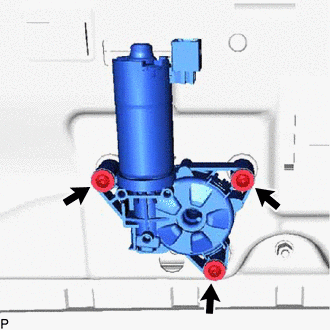
Using a T25 "TORX" socket wrench, remove the 3 screws and slide roof motor assembly.
-
REMOVE CURTAIN SHIELD AIRBAG ASSEMBLY LH (w/ Curtain Shield Airbag)
REMOVE CURTAIN SHIELD AIRBAG ASSEMBLY RH (w/ Curtain Shield Airbag)
Tip:Use the same procedure as for the LH side.
REMOVE FRONT REMOVABLE ROOF HOUSING MOUNTING BRACKET LH
-
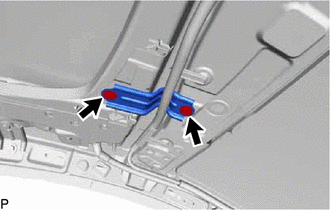
Remove the 2 bolts and front removable roof housing mounting bracket LH.
-
REMOVE FRONT REMOVABLE ROOF HOUSING MOUNTING BRACKET RH
Tip:Use the same procedure as for the LH side.
REMOVE NO. 1 SLIDING ROOF HOUSING BRACKET
-
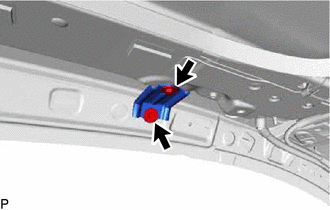
Remove the 2 bolts and No. 1 sliding roof housing bracket.
Tip:Use the same procedure for the RH side and LH side.
-
REMOVE REAR SLIDING ROOF HOUSING MOUNTING BRACKET LH
-
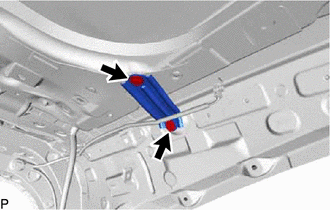
Remove the 2 bolts and rear sliding roof housing mounting bracket LH.
-
REMOVE REAR SLIDING ROOF HOUSING MOUNTING BRACKET RH
Tip:Use the same procedure as for the LH side.
REMOVE CANVAS TOP TRIM SUB-ASSEMBLY
-
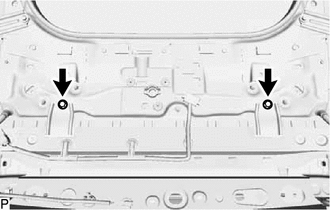
Remove the 2 bolts.
Half open the canvas top trim sub-assembly as shown in the illustration.

Using a T30 "TORX" socket wrench, remove the clip as shown in the illustration.
 Tip:
Tip:Use the same procedure for the RH side and LH side.
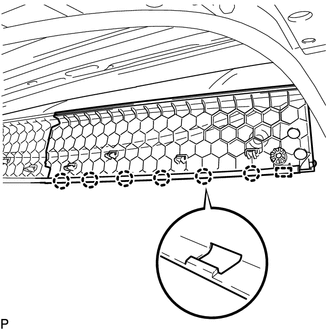
Disengage the 8 claws.
-
Disengage the hook.
Tip:Use the same procedure for the RH side and LH side.
-
Disengage the 6 claws and guide to remove the front fixation headliner cover LH.
Tip:Use the same procedure for the RH side and LH side.
-
Remove the 4 nuts.
-
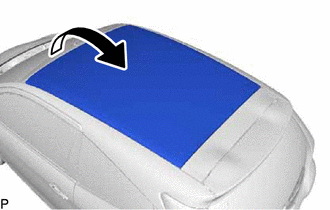
Turn back the canvas top trim sub-assembly as shown in the illustration.
-
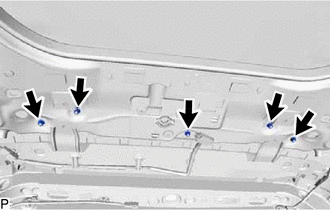
Remove the 5 nuts.
-
Turn back the canvas top trim sub-assembly as shown in the illustration.
-
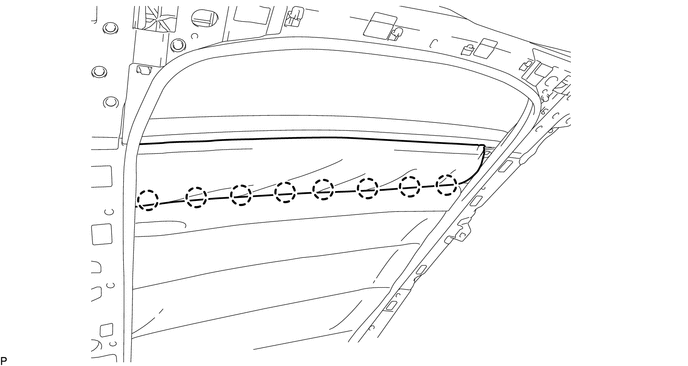
Using a drill bit with a diameter of less than 4.0 mm (0.157 in.), drill out the 5 rivet heads and disconnect the sliding roof headlining sub-assembly.
Note:Do not drill the rivet at an angle as this will cause damage to the drill and drill hole. Line up the drill and rivet, and carefully drill out the rivet head.
Be careful as the cut rivet will be very hot.
-
Using a drill bit with a diameter of less than 4.0 mm (0.157 in.), drill out the 2 rivet heads and disconnect the tarpaulin rail cable LH and tarpaulin rail cable RH.
Note:Do not drill the rivet at an angle as this will cause damage to the drill and drill hole. Line up the drill and rivet, and carefully drill out the rivet head.
Be careful as the cut rivet will be very hot.
-
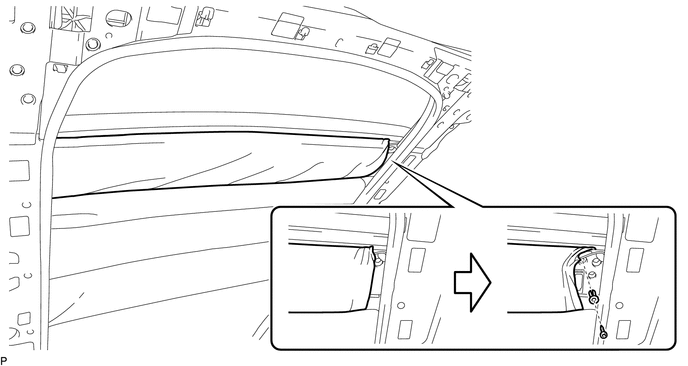
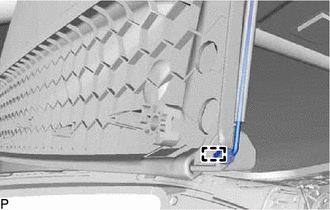
Disengage the 2 claws as shown in the illustration.
-
Using a T20 "TORX" socket wrench, remove the 2 bolts.
-
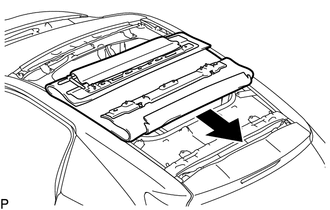
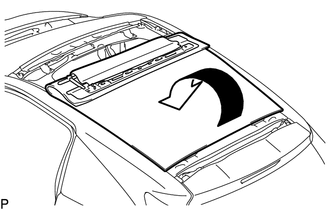
Remove the canvas top trim sub-assembly as shown in the illustration.
-
REMOVE SLIDING ROOF GUIDE RAIL COVER LH
-
Using a T30 "TORX" socket wrench, remove the 2 clips.
-
Disengage the 4 claws and remove the sliding roof guide rail cover LH as shown in the illustration.
-
REMOVE SLIDING ROOF GUIDE RAIL COVER RH
Tip:Use the same procedure as for the LH side.
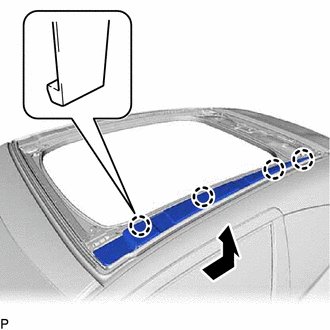
REMOVE ROOF WIND DEFLECTOR PANEL SUB-ASSEMBLY
-
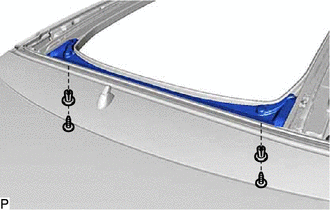
Using a T30 "TORX" socket wrench, remove the 2 clips.
-
Disengage the 2 claws and 6 guides to remove the roof wind deflector panel sub-assembly.
-
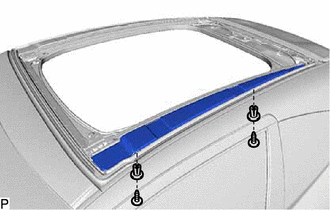
REMOVE SLIDING ROOF SEAL
-
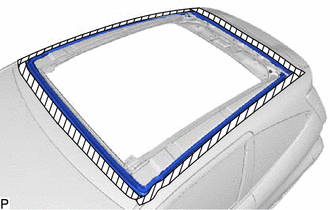

Protective Tape
Apply protective tape to the area around the installation position of the sliding roof housing sub-assembly on the vehicle body to prevent it from being scratched.
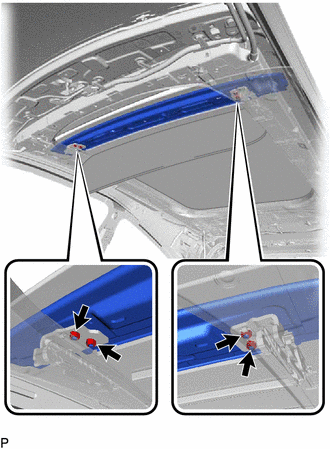
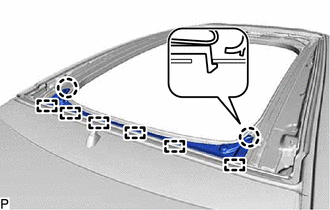
Remove the sliding roof seal.
Tip:Remove any remaining butyl tape from the sliding roof housing sub-assembly.
-
REMOVE SLIDING ROOF HOUSING SUB-ASSEMBLY
-
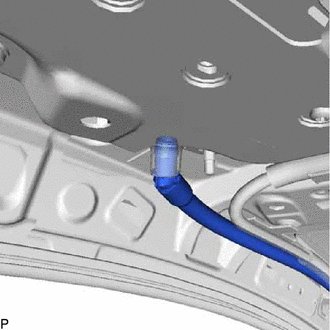
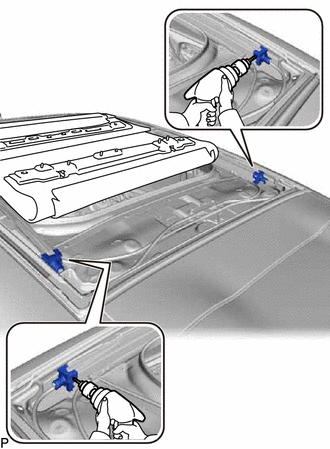
Disconnect the sliding roof drain hose.
Tip:Use the same procedure for the other 3 sliding roof drain hoses.
-
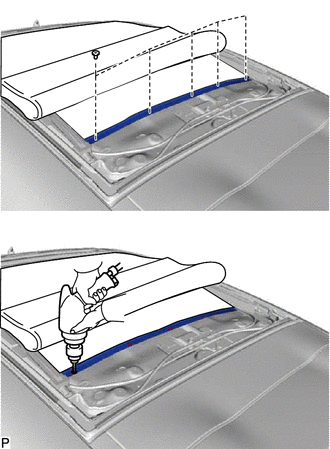
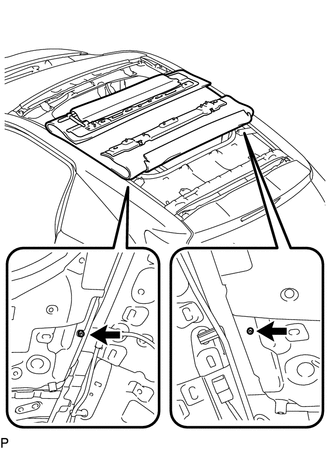
Pass a piano wire between the vehicle body and sliding roof housing sub-assembly from the interior.
Note:Do not pull the piano wire in a vertical direction, but pull it in a horizon direction.
Tie both wire ends to wooden blocks or similar objects that can serve as handles.
Cut off the adhesive by pulling the piano wire around the sliding roof housing sub-assembly.
Note:When separating the sliding roof housing sub-assembly, be careful not to damage the paint or interior and exterior ornaments.
To prevent the safety pad from being scratched when removing the sliding roof housing sub-assembly, place a plastic sheet between the piano wire and safety pad.
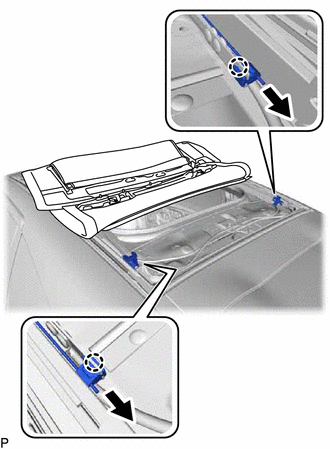
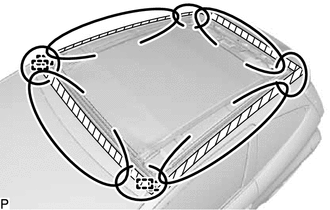
Disengage the 2 pins and remove the sliding roof housing sub-assembly.
Note:Be careful not to drop the sliding roof housing sub-assembly.
Leave as much adhesive on the vehicle body as possible when removing the sliding roof housing sub-assembly.
-