GENERATOR REASSEMBLY

PROCEDURE
-
INSTALL GENERATOR PULLEY WITH CLUTCH
-
Secure the generator assembly in a vise between aluminum plates.
-
Temporarily install the generator pulley with clutch to the rotor shaft.
-
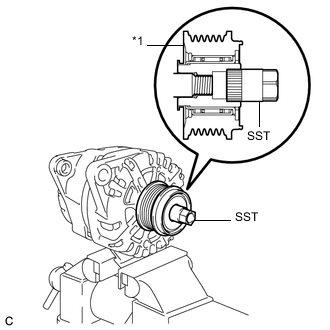
*1 Generator Pulley with Clutch Fit SST to the generator pulley with clutch.
- SST
- 09820-30010
-
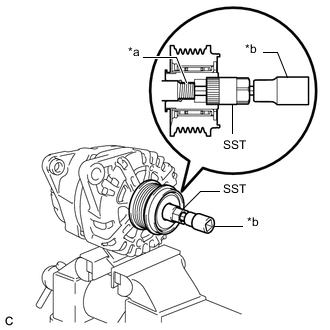
*a Rotor Shaft *b T45 "TORX" Socket Wrench Fit a T45 "TORX" socket wrench into the rotor shaft end.
-
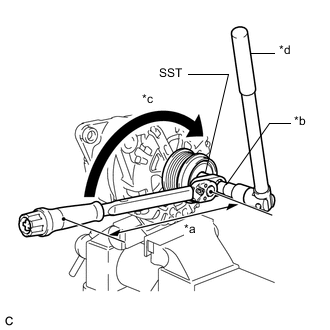
*a Torque Wrench Fulcrum Length *b T45 "TORX" Socket Wrench *c Turn *d Hold Tighten the generator pulley with clutch by turning SST as shown in the illustration.
- Torque:
- Specified tightening torque
- 78.5 N*m { 800 kgf*cm, 58 ft.*lbf }
Tech Tips
-
Calculate the torque wrench reading when changing the fulcrum length of the torque wrench.
-
When using a 17 mm union nut wrench (fulcrum length of 30 mm (1.18 in.)) + torque wrench (fulcrum length of 400 mm (1.312 ft.)): 73 N*m (744 kgf*cm, 54 ft.*lbf)
-
Remove SST and the T45 "TORX" socket wrench from the generator pulley with clutch.
-
Check that the generator pulley with clutch rotates smoothly.
-
Remove the generator assembly from the vise.
-
-
INSTALL GENERATOR PULLEY CAP
-
Install a new generator pulley cap to the generator pulley with clutch.
-