REAR SEAT SIDE AIRBAG ASSEMBLY(for Fixed Seat Type) INSTALLATION

CAUTION / NOTICE / HINT
Tech Tips
-
Use the same procedure for the RH and LH sides.
-
The procedure listed below is for the LH side.
PROCEDURE
-
INSTALL REAR SEAT AIRBAG ASSEMBLY LH
-
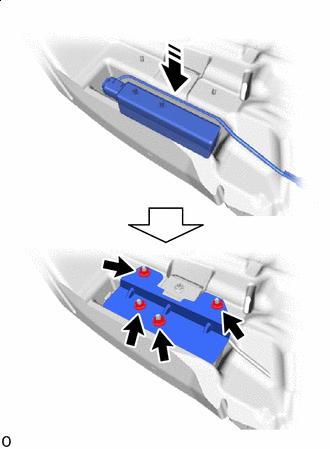

Install in this Direction Set the rear seat airbag assembly LH into place.
-
Install the rear seatback panel LH with 4 new nuts.
- Torque:
- 5.5 N*m { 56 kgf*cm, 49 in.*lbf }
CAUTION:
-
Do not reuse the nut.
-
If the installation surface or surrounding area of the rear seat airbag assembly LH is deformed or damaged, replace the rear seatback pad sub-assembly with a new one.
-
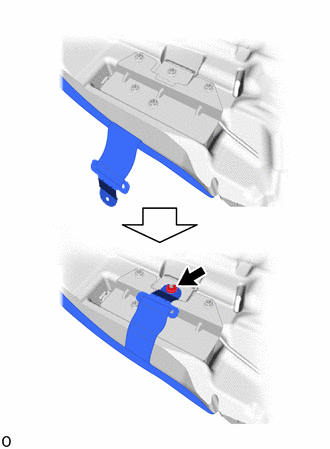
Connect the strap with a new nut.
- Torque:
- 5.5 N*m { 56 kgf*cm, 49 in.*lbf }
CAUTION:
Do not reuse the nut.
-
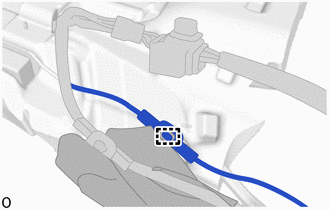
Attach the wire harness clamp.
-
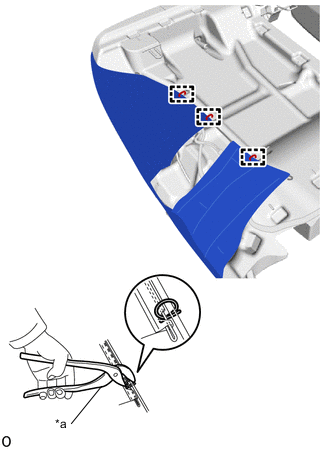
*a Hog Ring Pliers Return the rear seatback cover to its original position and using hog ring pliers, install new hog rings.
Note
-
Be careful not to damage the rear seatback cover.
-
Be sure to securely install the hog rings as shown in the illustration while preventing wrinkles from forming on the rear seatback cover.
-
-

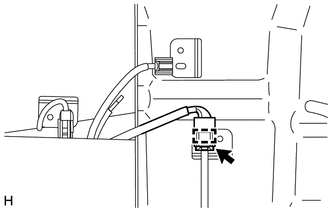
Attach the wire harness clamp.
-
Connect the airbag connector.
-
Before connecting the airbag connector, check that the CPA is positioned as shown in the illustration.
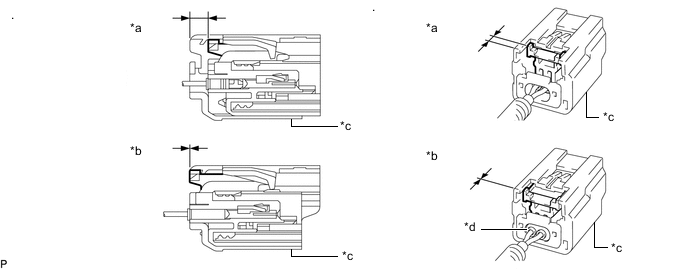
*a Correct *b Incorrect *c CPA *d Housing -
Holding the sides of the CPA of the rear seat airbag assembly connector, connect the connector by engaging it until a "click" sound is heard.
Note
-
Be careful not to damage the rear seat airbag connector or wire harness.
-
When connecting the connector, push the connector straight in.
-
Do not connect the connector while holding components other than the CPA.
-
If the top of the CPA is held down when connecting the connector, the half connection prevention mechanism will not function due to deformation of the CPA. Therefore, hold the sides of the CPA.
-
-
-
w Seat Heater System:
Connect the connector and attach the wire harness clamp.
-
-
INSTALL REAR SEATBACK ASSEMBLY
-
CONNECT CABLE TO NEGATIVE BATTERY TERMINAL
for 8GR-FKS:
for V35A-FTS:
Note
When disconnecting the cable, some systems need to be initialized after the cable is reconnected.
-
INSTALL LUGGAGE COMPARTMENT MAT SUB-ASSEMBLY
-
PERFORM DIAGNOSTIC SYSTEM CHECK
-
CHECK SRS WARNING LIGHT