RADIATOR INSTALLATION
PROCEDURE
-
INSTALL SUB RADIATOR ASSEMBLY
-
Attach the claws and clamp to install the No. 2 sub-radiator duct to the No. 1 sub-radiator bracket.
-
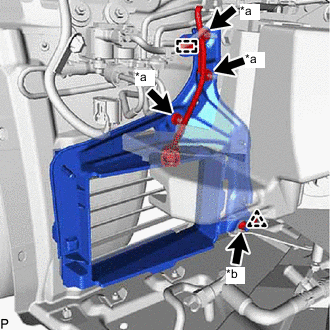
*a Nut A *b Nut B Install the No. 3 radiator bracket with the 3 nuts A.
- Torque:
- 11 N*m { 112 kgf*cm, 8 ft.*lbf }
-
Attach the clamp.
-
Install the nut B and clip.
- Torque:
- 8.0 N*m { 82 kgf*cm, 71 in.*lbf }
-
Install the sub radiator assembly with the 3 nuts.
- Torque:
- 8.0 N*m { 82 kgf*cm, 71 in.*lbf }
-
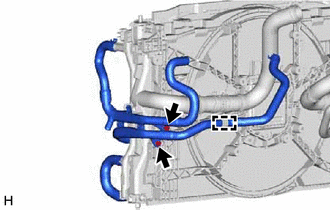
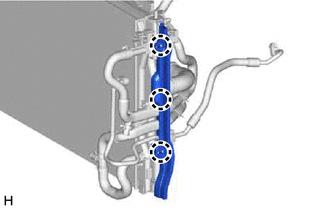
Connect the No. 1 sub-radiator hose and No. 6 sub-radiator hose to the sub radiator assembly, and slide the clips to secure the hose.
Note
-
Make sure the No. 1 sub-radiator hose and No. 6 sub-radiator hose is securely inserted to the stopper.
-
Install the clip so that it faces the bottom of the vehicle from the No. 1 sub-radiator hose and No. 6 sub-radiator hose.
-
-
Attach the claw to install the No. 1 sub-radiator duct.
-
Install the 2 bolts.
- Torque:
- 8.0 N*m { 82 kgf*cm, 71 in.*lbf }
-
Install the front bumper assembly.
-
for Sport Package:
-
except Sport Package:
-
-
-
INSTALL INTERCOOLER COOLING RADIATOR ASSEMBLY
-
Attach the guides and claws to install the intercooler cooling radiator assembly to the radiator assembly.
-
Connect the intercooler water hose assembly, and slide the clips to secure the hose to the intercooler cooling radiator assembly.
Note
-
Install so that the intercooler water hose assembly paint mark and intercooler cooling radiator assembly positioning stopper are securely overlapped. (Rotational Direction)
-
Make sure the intercooler water hose assembly is securely inserted to the stopper. (Axial Direction)
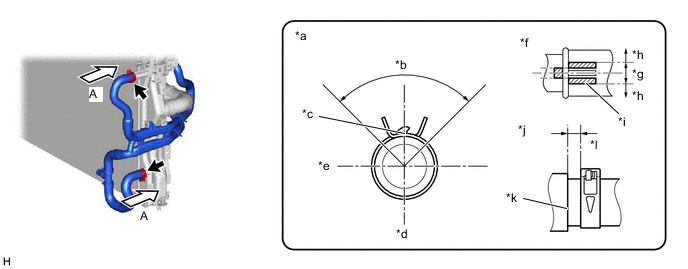
*a View A *b 90° *c Paint Mark *d Lower Side *e RH Side *f Rotational Direction *g OK *h NG *i Variation Range *j Axis Direction *k Stopper *l 2 to 7 mm (0.0787 to 0.276 in.) -
-
Install the intercooler water hose assembly with the 2 bolts.
- Torque:
- 8.0 N*m { 82 kgf*cm, 71 in.*lbf }
-
Attach the clamp.
-
Attach the claw and install the rear radiator side air guide plate LH to the radiator assembly.
-
Install the radiator assembly.
-
-
ADD COOLANT (for Intercooler)
-
ADD ENGINE COOLANT
-
INSPECT FOR COOLANT LEAK (for Intercooler)
-
INSPECT FOR COOLANT LEAK