REAR LEAF SPRING(for 4WD and Pre-Runner) REMOVAL

CAUTION / NOTICE / HINT
The necessary procedures (adjustment, calibration, initialization, or registration) that must be performed after parts are removed, installed, or replaced during the rear leaf spring removal/installation are shown below.
| Necessary Procedure After Parts Removed/Installed/Replaced | ||||||||
|---|---|---|---|---|---|---|---|---|
|
Tech Tips
-
Use the same procedure for the RH and LH sides.
-
The procedure listed below is for the LH side.
PROCEDURE
-
REMOVE REAR WHEEL
-
REMOVE REAR HEIGHT CONTROL SENSOR SUB-ASSEMBLY LH (w/ Automatic Headlight Beam Level Control System)
-
DISCONNECT NO. 3 PARKING BRAKE CABLE ASSEMBLY
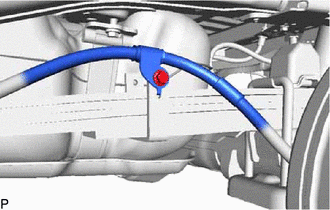
-
Remove the bolt and disconnect the No. 3 parking brake cable assembly from the rear leaf spring assembly LH.
-
-
REMOVE REAR SHOCK ABSORBER ASSEMBLY LH
-
REMOVE REAR SPRING U BOLT
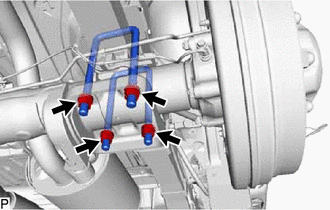
-
Remove the 4 nuts, 4 washers, 2 rear spring U bolts, rear spring bumper and spring U bolt seat sub-assembly.
-
-
REMOVE REAR LEAF SPRING PIN BOLT
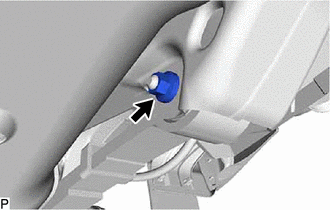
-
Remove the nut, washer and rear leaf spring pin bolt.
-
-
REMOVE SPRING SHACKLE INNER PLATE
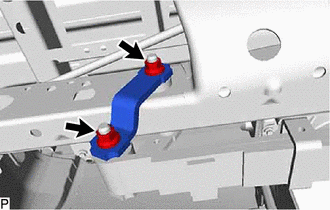
-
Remove the 2 nuts, 2 washers and spring shackle inner plate.
-
-
REMOVE NO. 2 REAR SPRING SHACKLE SUB-ASSEMBLY
-
Using a screwdriver, remove the No. 2 rear spring shackle sub-assembly.
Tech Tips
Tape the screwdriver tip before use.
-
-
REMOVE REAR UPPER SPRING SHACKLE BUSH
-
Using a screwdriver, remove the 2 rear upper spring shackle bushes from the vehicle frame.
Tech Tips
Tape the screwdriver tip before use.
-
-
REMOVE REAR LEAF SPRING ASSEMBLY LH
-
Remove the rear leaf spring assembly LH from the vehicle body.
-