FRONT POWER SEAT MOTOR ASSEMBLY (for Rear Lifter) INSTALLATION
CAUTION:
Wear protective gloves. Sharp areas on the parts may injure your hands.
Tech Tips
A bolt without a torque specification is shown in the standard bolt chart Click here.
-
INSTALL POWER SEAT MOTOR ASSEMBLY (for Rear Lifter)
-
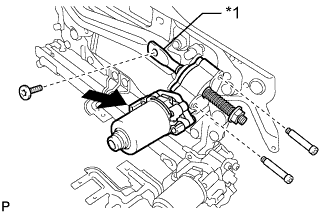
Using a 4 mm socket hexagon wrench, install the power seat motor assembly (for Rear Lifter) with the 2 bolts.
- Torque:
- 2.5 N*m { 25 kgf*cm, 22 in.*lbf }
-
Clean the threads of the "TORX" bolt for the adjust screw with non-residue solvent (when reusing the "TORX" bolt).
-
Apply adhesive to the threads of the "TORX" bolt for the adjust screw (when reusing the "TORX" bolt).
Adhesive Toyota Genuine Adhesive 1324, Three Bond 1324 or equivalent Text in Illustration *1 Adjust Screw -
Using a T40 "TORX" socket wrench, install the "TORX" bolt.
- Torque:
- 25 N*m { 255 kgf*cm, 18 ft.*lbf }
-
Connect the connector.
-
Using a T40 "TORX" socket wrench, install the tilt rod with the 2 "TORX" bolts for the tilt rod.
- Torque:
- 25 N*m { 255 kgf*cm, 18 ft.*lbf }
-
Install the nut.
-
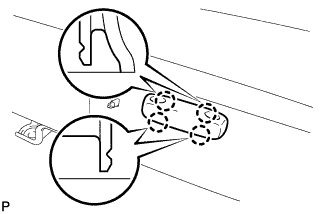
Install the seat cushion frame with the 4 bolts.
- Torque:
- 19 N*m { 194 kgf*cm, 14 ft.*lbf }
-
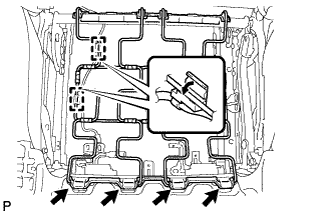
Attach the 4 clamps indicated by the arrows in the illustration to install the seat cushion spring.
-
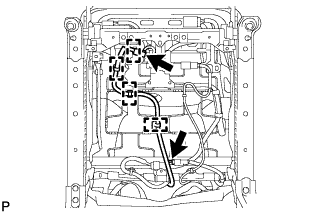
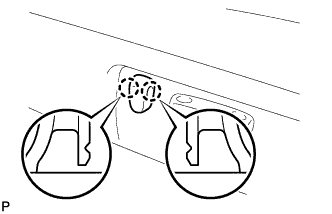
Attach the 2 wire harness clamps.
-
-
INSTALL FRONT SEAT CUSHION COVER WITH PAD
-
Attach the hooks to install the front seat cushion cover with pad.
-
Bend the 2 front seat cushion frame claws downward.
-
for LHD, w/ Seat Heater System:
-
Attach the 4 front seat cushion heater assembly LH clamps.
-
Connect the 2 front seat cushion heater assembly LH connectors.
-
-
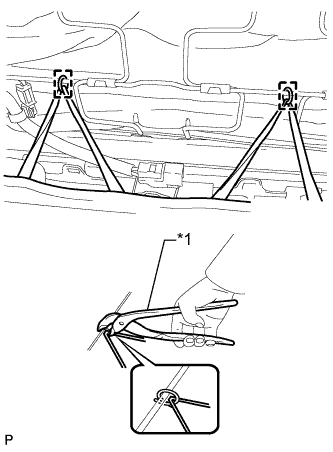
Text in Illustration *1 Hog Ring Pliers Using hog ring pliers, attach the rubber bands of the separate type front seatback cover to the seat cushion spring with new hog rings.
Note
-
Be careful not to damage the cover.
-
When installing the hog rings, avoid wrinkling the cover.
-
-
-
INSTALL FRONT SEAT INNER BELT ASSEMBLY RH
-
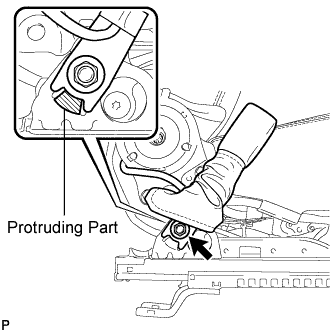
Install the front seat inner belt assembly LH with the nut.
- Torque:
- 42 N*m { 428 kgf*cm, 31 ft.*lbf }
Note
Do not allow the anchor part of the front seat inner belt assembly to overlap the protruding part of the front seat adjuster.
-
Connect the connector and attach the 3 clamps.
-
-
INSTALL FRONT SEAT INNER CUSHION SHIELD RH
-
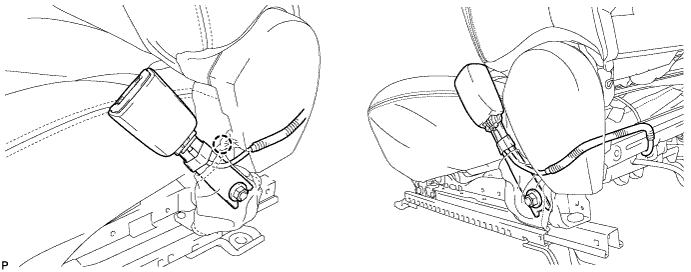
Pass the wire harness of the front seat inner belt assembly below the claw and into the front seat inner cushion shield RH.
-
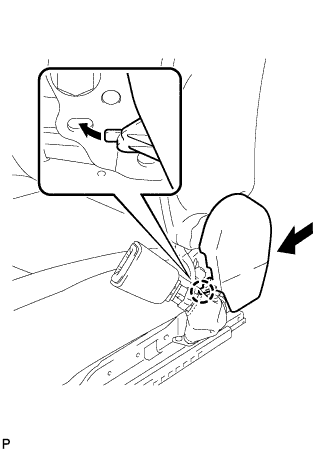
Attach the claw to temporarily install the front seat inner cushion shield RH.
Note
Make sure that the wire harness of the front seat inner belt assembly is not being pinched inside the front seat inner cushion shield.
-
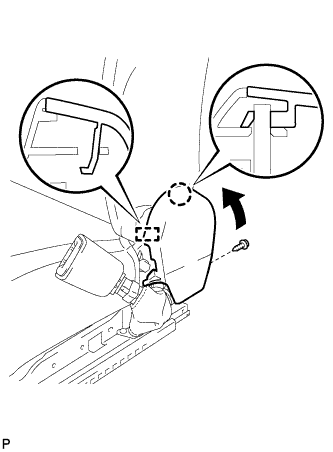
Attach the guide and claw.
Note
Make sure that the wire harness of the front seat inner belt assembly is not being pinched inside the front seat inner cushion shield.
-
Install the screw.
-
-
INSTALL FRONT POWER SEAT SWITCH RH
-
Connect the connector.
-
Install the front power seat switch RH with the 3 screws.
-
-
INSTALL FRONT SEAT CUSHION SHIELD RH
-
Attach the claw and guide to install the front seat cushion shield RH.
-
Install the 3 screws.
-
Install the 2 screws.
-
-
INSTALL SLIDE AND VERTICAL POWER SEAT SWITCH KNOB
-
Attach the 4 claws to install the slide and vertical power seat switch knob.
-
-
INSTALL RECLINING POWER SEAT SWITCH KNOB
-
Attach the 2 claws to install the reclining power seat switch knob.
-
-
INSTALL FRONT SEAT ASSEMBLY
-
INSPECT FRONT SEAT ASSEMBLY