FUEL SUPPLY PUMP (w/o EGR Cooler) REMOVAL
Note
-
When replacing the fuel supply pump, also replace the injection pipe.
-
After removing the injection pipes and fuel inlet pipe, clean them with a brush and compressed air.
-
DISCONNECT CABLE FROM NEGATIVE BATTERY TERMINAL
CAUTION:
Wait at least 90 seconds after disconnecting the cable from the negative (-) battery terminal to prevent airbag and seat belt pretensioner activation.
-
REMOVE NO. 1 ENGINE UNDER COVER (for 4WD and Pre-Runner)
-
Remove the 4 bolts and under cover.
-
-
REMOVE NO. 2 ENGINE UNDER COVER (for 4WD and Pre-Runner)
-
Remove the 2 bolts and under cover.
-
-
LOOSEN FUEL TANK CAP ASSEMBLY
-
DRAIN FUEL
-
DRAIN ENGINE COOLANT
Note
Do not remove the radiator reservoir cap while the engine and radiator are still hot. Pressurized, hot engine coolant and steam may be released and cause serious burns.
-
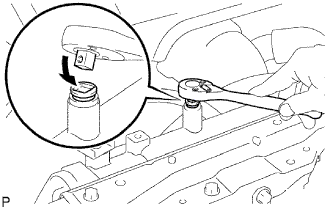
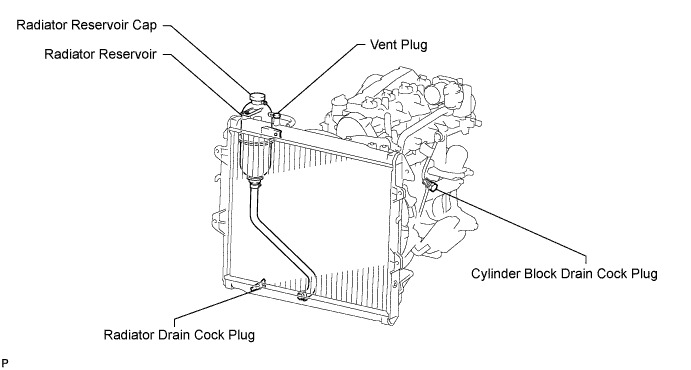
Drain the coolant by removing the reservoir cap and, using a wrench, remove the vent plug.
-
Loosen the cylinder block drain cock plug and the radiator drain cock plug.
Tech Tips
Collect the coolant in a container and dispose of it according to the regulations in your area.
-
-
DRAIN AUTOMATIC TRANSMISSION FLUID
Tech Tips
Drive the vehicle so that the engine and transmission are at normal operating temperature.
ATF temperature 70 to 80° C (158 to 176° F)
-
Park the vehicle on a level surface and set the parking brake.
-
With the engine idling and the brake pedal depressed, move the shift lever into all positions from P to L. Then return it to P.
-
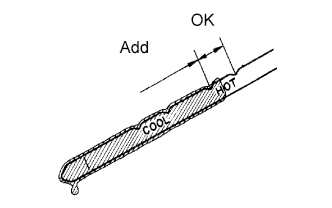
Pull out the dipstick and wipe it clean.
-
Push it back fully into the pipe.
-
Pull it out and check that the fluid level is in the HOT range.
If there are leaks, it is necessary to repair or replace O-rings, FIPG, oil seals, plugs or other parts.
-
-
REMOVE RADIATOR ASSEMBLY
-
Remove the radiator assembly Click here.
-
-
REMOVE NO. 1 TIMING BELT COVER
-
Remove the bolt and water hose clamp.
-
Remove the wire harness clamp.
-
Remove the 6 bolts and timing belt cover.
-
-
REMOVE TIMING BELT
-
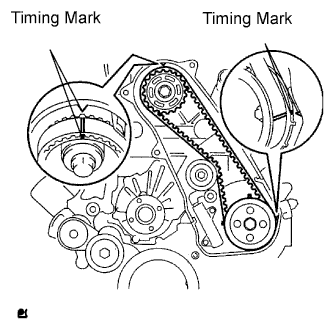
Turn the crankshaft clockwise and align the timing marks as shown in the illustration.
-
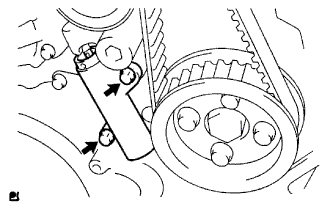
Uniformly loosen the 2 bolts and remove the timing belt tensioner.
-
Remove the timing belt.
-
Using a 10 mm hexagon wrench, remove the bolt, timing belt idler and washer.
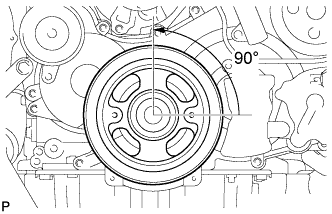
Tech Tips
-
When turning the camshaft while the timing belt is removed, turn the crankshaft 90° counterclockwise.
-
When installing the timing belt, return the camshaft to the timing marks and then turn the crankshaft clockwise until it aligns with the timing marks, as shown in the illustration.
-
-
-
REMOVE FUEL SUPPLY PUMP
-
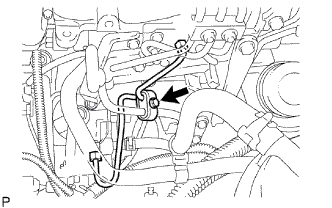
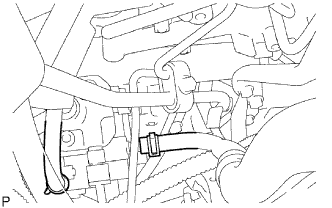
Remove the bolt and clamp.
-
Remove the 2 bolts and oil level gauge guide.
-
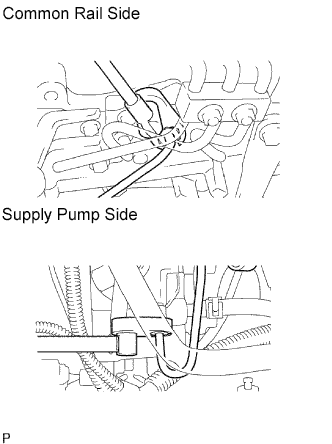
Using a 17 mm union nut wrench, loosen the union nuts and remove the fuel inlet pipe.
-
Disconnect the 2 fuel hoses.
-
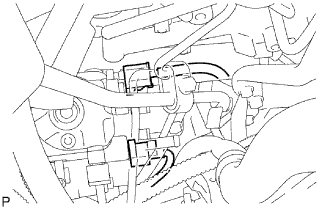
Disconnect the 2 connectors.
-
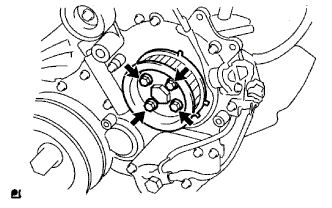
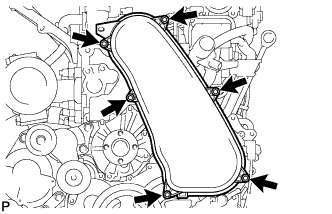
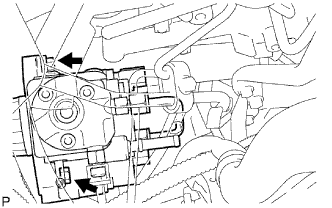
Remove the 4 bolts indicated by the arrows in the illustration.
-
Remove the No. 2 camshaft timing pulley flange and pump drive shaft pulley.
-
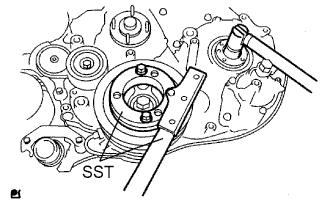
Remove the set nut and O-ring while holding the crankshaft pulley by using SST.
- SST
- 09213-58013
- 09330-00021
-
Loosen the 2 nuts.
-
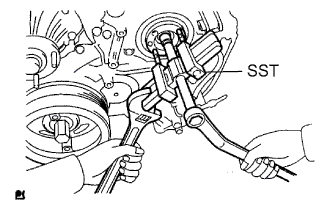
Using SST, disconnect the pump from the injection gear.
- SST
- 09950-50013 ( 09951-05010, 09952-05010, 09953-05020, 09954-05021 )
Note
Apply lubricant to the threads and tip of SST (center bolt) before using it.
-
Remove the 2 nuts and pump.
Note
-
Do not hold the pump or carry it holding the pipe.
-
The pump must be kept horizontal.
-
-
Remove the O-ring.
-