RADIO ANTENNA CORD REMOVAL
PROCEDURE
-
PRECAUTION
Note
After turning the engine switch off, waiting time may be required before disconnecting the cable from the battery terminal. Therefore, make sure to read the disconnecting the cable from the battery terminal notice before proceeding with work.
-
DISCONNECT CABLE FROM NEGATIVE BATTERY TERMINAL
Note
When disconnecting the cable, some systems need to be initialized after the cable is reconnected.
-
REMOVE UPPER INSTRUMENT PANEL SUB-ASSEMBLY
-
REMOVE NO. 1 ANTENNA CORD SUB-ASSEMBLY
-
for LHD:
-
Disconnect the connector.
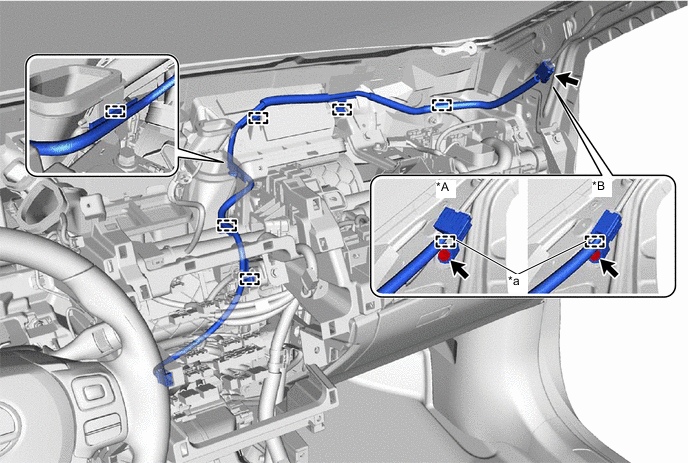
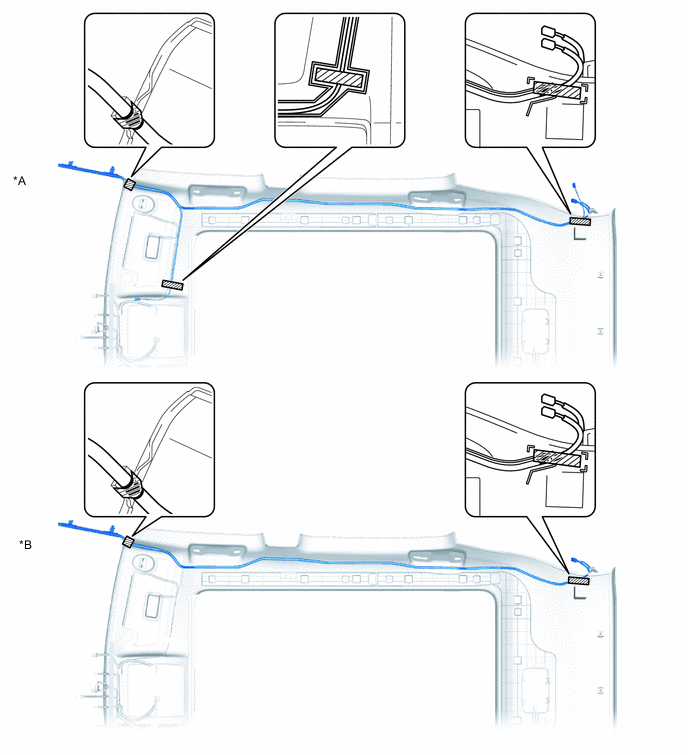
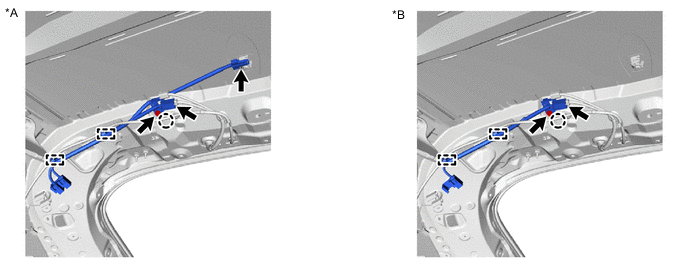
*A for Type A *B for Type B *a Guide - - -
Remove the bolt.
-
Detach the 6 clamps, guide and remove the No. 1 antenna cord sub-assembly.
-
-
for RHD:
-
Disconnect the connector.
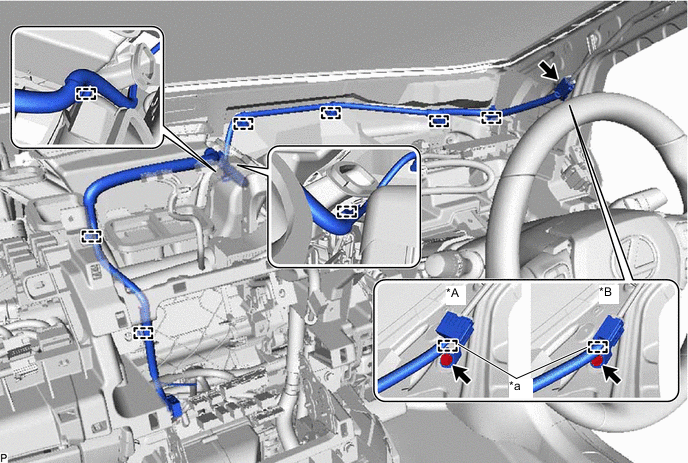
*A for Type A *B for Type B *a Guide - - -
Remove the bolt.
-
Detach the 8 clamps, guide and remove the No. 1 antenna cord sub-assembly.
-
-
-
REMOVE ROOF HEADLINING ASSEMBLY
-
REMOVE NO. 2 ANTENNA CORD SUB-ASSEMBLY
-
Normal roof
-
Remove the tape enough that the No. 2 antenna cord sub-assembly can be removed, and then remove the No. 2 antenna cord sub-assembly from the double-sided tape on the roof headlining.
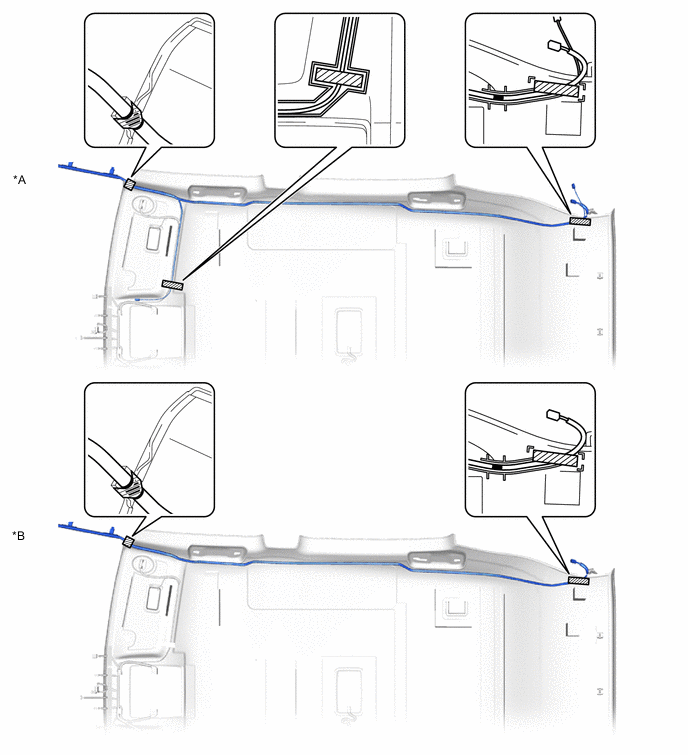
*A w/ Digital Audio Broadcasting *B w/o Digital Audio Broadcasting 
Tape - -
-
-
Sliding roof
-
Remove the tape enough that the No. 2 antenna cord sub-assembly can be removed, and then remove the No. 2 antenna cord sub-assembly from the double-sided tape on the roof headlining
*A w/ Digital Audio Broadcasting *B w/o Digital Audio Broadcasting Tape - -
-
-
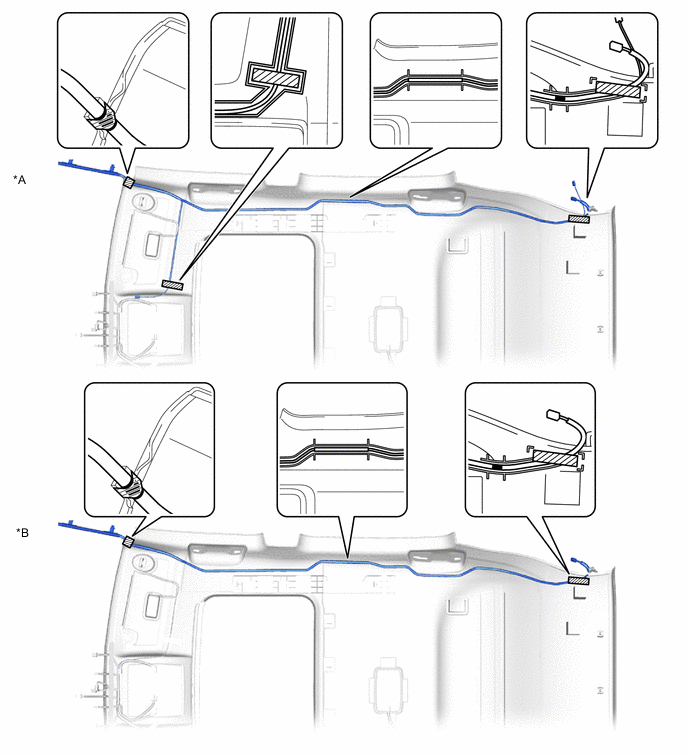
Panoramic moon roof
-
Remove the tape enough that the No. 2 antenna cord sub-assembly can be removed, and then remove the No. 2 antenna cord sub-assembly from the double-sided tape on the roof headlining.
*A w/ Digital Audio Broadcasting *B w/o Digital Audio Broadcasting Tape - -
-
-
-
REMOVE NO. 4 ANTENNA CORD SUB-ASSEMBLY
-
Disconnect each connector.
*A w/ Telematics *B w/o Telematics -
Detach the 2 clamps to washer hose and remove the bolt.
-
Detach the 2 clamps, guide and remove the No. 4 antenna cord-assembly
-