AIR CONDITIONING UNIT DISASSEMBLY
PROCEDURE
REMOVE QUICK HEATER ASSEMBLY (w/ PTC Heater)
REMOVE NO. 2 HEATER CONTROL CABLE SUB-ASSEMBLY (for Manual Air Conditioning System)
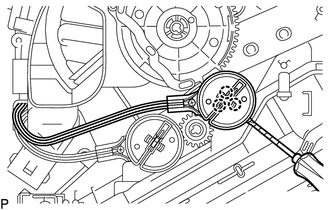
Using a screwdriver with the tip wrapped with protective tape, detach the 3 claws and remove the No. 2 heater control cable sub-assembly.
REMOVE AND INSTALL AIRMIX DAMPER CONTROL CABLE SUB-ASSEMBLY (for Manual Air Conditioning System)
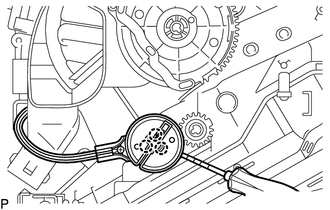
Using a screwdriver with the tip wrapped with protective tape, detach the 3 claws and remove the air mix damper control cable sub-assembly.
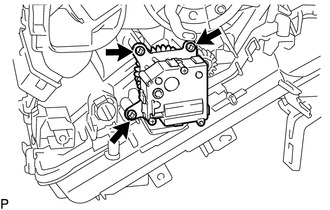
REMOVE NO. 1 AIR CONDITIONING RADIATOR DAMPER SERVO SUB-ASSEMBLY (for Automatic Air Conditioning System)
-
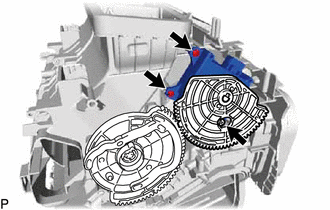
Remove the 3 screws and No. 1 air conditioning radiator damper servo sub-assembly.
-
REMOVE NO. 2 AIR CONDITIONING RADIATOR DAMPER SERVO SUB-ASSEMBLY (for Automatic Air Conditioning System)
-
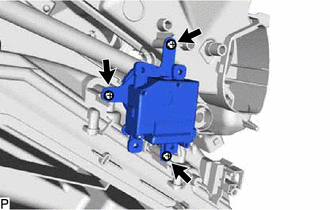
Remove the 3 screws and No. 2 air conditioning radiator damper servo sub-assembly.
-
REMOVE NO. 3 AIR CONDITIONING RADIATOR DAMPER SERVO SUB-ASSEMBLY (for Automatic Air Conditioning System)
-
Remove the 3 screws and No. 3 air conditioning radiator damper servo sub-assembly.
-
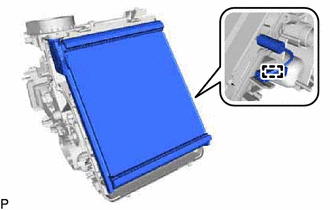
REMOVE HEATER RADIATOR UNIT SUB-ASSEMBLY
-
Remove the screw and clamp.
-
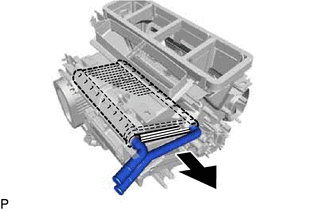
Remove the heater radiator unit sub-assembly from the air conditioning radiator assembly as shown in the illustration.
-
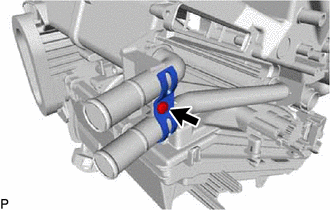
REMOVE COOLER EXPANSION VALVE
-
Using a 4 mm hexagon wrench, remove the 2 hexagon bolts and cooler expansion valve.
-
REMOVE NO. 1 COOLER EVAPORATOR SUB-ASSEMBLY
-

Remove the 4 screws.
Detach the 2 claws and 2 guides, and remove the lower heater case.
-
Detach the clamp.
Remove the No. 1 cooler evaporator sub-assembly with the No. 1 cooler thermistor from the upper heater case.
Remove the 2 O-rings from the No. 1 cooler evaporator sub-assembly.
-
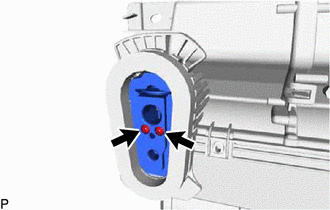
REMOVE NO. 1 COOLER THERMISTOR