BATTERY BLOWER REMOVAL
PROCEDURE
-
REMOVE FRONT SEAT ASSEMBLY RH
-
for Manual Seat:
-
for Power Seat:
-
-
REMOVE FRONT DOOR SCUFF PLATE RH
Tech Tips
Use the same procedure as for the LH side Click here.
-
REMOVE COWL SIDE TRIM SUB-ASSEMBLY RH
Tech Tips
Use the same procedure as for the LH side Click here.
-
REMOVE REAR DOOR SCUFF PLATE RH
Tech Tips
Use the same procedure as for the LH side Click here.
-
REMOVE LAP BELT OUTER ANCHOR COVER (for RH Side)
-
DISCONNECT FRONT SEAT OUTER BELT ASSEMBLY
-
DISCONNECT FRONT DOOR OPENING TRIM WEATHERSTRIP RH
Tech Tips
Use the same procedure as for the LH side Click here.
-
DISCONNECT REAR DOOR OPENING TRIM WEATHERSTRIP RH
Tech Tips
Use the same procedure as for the LH side Click here.
-
REMOVE CENTER PILLAR LOWER GARNISH RH
Tech Tips
Use the same procedure as for the LH side Click here.
-
REMOVE FUEL LID LOCK OPEN LEVER SUB-ASSEMBLY (for RHD)
-
REMOVE BATTERY COOLING BLOWER ASSEMBLY
Note
-
Be sure not to touch the fan part of the battery cooling blower assembly.
-
Do not lift the battery cooling blower assembly using the wire harness.
-

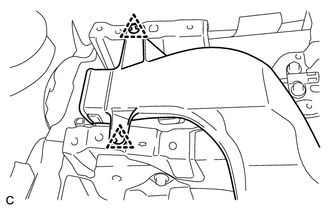
Disconnect the 2 clips and remove the No.1 rear heater register bezel.
-
Turn over the front floor carpet.
-
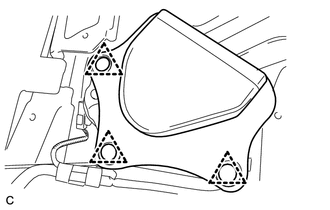
Remove the 3 clips and No. 1 hybrid battery intake duct.
-
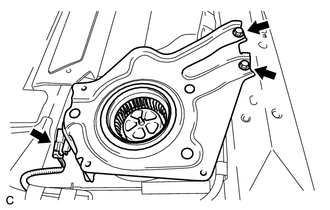
Disconnect the connector.
-
Remove the 2 bolts.
-
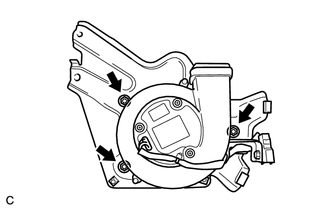
Remove the 3 nuts and battery cooling blower assembly from the battery cooling blower bracket.
-
-
REMOVE NO. 2 HYBRID BATTERY INTAKE DUCT
Tech Tips
Perform this procedure only when replacement of the No. 2 hybrid battery intake duct is necessary.
-
Remove the HV battery Click here.
-
Remove the 2 clips and No. 2 hybrid battery intake duct.
-