ROOF SUNSHADE DISASSEMBLY
PROCEDURE
-
REMOVE NO. 1 SUNSHADE GARNISH LH
-
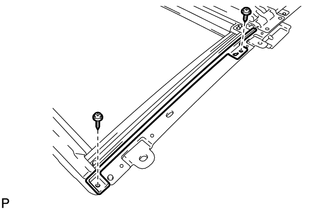
Remove the 2 screws and No. 1 sunshade garnish LH.
-
-
REMOVE NO. 1 SUNSHADE GARNISH RH
Tech Tips
Use the same procedure as for the LH side.
-
REMOVE NO. 2 SUNSHADE GARNISH LH
-
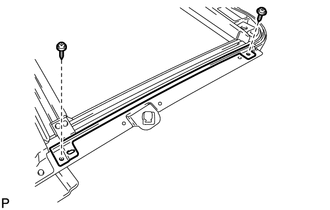
Remove the 2 screws and No. 2 sunshade garnish LH.
-
-
REMOVE NO. 2 SUNSHADE GARNISH RH
Tech Tips
Use the same procedure as for the LH side.
-
REMOVE CONNECTOR WIRE
-
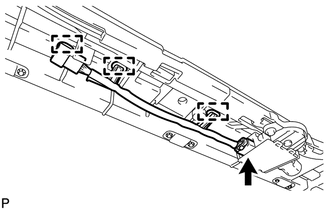
Disconnect the connector.
-
Disengage the 3 clamps and remove the connector wire.
-
-
REMOVE SLIDING ROOF DRIVE GEAR ASSEMBLY
-
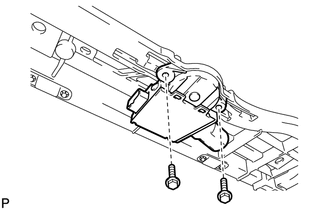
Remove the 2 bolts and sliding roof drive gear assembly.
-
-
REMOVE SUNSHADE TRIM SUB-ASSEMBLY
-
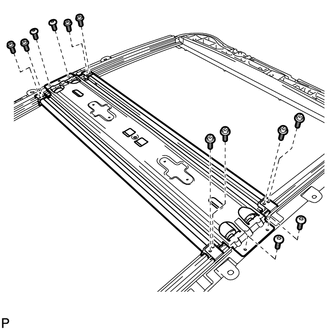
Remove the 8 screws.
-
Using a T20 "TORX" socket wrench, remove the 4 "TORX" screws and sunshade trim sub-assembly from the slide roof rail sub-assembly.
-
-
REMOVE NO. 2 SUNSHADE TRIM SUB-ASSEMBLY
Tech Tips
Perform this procedure only when the No. 2 sunshade trim sub-assembly needs to be replaced.
-
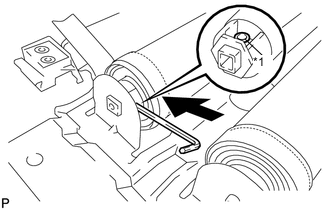
Text in Illustration *1 Circular Hole Insert a 2.5 mm hexagon wrench into the circular hole of the No. 2 sunshade trim assembly as shown in the illustration.
Note
Make sure that the hexagon wrench does not fall out when removing the No. 2 sunshade trim assembly.
-
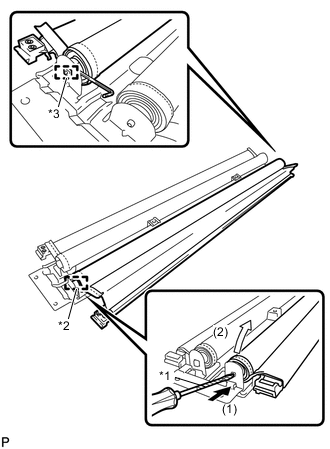
Text in Illustration *1 Protective Tape *2 Pin *3 Guide Using a screwdriver, press the pin in the direction indicated by the arrow (1) shown in the illustration.
Tech Tips
Tape the screw driver tip before use.
-
Pull the No. 2 sunshade trim sub-assembly in the direction indicated by the arrow (2) shown in the illustration.
-
Disengage the guide and remove the No. 2 sunshade trim sub-assembly.
Tech Tips
Use the same procedure for the other side sunshade trim.
-