ROOF SUNSHADE REASSEMBLY
PROCEDURE
INSTALL SLIDING ROOF CABLE GUIDE CASING
-
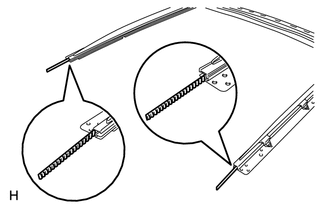
Install the 2 sliding roof cable guide casings.
Note:Make sure the sliding roof cable guide casing is facing as shown in the illustration.
Insert the sliding roof cable guide casing partway until it is as shown in the illustration.
-
INSTALL NO. 3 SUNSHADE TRIM SUB-ASSEMBLY
Slide the No. 3 sunshade trim in the direction indicated by the arrow in the illustration to install it.
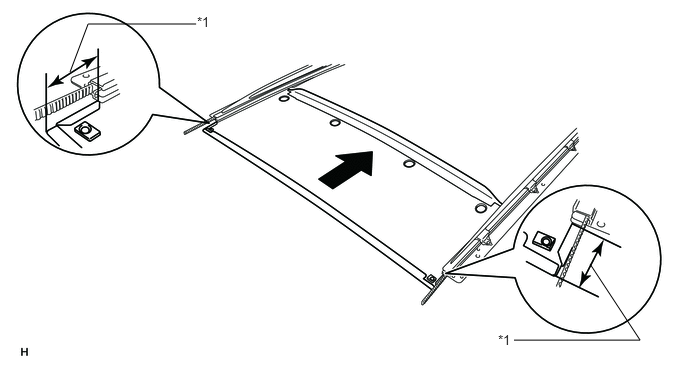
Table 1. Text in Illustration *1
Approximately 60 mm (2.36 in.)
-
-
Note:Make sure the sunshade trim is protruding approximately 60 mm (2.36 in.) from the housing as shown in the illustration.
INSTALL NO. 2 SUNSHADE TRIM SUB-ASSEMBLY
Slide the No. 2 sunshade trim in the direction indicated by the arrow in the illustration to install it.
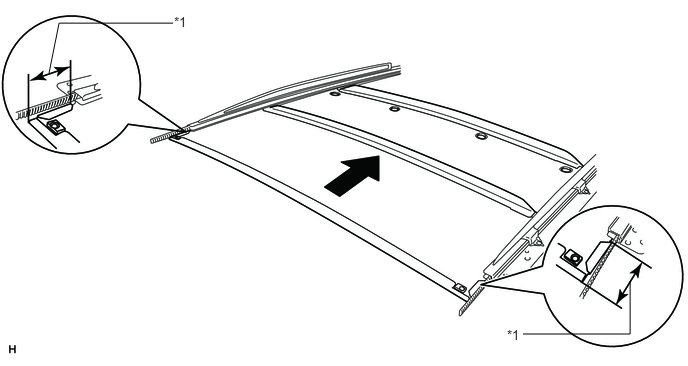
Table 2. Text in Illustration *1
Approximately 60 mm (2.36 in.)
-
-
Note:Make sure the sunshade trim is protruding approximately 60 mm (2.36 in.) from the housing as shown in the illustration.
INSTALL NO. 1 SUNSHADE TRIM SUB-ASSEMBLY
Connect the 2 sliding roof drive cables to the No. 1 sunshade trim.
Note:Do not bend or twist the sliding roof drive cable as it will damage the cable.
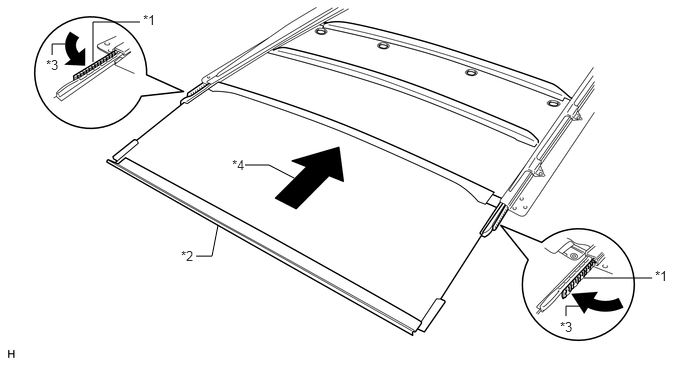
Table 3. Text in Illustration *1
Sliding Roof Drive Cable
*2
No. 1 sunshade Trim
*3
Sliding Roof Drive Cable Connection Direction
*4
Sunshade Trim Sliding Direction
Slide the No. 1 sunshade trim in the direction indicated by the arrow in the illustration to install it.
Install the 4 sliding roof guide rail stoppers with the 4 screws.
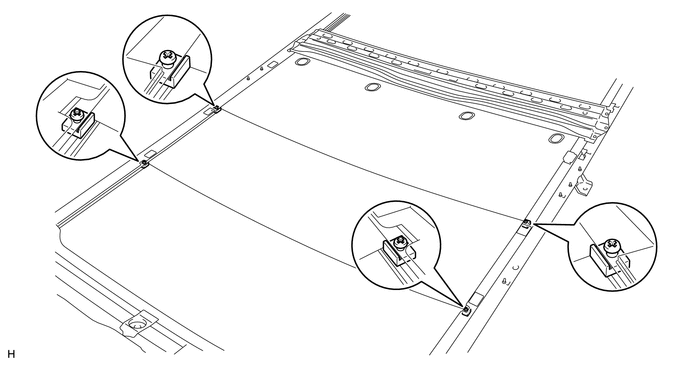
-
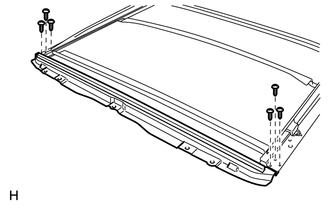
Install the sliding roof housing frame sub-assembly with the 6 screws.
TEMPORARILY INSTALL NO. 2 SLIDING ROOF HOUSING BRACKET
-
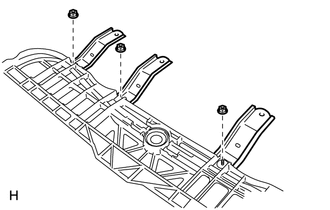
Temporarily install the 3 No. 2 sliding roof housing brackets with the 3 nuts.
-
TEMPORARILY INSTALL NO. 1 SLIDING ROOF HOUSING BRACKET
-
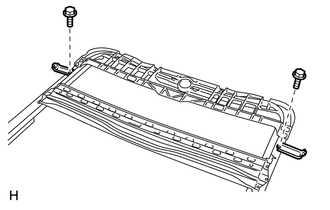
Temporarily install the 2 No. 1 sliding roof housing brackets with the 2 bolts.
-
INSTALL SLIDING ROOF DRIVE GEAR SUB-ASSEMBLY
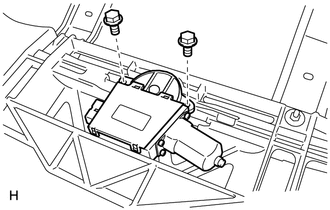
Install the drive gear with the 2 bolts.
5.4 N*m
55 kgf*cm
48 in.*lbf