AUTOMATIC TRANSAXLE ASSEMBLY REMOVAL
CAUTION / NOTICE / HINT
If automatic transmission parts are replaced, refer to the Parts Replacement Compensation Table to determine if any additional operations are necessary.
PROCEDURE
REMOVE DRIVE PLATE AND TORQUE CONVERTER ASSEMBLY SETTING BOLT
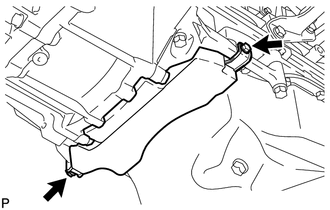
Remove the 2 bolts and oil pan insulator.
-

Using SST, hold the crankshaft pulley.
09213-58014
91551-80840
09330-00021
-
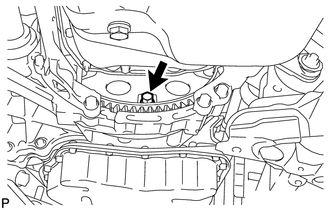
Remove the 6 drive plate and torque converter assembly setting bolts.
REMOVE ENGINE ASSEMBLY WITH TRANSAXLE
REMOVE STARTER ASSEMBLY
DISCONNECT WIRE HARNESS
Detach the 7 wire harness clamps.
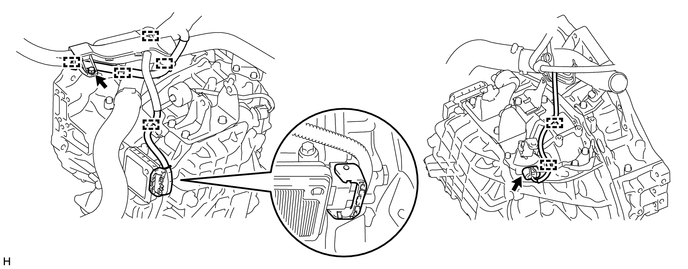
Disconnect the park/neutral position switch connector and TCM connector.
Tip:Detach the claw, turn the lock lever, and then disconnect the TCM connector.
Remove the bolt and disconnect the wire harness from the automatic transaxle assembly.
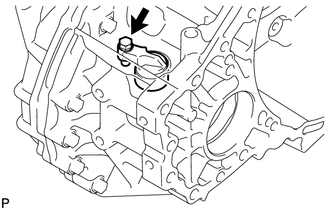
REMOVE GROUND CABLE
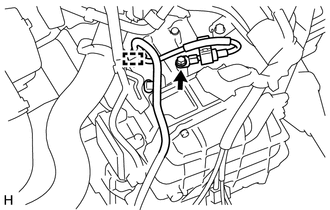
Detach the clamp.
Remove the bolt and ground cable from the automatic transaxle assembly.
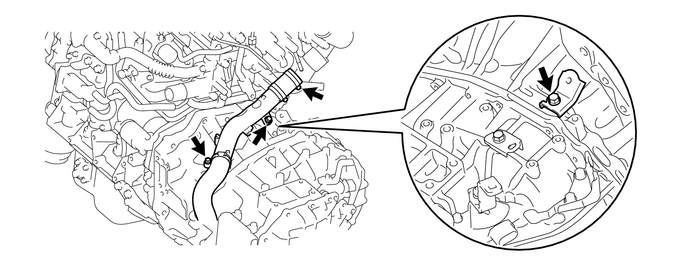
REMOVE BREATHER TUBE BRACKET
-
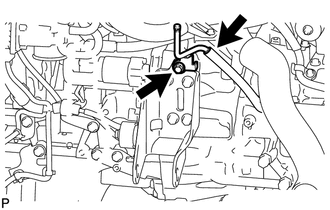
Disconnect the breather plug hose.
Remove the bolt and breather tube bracket from the front engine mounting bracket.
-
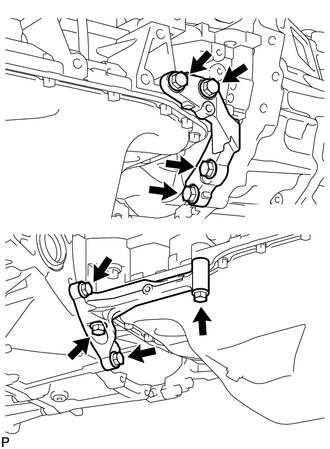
REMOVE FRONT ENGINE MOUNTING BRACKET
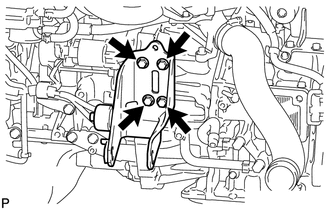
Remove the 4 bolts and front engine mounting bracket from the automatic transaxle assembly.
REMOVE REAR ENGINE MOUNTING BRACKET
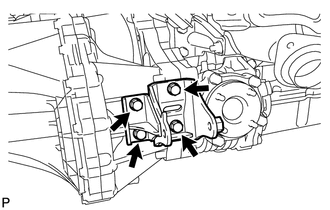
Remove the 4 bolts and rear engine mounting bracket from the automatic transaxle assembly.
REMOVE ENGINE MOUNTING BRACKET LH
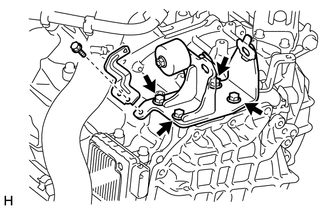
Remove the bolt and wire harness clamp bracket.
Remove the 4 bolts and engine mounting bracket LH from the automatic transaxle assembly.
REMOVE NO. 1 AIR TUBE ASSEMBLY
Loosen the hose clamp, and remove the 2 bolts and No. 1 air tube from the automatic transaxle assembly.
Remove the bolt and air tube support.
REMOVE WIRE HARNESS CLAMP BRACKET
Remove the bolt and wire harness clamp bracket.
REMOVE NO. 1 TRANSMISSION CONTROL CABLE BRACKET
Remove the 2 bolts and transmission control cable bracket from the automatic transaxle assembly.
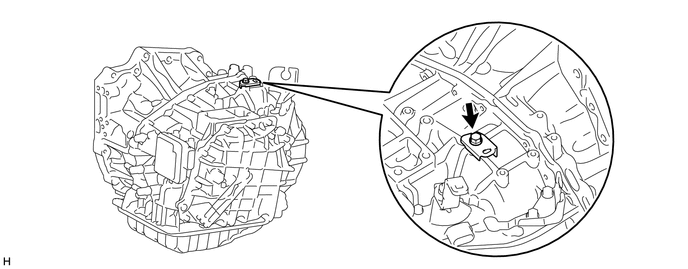
REMOVE SPEEDOMETER DRIVEN HOLE COVER SUB-ASSEMBLY
Remove the bolt and speedometer driven hole cover sub-assembly from automatic transaxle assembly.
Remove the O-ring from the speedometer driven hole cover sub-assembly.
REMOVE TCM
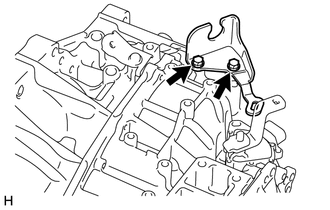
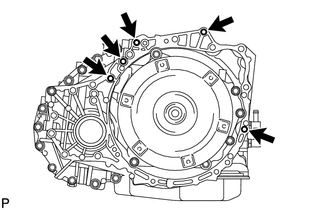
REMOVE STIFFENER PLATE LH AND RH
-
Remove the 8 bolts and stiffener plate LH and RH.
-
REMOVE AUTOMATIC TRANSAXLE ASSEMBLY
-
Remove the 5 bolts and automatic transaxle assembly.
Note:To prevent damage to the knock pins, do not pry between the automatic transaxle assembly and engine assembly.
-
REMOVE TORQUE CONVERTER ASSEMBLY
Remove the torque converter assembly from the automatic transaxle assembly.
Note:Remove the torque converter assembly from the input shaft horizontally.
REMOVE TRANSFER ASSEMBLY
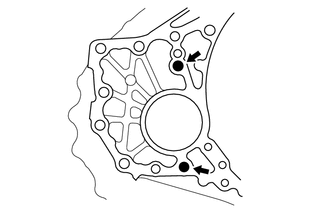
REMOVE TRANSFER AND TRANSAXLE SETTING STUD BOLT
Transfer Side:
Remove the 2 transfer and transaxle setting stud bolts.
Tip:It is not necessary to remove the transfer and transaxle setting stud bolts unless they are being replaced.
INSPECT TORQUE CONVERTER ASSEMBLY
INSPECT DRIVE PLATE