REAR BUMPER REMOVAL
PROCEDURE
REMOVE DECK BOARD ASSEMBLY (w/ Touchless Power Back Door)
PRECAUTION (w/ Touchless Power Back Door)
Note:After turning the power switch off, waiting time may be required before disconnecting the cable from the auxiliary battery terminal. Therefore, make sure to read the disconnecting the cable from the auxiliary battery terminal notice before proceeding with work.
DISCONNECT CABLE FROM NEGATIVE AUXILIARY BATTERY TERMINAL (w/ Touchless Power Back Door)
CAUTION:Wait at least 90 seconds after disconnecting the cable from the negative (-) auxiliary battery terminal to disable the SRS system.
Note:When disconnecting the cable, some systems need to be initialized after the cable is reconnected.
REMOVE REAR QUARTER PANEL MUDGUARD LH (w/ Mudguard)
-
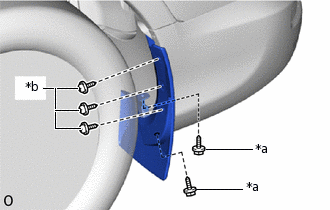
*a
Screw A
*b
Screw B
Remove the 2 screws labeled A.
Remove the 3 screws labeled B and rear quarter panel mudguard LH.
-
REMOVE REAR QUARTER PANEL MUDGUARD RH (w/ Mudguard)
Tip:Use the same procedure described for the LH side.
REMOVE REAR BUMPER COVER
-
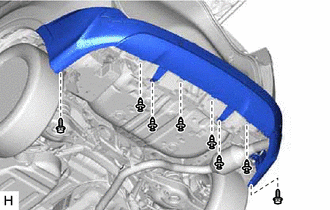
Remove the 6 clips.
Remove the 2 screws.
-
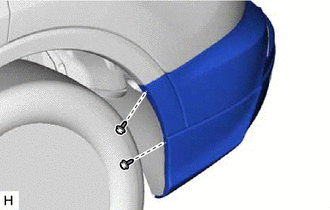
w/o Mudguard
Remove the screws.
Tip:Use the same procedure for the other side.
-
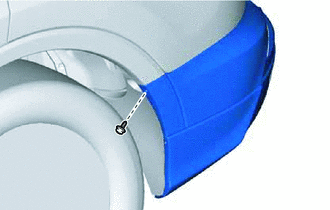
w/ Mudguard
Remove the screw.
Tip:Use the same procedure for the other side.
-

Remove the 2 bolts.
-
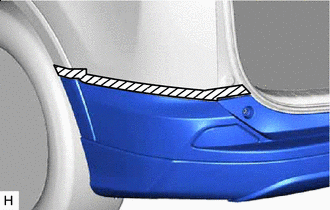

Protective Tape
Put protective tape around the rear bumper cover.
Tip:Use the same procedure for the other side.
-
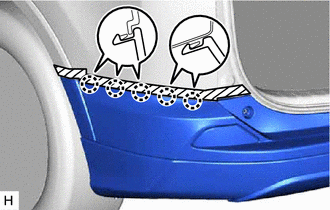
Detach the 5 claws.
Tip:Use the same procedure to detach the claw on the other side.
-
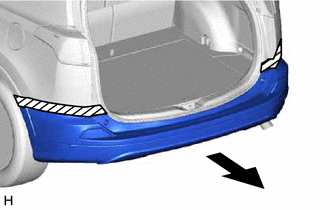
Remove the rear bumper cover as shown in the illustration.
Disconnect each connector.
-
REMOVE NO. 2 LUGGAGE COMPARTMENT SERVICE COVER PROTECTOR
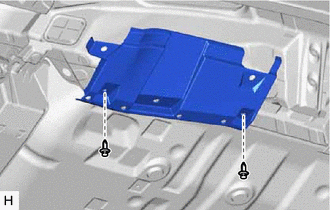
Remove the 2 clips and No. 2 luggage compartment service cover protector.
REMOVE NO. 1 LUGGAGE COMPARTMENT SERVICE COVER PROTECTOR
Tip:Use the same procedure described for the LH side.
REMOVE REAR BUMPER REINFORCEMENT SUB-ASSEMBLY
-
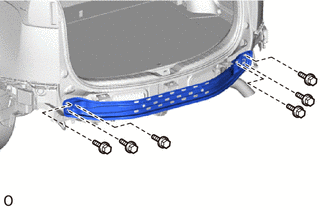
for Step Type:
Remove the 6 bolts and rear bumper reinforcement sub-assembly.
-

w/ TOYOTA Parking Assist-sensor System:
Remove the 6 bolts and rear bumper reinforcement sub-assembly.
-
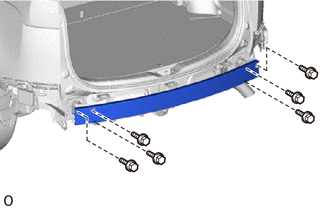
for Standard Type:
Remove the 6 bolts and rear bumper reinforcement sub-assembly.
-
REMOVE REAR BUMPER ARM SUB-ASSEMBLY LH
-
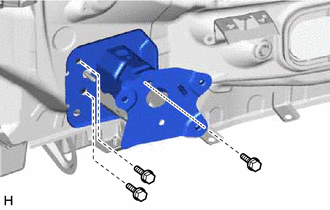
Remove the 3 bolts and rear bumper arm sub-assembly LH.
-
REMOVE REAR BUMPER ARM SUB-ASSEMBLY RH
Tip:Use the same procedure described for the LH side.
REMOVE REAR BUMPER SIDE SUPPORT LH
-
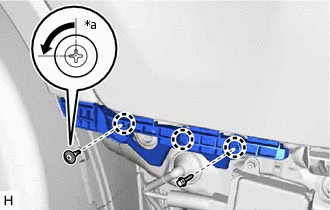
*a
90°
Using a screwdriver, turn the clip 90° and remove the clip.
Remove the screw.
Detach the 3 claws and rear bumper side support LH.
-
REMOVE REAR BUMPER SIDE SUPPORT RH
Tip:Use the same procedure described for the LH side.
REMOVE REAR BUMPER UPPER RETAINER LH
-
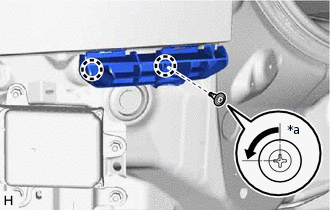
*a
90°
Using a screwdriver, turn the clip 90° and remove the clip.
Detach the 2 claws and rear bumper upper retainer LH.
-
REMOVE REAR BUMPER UPPER RETAINER RH
Tip:Use the same procedure described for the LH side.