ROOF HEADLINING(for Hatchback) DISASSEMBLY
PROCEDURE
REMOVE NO. 1 ROOM LIGHT ASSEMBLY (for Push Switch Type)
-
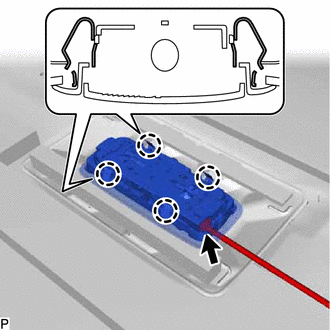
Disconnect the connector.
Disengage the 4 claws to remove the No. 1 room light assembly.
-
REMOVE VANITY LIGHT ASSEMBLY (w/ Vanity Light)
-
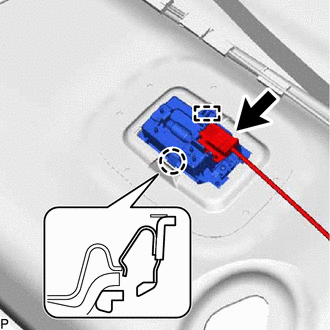
Disconnect the connector.
Tip:Use the same procedure for the RH side and LH side.
Disengage the claw and guide to remove the vanity light assembly.
Tip:Use the same procedure for the RH side and LH side.
-
REMOVE NO. 3 ANTENNA CORD SUB-ASSEMBLY
REMOVE NO. 4 ROOF SILENCER PAD (for Standard Roof)
-
w/ Front Silencer Pad:
Remove the No. 4 roof silencer pad.
-
REMOVE NO. 3 ROOF SILENCER PAD (for Standard Roof)
-
w/ Front Silencer Pad:
Remove the 2 No. 3 roof silencer pads.
-
REMOVE NO. 1 ROOF SILENCER PAD (for Standard Roof)
w/ Silencer Pad:

Remove the 4 No. 1 roof silencer pads.
REMOVE NO. 5 ROOF SILENCER PAD (for Standard Roof)
-
w/ Silencer Pad:
Remove the No. 5 roof silencer pad.
-
REMOVE ROOF HEADLINING PAD (for Standard Roof)
-
w/ Vanity Light:
Remove the roof headlining pad.
-
REMOVE NO. 2 ROOF HEADLINING PAD (for Standard Roof)
-
w/ Vanity Light:
Remove the No. 2 roof headlining pad.
-
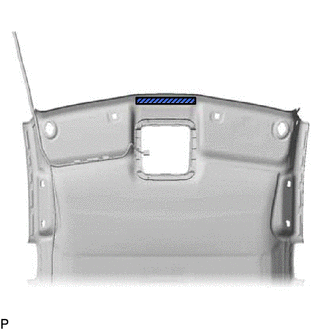
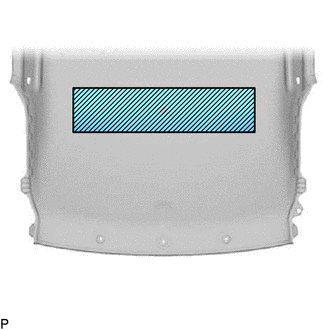
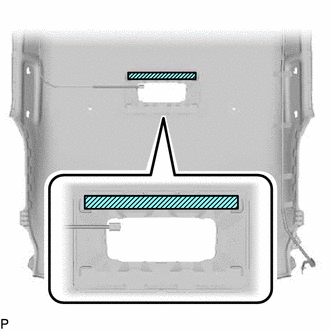
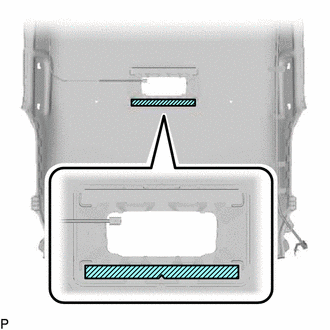
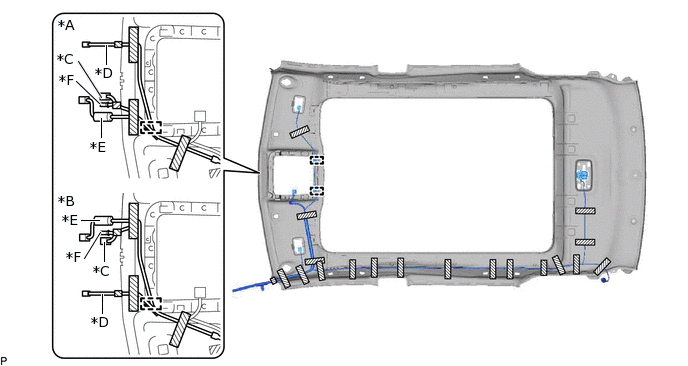
REMOVE NO. 1 ROOF WIRE (for Standard Roof)
Remove each adhesive tape from the roof headlining.
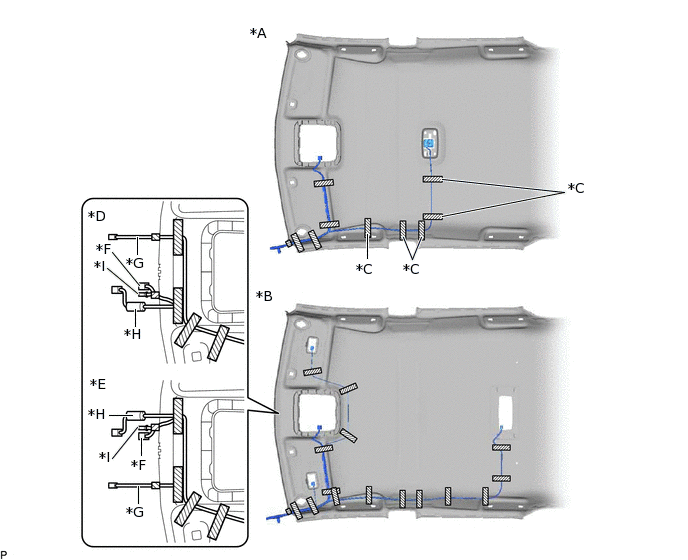
*A
w/o Vanity Light
*B
w/ Vanity Light
*C
w/ No. 1 Room Light
*D
for LHD
*E
for RHD
*F
w/ EC Mirror
*G
w/ Rain Sensor
*H
w/ Pre-crash Safety System
*I
w/ Pre-Crash Safety City Heater
-
-

Adhesive Tape
-
-
Remove the No. 1 roof wire from the roof headlining.
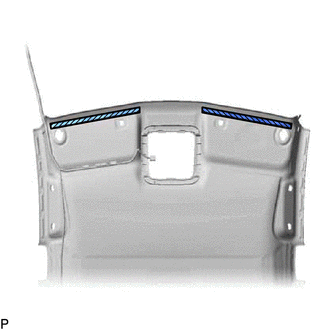
REMOVE NO. 1 ROOF WIRE (for Glass Roof)
Remove each adhesive tape from the roof headlining.
*A
for LHD
*B
for RHD
*C
w/ EC Mirror
*D
w/ Rain Sensor
*E
w/ Pre-crash Safety System
*F
w/ Pre-Crash Safety City Heater
Adhesive Tape
-
-
Disengage each clamp to remove the No. 1 roof wire from the roof headlining.