MOTOR WATER JACKET COVER ASSEMBLY REMOVAL

-
DRAIN COOLANT (for Inverter)
Note
-
Do not reuse the drained coolant because it may contain foreign objects.
-
Collect the drained coolant and measure its volume to establish a benchmark. When adding coolant, make sure to add more coolant than the measured amount.
-
Remove the reserve tank cap.
CAUTION:
To avoid the danger of being burned, do not remove the reserve tank cap while the coolant for the inverter is still hot.
-
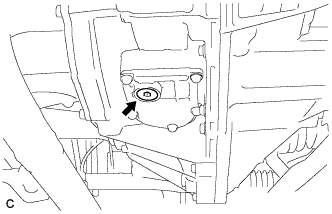
Using a hexagon wrench (10 mm), remove the drain plug indicated in the illustration and drain the coolant.
CAUTION:
Use caution when handling coolant immediately after driving or in summer because it may be hot.
-
Install the plug with a new gasket.
- Torque:
- 39 N*m { 397 kgf*cm, 29 ft.*lbf }
-
-
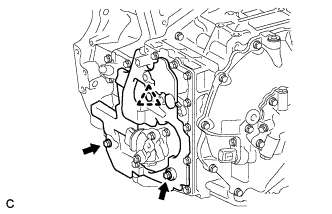
REMOVE NO. 2 MOTOR WATER JACKET COVER ASSEMBLY
-
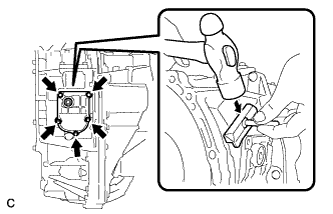
Remove the 5 bolts.
-
Insert the blade of an oil pan seal cutter between the transaxle housing. Cut through the applied sealer and remove the No. 2 motor water jacket cover assembly.
Note
Be careful not to damage the contact surfaces of the transaxle housing where the motor water jacket cover is installed.
-
-
REMOVE HYBRID VEHICLE TRANSAXLE ASSEMBLY
-
REMOVE FRONT ENGINE MOUNTING BRACKET
-
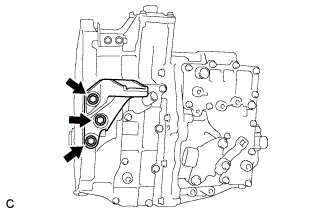
Remove the 3 bolts and front engine mounting bracket from the hybrid vehicle transaxle assembly.
-
-
REMOVE NO. 1 TRANSMISSION CONTROL CABLE BRACKET
-
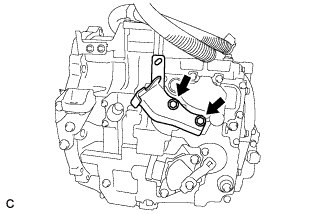
Remove the 2 bolts and No. 1 transmission control cable bracket from the hybrid vehicle transaxle assembly.
-
-
REMOVE AUTOMATIC TRANSMISSION CASE COVER
-
Remove the 2 bolts, clip and automatic transmission case cover from the hybrid vehicle transaxle assembly.
-
-
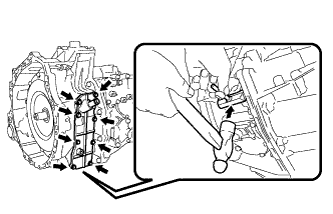
REMOVE NO. 1 MOTOR WATER JACKET COVER ASSEMBLY
-
Remove the 8 bolts.
-
Insert the blade of an oil pan seal cutter between the transaxle housing. Cut through the applied sealer and remove the No. 1 motor water jacket cover assembly.
Note
Be careful not to damage the contact surfaces of the transaxle housing where the motor water jacket cover is installed.
-