TRANSMISSION CONTROL CABLE REMOVAL

-
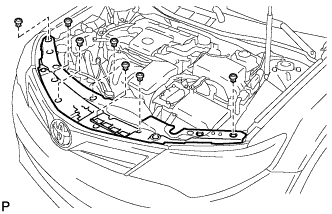
REMOVE COOL AIR INTAKE DUCT SEAL
-
Remove the 7 clips and cool air intake duct seal.
-
-
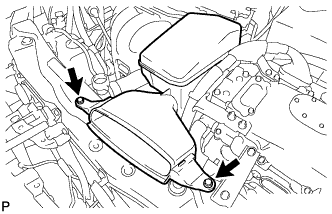
REMOVE INLET AIR CLEANER ASSEMBLY
-
Remove the 2 bolts and inlet air cleaner assembly.
-
-
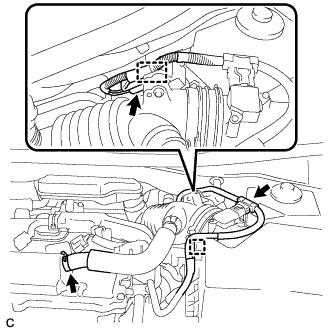
REMOVE AIR CLEANER CAP SUB-ASSEMBLY
-
Disconnect the mass air flow meter connector and wire harness clamp from the air cleaner cap sub-assembly.
-
Disconnect the ventilation hose from the cylinder head cover.
-
Disconnect the connector and wire harness clamp.
-
Release the 2 clamps and remove the air cleaner cap sub-assembly.
-
Disconnect the 2 fuel vapor feed hoses.
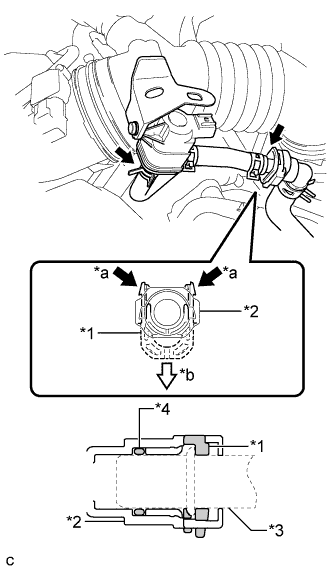
Text in Illustration *1 Retainer *2 Fuel Tube Connector *3 Pipe *4 O-ring *a Pinch *b Pull Note
-
Remove any dirt or foreign matter on the fuel tube connector before performing this work.
-
Do not allow any scratches or foreign matter to get on the parts when disconnecting them as the fuel tube connector has an O-ring that seals the pipe.
-
Perform this work by hand. Do not use any tools.
-
Protect the disconnected parts by covering them with plastic bags after disconnecting each fuel vapor feed hose.
-
-
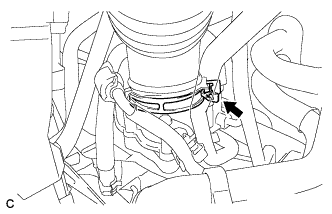
Loosen the hose clamp and disconnect the air cleaner hose from the throttle with motor body assembly.
-
-
REMOVE AIR CLEANER FILTER ELEMENT
-
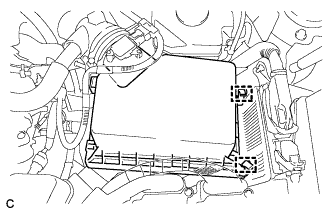
REMOVE AIR CLEANER CASE SUB-ASSEMBLY
-
Remove the 2 bolts and air cleaner case sub-assembly.
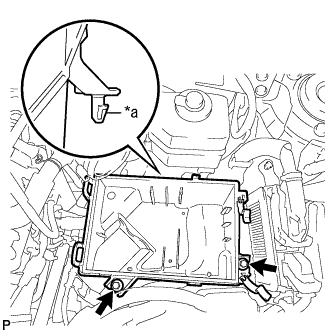
Text in Illustration *a Projection
-
-
REMOVE AIRBAG SENSOR ASSEMBLY
-
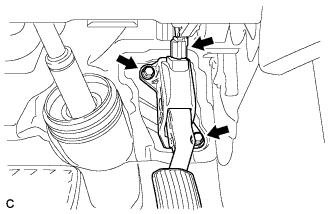
REMOVE ACCELERATOR PEDAL SENSOR ASSEMBLY
Note
-
Avoid physical shock to the accelerator pedal sensor assembly.
-
Do not disassemble the accelerator pedal sensor assembly.
-
This accelerator pedal does not require lubrication. Do not apply oil or other lubrication to the accelerator pedal sensor assembly. If applied, the accelerator pedal sensor assembly must be replaced.
-
Disconnect the connector.
-
Remove the 2 bolts and accelerator pedal sensor assembly.
-
-
DISCONNECT NO. 1 PARKING BRAKE CABLE ASSEMBLY
-
Turn back the floor carpet.
-
Remove the bolt and nut, and disconnect the No. 1 parking brake cable assembly.
-
-
REMOVE TRANSMISSION CONTROL CABLE ASSEMBLY
-
Move the shift lever to N.
-
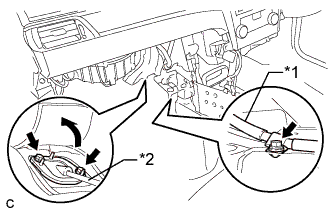
Disconnect the end of the transmission control cable from the lower shift lever assembly.

-
Disengage the 2 claws and disconnect the transmission control cable assembly from the lower shift lever assembly.
-
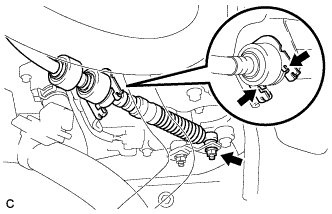
Remove the nut and disconnect the transmission control cable assembly from the control shaft lever.
-
Using a screwdriver, disengage the 4 claws and disconnect the transmission control cable assembly with clip from the No. 1 transmission control cable bracket.
-
Remove the clip from the transmission control cable assembly.
-
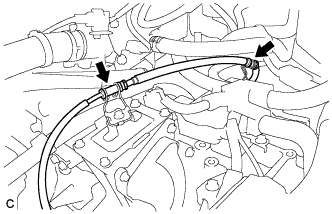
Disconnect the transmission control cable assembly from the 2 transmission control brackets.
-
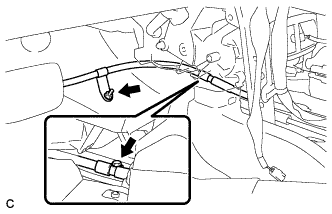
Remove the bolt and disconnect the No. 1 parking brake cable assembly from the body.
Text in Illustration *1 No. 1 parking brake cable assembly *2 Transmission control cable assembly -
Turn back the dash panel insulator.
-
Remove the 2 bolts and pull out the transmission control cable assembly from the body.
-