HYBRID VEHICLE TRANSAXLE REMOVAL

CAUTION:
The engine assembly with transmission is very heavy. Be sure to follow the procedure described in the repair manual, or the engine lifter may suddenly drop.
-
REMOVE ENGINE ASSEMBLY WITH TRANSAXLE
-
SEPARATE WIRE HARNESS
-
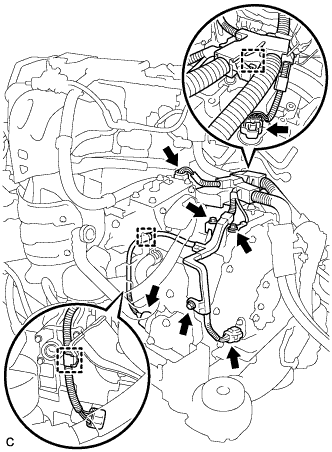
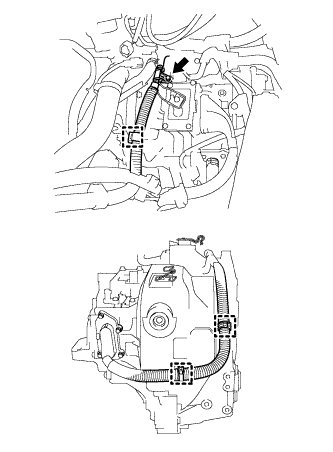
Remove the 3 bolts and disconnect the 4 connectors, 3 clamps and wire harness from the hybrid vehicle transaxle assembly.
-
Remove the bolt and disconnect the 3 clamps and motor cable from the hybrid vehicle transaxle assembly.
-
-
REMOVE FRONT FRAME ASSEMBLY
-
Remove the bolt and disconnect the No. 4 engine wire from the front frame assembly.

-
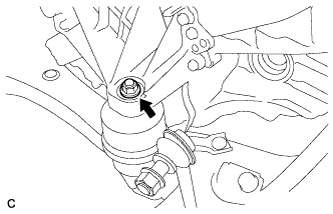
Remove the nut and separate the engine mounting insulator LH.
-
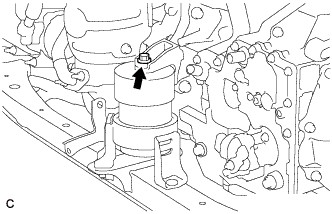
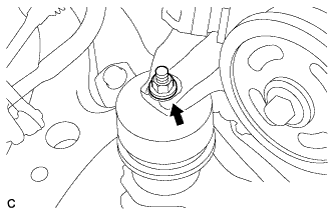
Remove the bolt and separate the front engine mounting insulator.
-
Remove the nut and separate the engine mounting insulator RH.
-
Remove the front frame assembly.
-
Using a height adjustable attachment and plate lift attachment, place the engine assembly on a flat level surface.
Note
-
Using a height adjustable attachment and plate lift attachment, place the engine assembly with transaxle horizontally.
-
To prevent the oil pan from deforming, do not place any attachments onto the oil pan of the engine assembly with transaxle.
-
Using an engine sling device and engine lift, secure the engine assembly before service.
-
-
-
REMOVE HYBRID VEHICLE TRANSAXLE ASSEMBLY
-
Using the transmission jack attachment, set the hybrid vehicle transaxle assembly on a transmission jack.
Note
-
Secure the hybrid vehicle transaxle assembly to the transmission jack using a suitable adapter, such as a rope or attachment.
-
To prevent the motor water jacket cover assembly from deforming, do not place any attachments onto the motor water jacket cover assembly of the hybrid vehicle transaxle assembly.
-
Hold the engine assembly with a suitable adapter, such as a rope, during the operation.
-
-
Remove the 9 bolts and hybrid vehicle transaxle assembly.
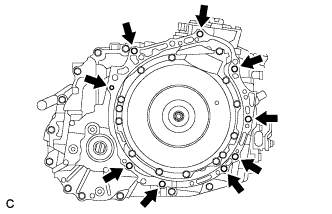
Note
-
To avoid damage to the knock pins, do not pry between the hybrid vehicle transaxle assembly and the engine.
-
To prevent the splines of the damper from becoming misaligned, do not allow the transaxle to hit the damper during transaxle removal and installation.
-
-
-
REMOVE FRONT ENGINE MOUNTING BRACKET
-
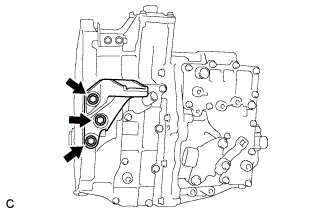
Remove the 3 bolts and front engine mounting bracket from the hybrid vehicle transaxle assembly.
-
-
REMOVE NO. 1 TRANSMISSION CONTROL CABLE BRACKET
-
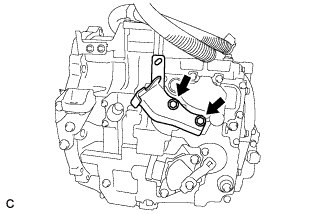
Remove the 2 bolts and No. 1 transmission control cable bracket from the hybrid vehicle transaxle assembly.
-
-
REMOVE NO. 2 TRANSMISSION CONTROL CABLE BRACKET
-
Remove the bolt and No. 2 transmission control cable bracket from the hybrid vehicle transaxle assembly.
-
-
REMOVE NO. 3 TRANSMISSION CONTROL CABLE BRACKET
-
Remove the bolt and No. 3 transmission control cable bracket from the hybrid vehicle transaxle assembly.
-
-
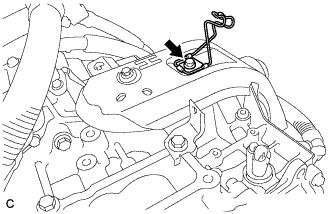
REMOVE AUTOMATIC TRANSMISSION CASE COVER
-
Disengage the 2 guides and remove the automatic transmission case cover.
-
-
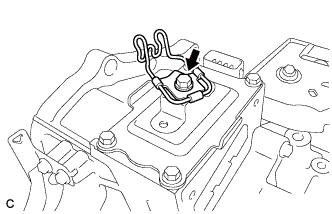
REMOVE NO. 3 AUTOMATIC TRANSMISSION CASE COVER
-
Remove the 2 bolts, clip and No. 3 automatic transmission case cover from the hybrid vehicle transaxle assembly.
-
-
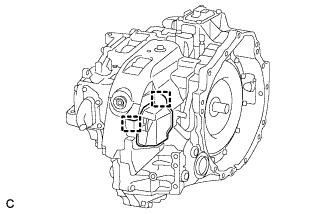
REMOVE HYBRID TRANSAXLE MASS DAMPER
-
Remove the hybrid transaxle mass damper and gasket from the hybrid vehicle transaxle assembly.
-
-
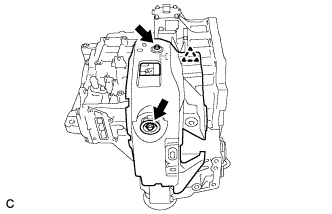
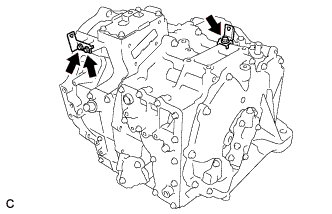
REMOVE WIRE HARNESS CLAMP BRACKET
-
Remove the 3 bolts and 2 wire harness clamp brackets from the hybrid vehicle transaxle assembly.
-
-
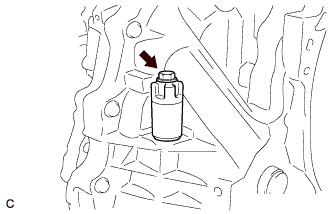
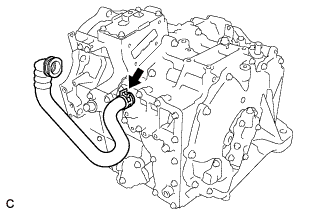
REMOVE NO. 1 INVERTER COOLING HOSE ASSEMBLY
-
Remove the No. 1 inverter cooling hose assembly from the hybrid vehicle transaxle assembly.
-
-
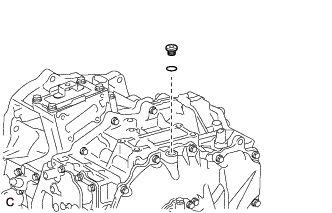
REMOVE WITH HEAD STRAIGHT SCREW PLUG
Tech Tips
Perform this procedure only when replacement of the with head straight screw plug is necessary.
-
Using a 10 mm hexagon socket wrench, remove the with head straight screw plug and O-ring from the hybrid vehicle transaxle assembly.
-