REAR DOOR BELT MOULDING INSTALLATION

-
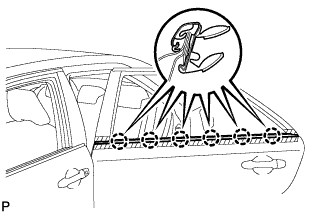
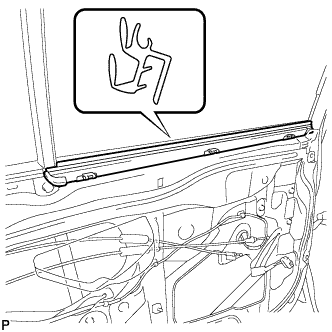
INSTALL REAR DOOR BELT MOULDING ASSEMBLY
-
Engage the 6 claws to install the rear door belt moulding assembly as shown in the illustration.
-
-
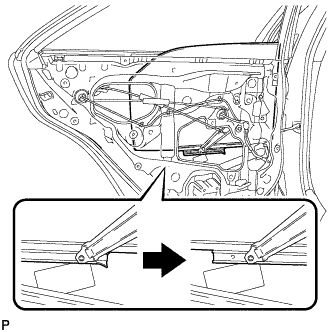
INSTALL REAR DOOR GLASS SUB-ASSEMBLY
-
Slide the rear door glass sub-assembly to install it as shown in the illustration.
-
-
INSTALL REAR DOOR QUARTER WINDOW GLASS
-
Install the rear door quarter window glass to the rear door quarter window weatherstrip.
-
Install the rear door quarter window glass together with the rear door quarter window weatherstrip in the direction indicated by the arrow in the illustration.

-
-
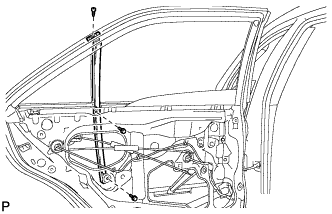
INSTALL REAR DOOR LOWER WINDOW FRAME SUB-ASSEMBLY
-
Install the rear door lower window frame sub-assembly with the screw and 2 bolts.
-
-
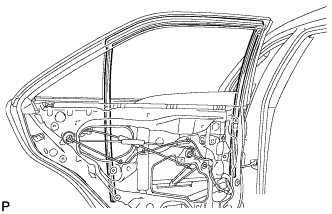
INSTALL REAR DOOR GLASS RUN
-
Install the rear door glass run.
-
-
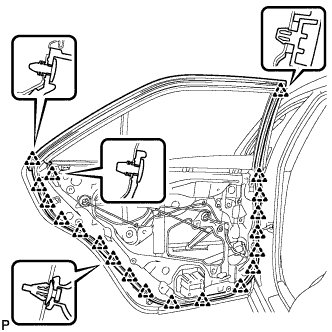
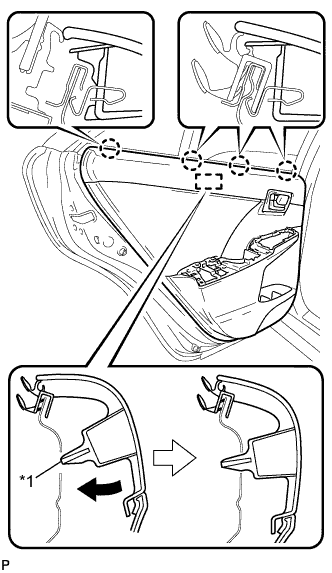
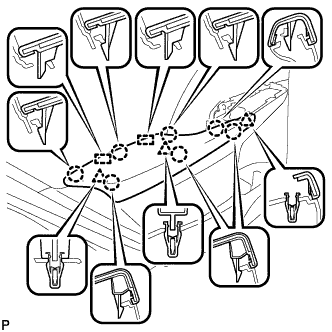
INSTALL REAR DOOR WEATHERSTRIP
-
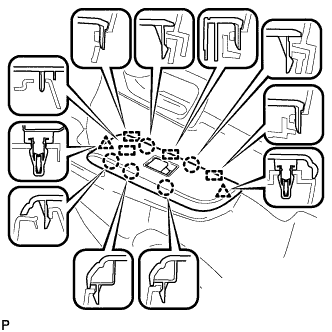
Engage the 20 clips to install the rear door weatherstrip.
-
-
INSTALL REAR DOOR CHECK ASSEMBLY
-
Apply MP grease to the sliding parts of the rear door check assembly.
-
Apply adhesive to the threads of the bolt.
Adhesive Toyota Genuine Adhesive 1324, Three Bond 1324 or equivalent -
Install the rear door check assembly with the 2 nuts and bolt.
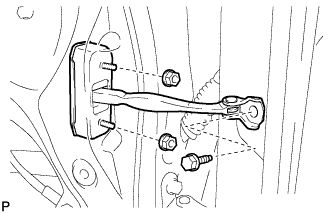
- Torque:
- Bolt
- 29 N*m { 296 kgf*cm, 21 ft.*lbf }
- Nut
- 8.0 N*m { 82 kgf*cm, 71 in.*lbf }
-
-
INSTALL REAR DOOR SERVICE HOLE COVER
-
Apply new butyl tape to the rear door panel.
-
Pass the rear door lock remote control cable assembly, rear door inside locking cable assembly and each connector through a new rear door service hole cover.
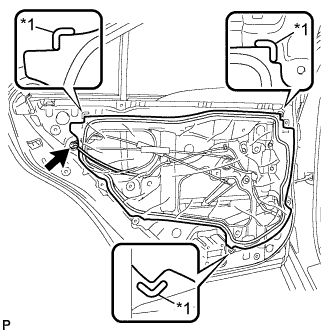
Text in Illustration *1 Reference Point -
Attach the rear door service hole cover according to the reference points on the rear door panel.
Note
Securely install the rear door service hole cover preventing wrinkles and air bubbles.
-
Connect the connector.
-
-
INSTALL REAR DOOR INNER GLASS WEATHERSTRIP
-
Install the rear door inner glass weatherstrip.
-
-
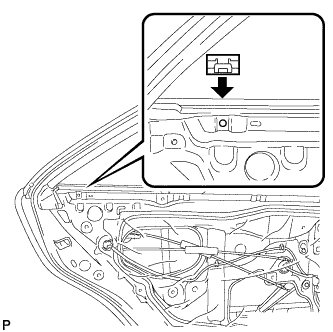
INSTALL REAR DOOR TRIM BOARD SUB-ASSEMBLY
-
Install the No. 1 door scuff plate clamp as shown in the illustration.
-
Connect the rear door lock remote control cable assembly and rear door inside locking cable assembly.
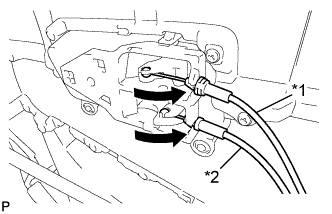
Text in Illustration *1 Rear Door Inside Locking Cable Assembly *2 Rear Door Lock Remote Control Cable Assembly -
Engage the rear door trim board sub-assembly with the 4 claws and reference boss as shown in the illustration.
Text in Illustration *1 Reference Boss -
Engage the 8 clips and install the rear door trim board sub-assembly.

-
Install the 3 screws.
-
If protective tape has been applied, remove it.
-
-
INSTALL REAR ARMREST ASSEMBLY
-
Engage the 2 guides, 3 clips and 7 claws to install the rear armrest assembly.
-
-
INSTALL REAR POWER WINDOW REGULATOR SWITCH ASSEMBLY WITH REAR DOOR ARMREST BASE PANEL
-
Connect the connector.
-
Engage the 4 guides, 2 clips and 5 claws to install the rear power window regulator switch assembly with rear door armrest base panel.
-
-
INSTALL REAR DOOR INSIDE HANDLE BEZEL PLUG
-
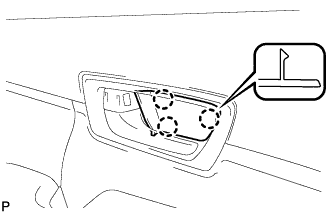
Engage the 3 claws to install the rear door inside handle bezel plug.
-
-
CONNECT CABLE TO AUXILIARY BATTERY NEGATIVE TERMINAL
Note
When disconnecting the cable, some systems need to be initialized after the cable is reconnected Click here.
-
INSTALL LUGGAGE TRIM SERVICE HOLE COVER
-
Engage the claw to connect the luggage trim service hole cover.
-
-
INSPECT POWER WINDOW OPERATION