СИСТЕМА МЕХАНИЧЕСКОЙ ТРАНСМИССИИ
-
CONSTRUCTION
-
Synchromesh Mechanism
-
Triple cone type (for 1st gear to 3rd gear), double-cone type (for 4th gear) and single-cone type (for 5th gear and 6th gear) synchromesh mechanisms are used.
-
The No. 2 transmission hub sleeve has a 2-step sleeve chamfer structure. This reduces the amount of time needed for the gears to engage after synchronizing, thus improving shift feeling.
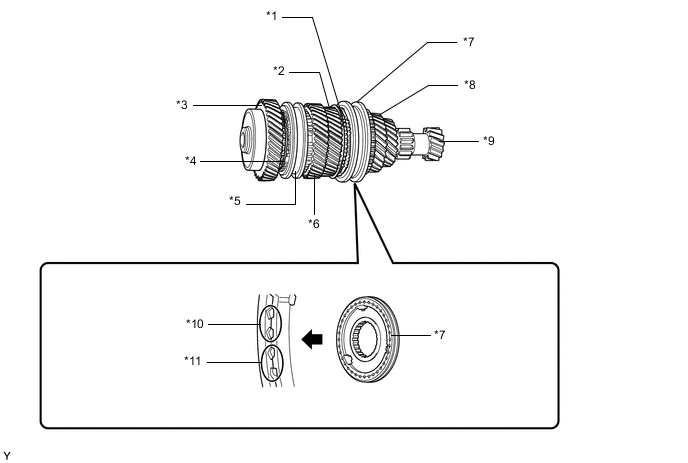
*1 4th Gear Synchronizer Ring *2 4th Gear *3 6th Gear Sub-assembly *4 No. 5 Synchronizer Ring (for 6th Gear) *5 No. 3 Transmission Hub Sleeve *6 5th Gear *7 No. 2 Transmission Hub Sleeve *8 3rd Gear *9 Input Shaft *10 Sleeve Chamfer (for 4th Gear) *11 Sleeve Chamfer (for Synchronizer Ring) - - -
The ball and spring in the synchromesh shifting key have been combined into one unit, thus ensuring the stable position of the synchromesh shifting key and improving shift feeling.
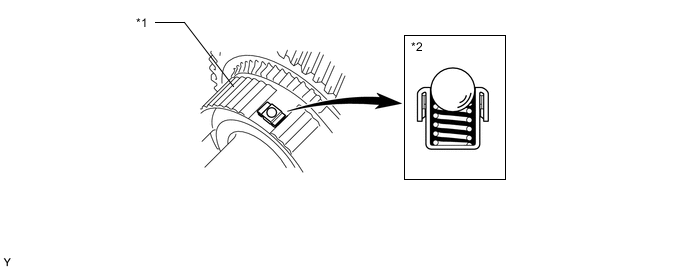
*1 Synchromesh Mechanism (for 1st and 2nd Gears) *2 No. 1 Synchromesh Shifting Key
-
-
Shift Mechanism
-
Sliding ball bearings are used in the shift and select lever shaft and shift fork shafts to improve the shift feeling.
-
A rolling type lock ball is used in the shift and select lever shaft to improve the shift feeling.
-
A shift guide plate is provided for the shift and select lever shaft to clarify the shift knob position and achieve accurate shift operation.

*1 Sliding Ball Bearing *2 Shift and Select Lever Shaft *3 Shift Guide Plate *4 Rolling Type Lock Ball *5 Shift Fork Shaft - - *a View from A Side - -
-
-