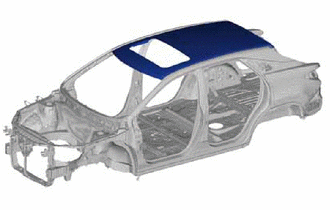
ROOF PANEL(for Sliding Roof) ASSEMBLY REPLACEMENT
-
REMOVAL
Symbol Meaning 
Remove Weld Points
-
If reusing the roof panel reinforcement, trim the hemming location using a disc sander, etc.
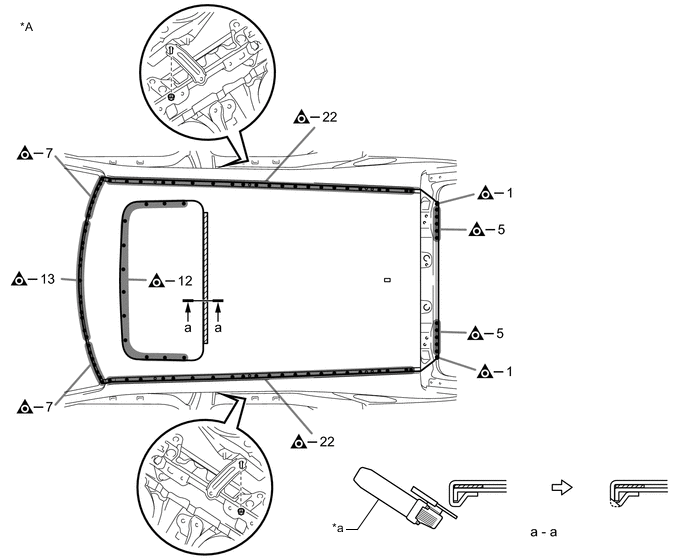
*A w/o Rear No. 2 Seat - - *a Disc Sander - - 
Adhesive - - 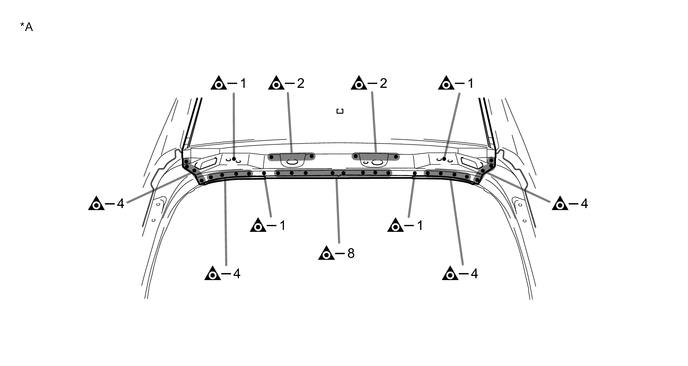
*A w/o Rear No. 2 Seat - - -
If reusing the roof panel reinforcement, trim the hemming location using a disc sander, etc.
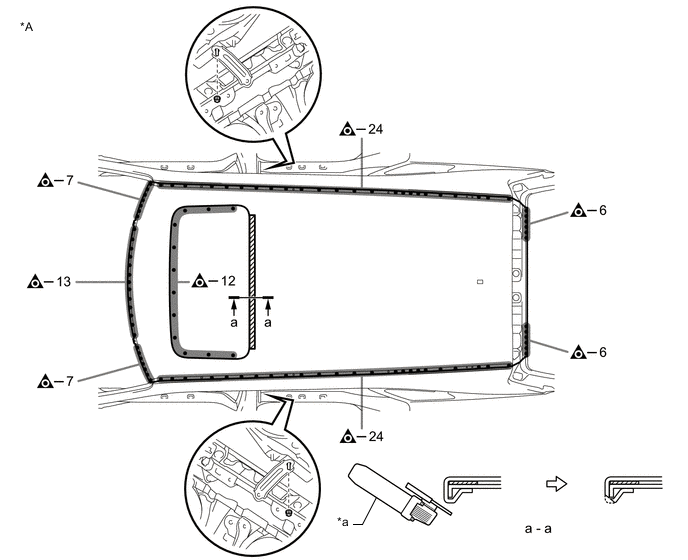
*A w/ Rear No. 2 Seat - - *a Disc Sander - - Adhesive - - 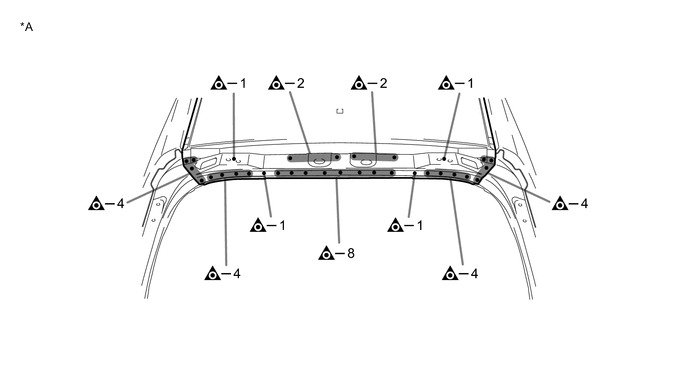
*A w/ Rear No. 2 Seat - -
-
-
INSTALLATION
Symbol Meaning 
Spot Weld 
Plug Weld 
Body Sealer
-
Inspect the fitting of the related parts around the new parts before welding. This affects the appearance of the finish.
-
Temporarily install the new parts and measure each part of the new parts in accordance with the body dimension diagram. (See the body dimensions)
-
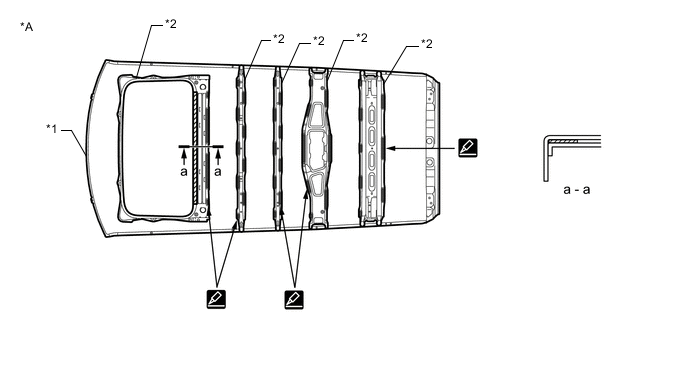
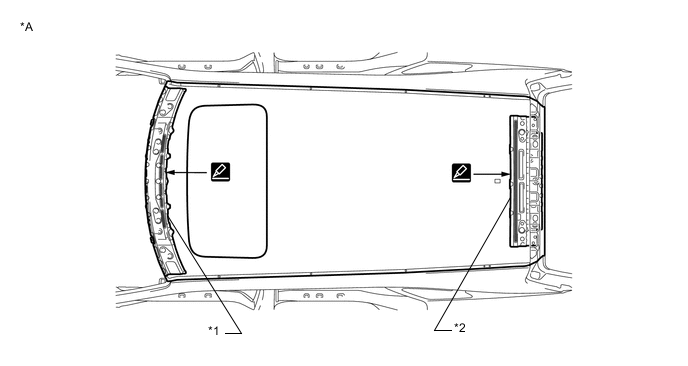
Before temporarily installing the new parts, apply body sealer to the roof panel reinforcement
Tech Tips
Apply enough body sealer to the panels.
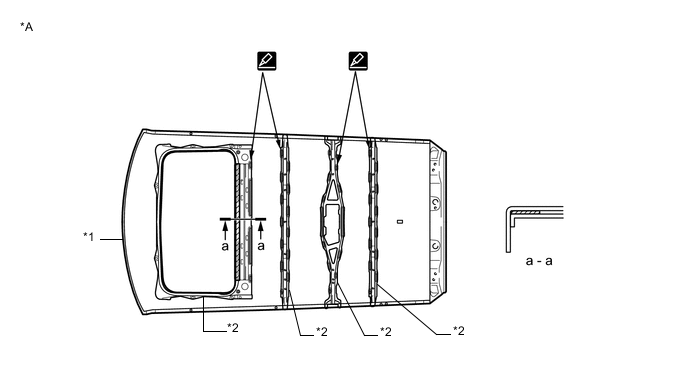
*A w/o Rear No. 2 Seat - - *1 ROOF PANEL *2 ROOF PANEL REINFORCEMENT Adhesive - - -
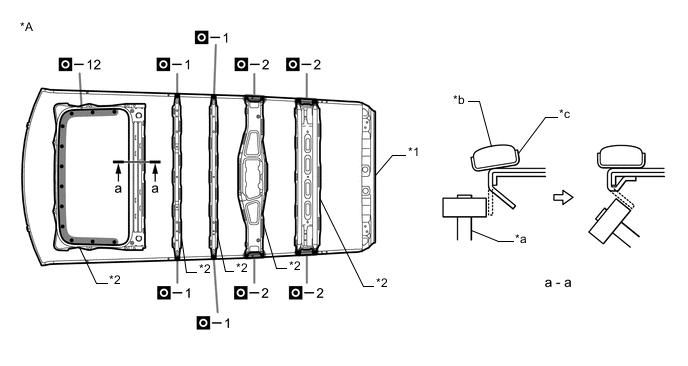
Before temporarily installing the new parts, weld the roof panel and roof panel reinforcement with the standard number of welding points.
-
Bend the flange hem with a wooden hammer and dolly.
Tech Tips
Bend the panel gradually so as not to distort it.
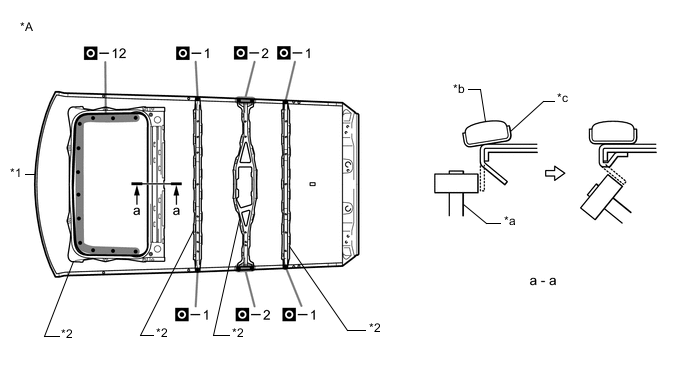
*A w/o Rear No. 2 Seat - - *1 ROOF PANEL *2 ROOF PANEL REINFORCEMENT *a Wooden Hammer *b Dolly *c Cloth Tape - - -
Before temporarily installing the new parts, apply body sealer to the windshield header panel and back door opening frame.
Tech Tips
Apply enough body sealer to the panels.
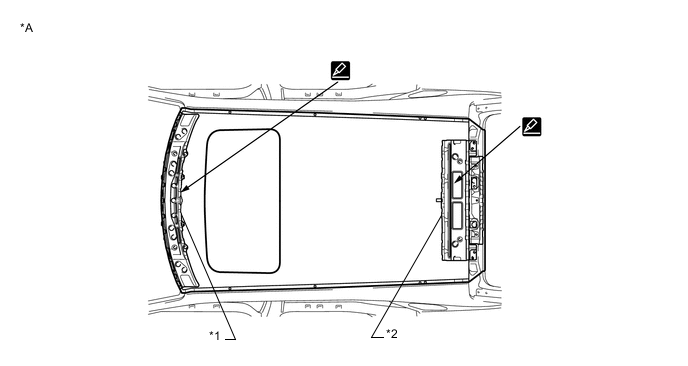
*A w/o Rear No. 2 Seat - - *1 WINDSHIELD HEADER PANEL *2 BACK DOOR OPENING FRAME -
Weld the roof panel to the vehicle side.
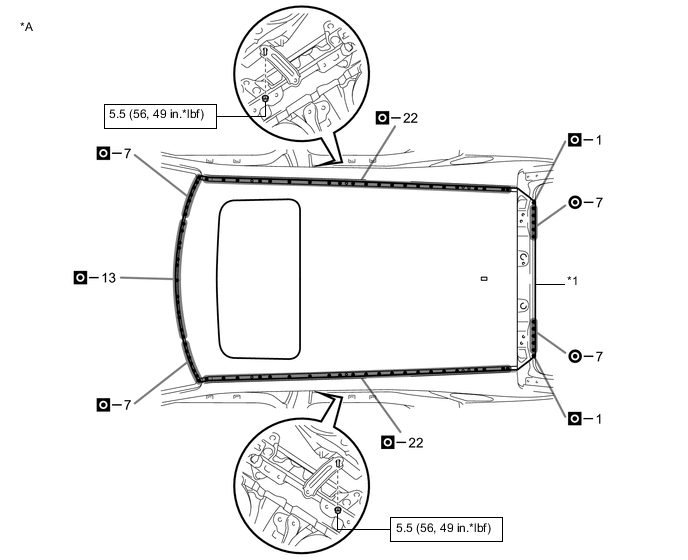
*A w/o Rear No. 2 Seat - - *1 ROOF PANEL - - 
N*m (kgf*cm, ft.*lbf): Specified torque - - 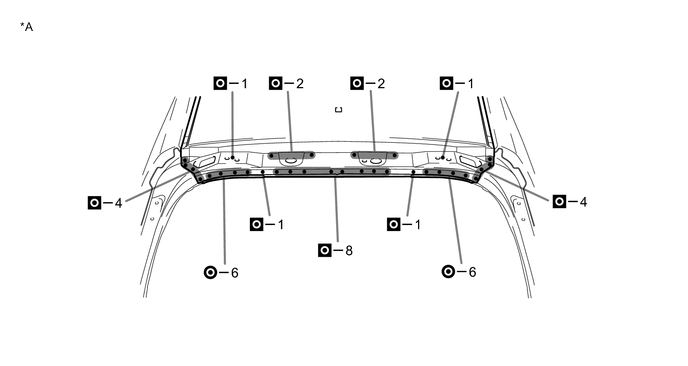
*A w/o Rear No. 2 Seat - - -
Before temporarily installing the new parts, apply body sealer to the roof panel reinforcement
Tech Tips
Apply enough body sealer to the panels.
*A w/ Rear No. 2 Seat - - *1 ROOF PANEL *2 ROOF PANEL REINFORCEMENT Adhesive - - -
Before temporarily installing the new parts, weld the roof panel and roof panel reinforcement with the standard number of welding points.
-
Bend the flange hem with a wooden hammer and dolly.
Tech Tips
Bend the panel gradually so as not to distort it.
*A w/ Rear No. 2 Seat - - *1 ROOF PANEL *2 ROOF PANEL REINFORCEMENT *a Wooden Hammer *b Dolly *c Cloth Tape - - -
Before temporarily installing the new parts, apply body sealer to the windshield header panel and back door opening frame.
Tech Tips
Apply enough body sealer to the panels.
*A w/ Rear No. 2 Seat - - *1 WINDSHIELD HEADER PANEL *2 BACK DOOR OPENING FRAME -
Weld the roof panel to the vehicle side.
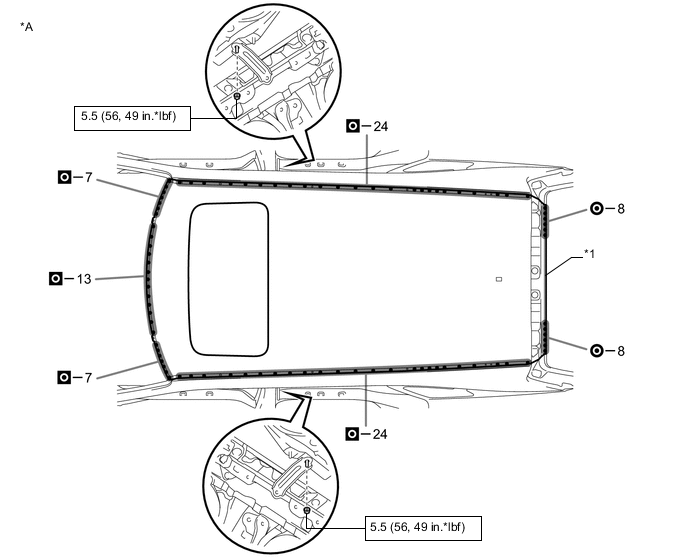
*A w/ Rear No. 2 Seat - - *1 ROOF PANEL - - N*m (kgf*cm, ft.*lbf): Specified torque - - 
*A w/ Rear No. 2 Seat - - -
After welding, apply the foamed sealing material to the corresponding parts. (See the painting / coating)
-
After welding, apply body sealer to the corresponding parts. (See the painting / coating)
-
After applying the top coat, apply anti-rust agent to the internal panel portion of the closed section structural weld points.
-