REAR FLOOR PAN ASSEMBLY REPLACEMENT
-
With the body lower back panel removed.
-
REMOVAL
Symbol meaning 
Remove Weld Points
-
After removing the rear floor side panel, remove the rear floor pan.
REMOVAL POINT
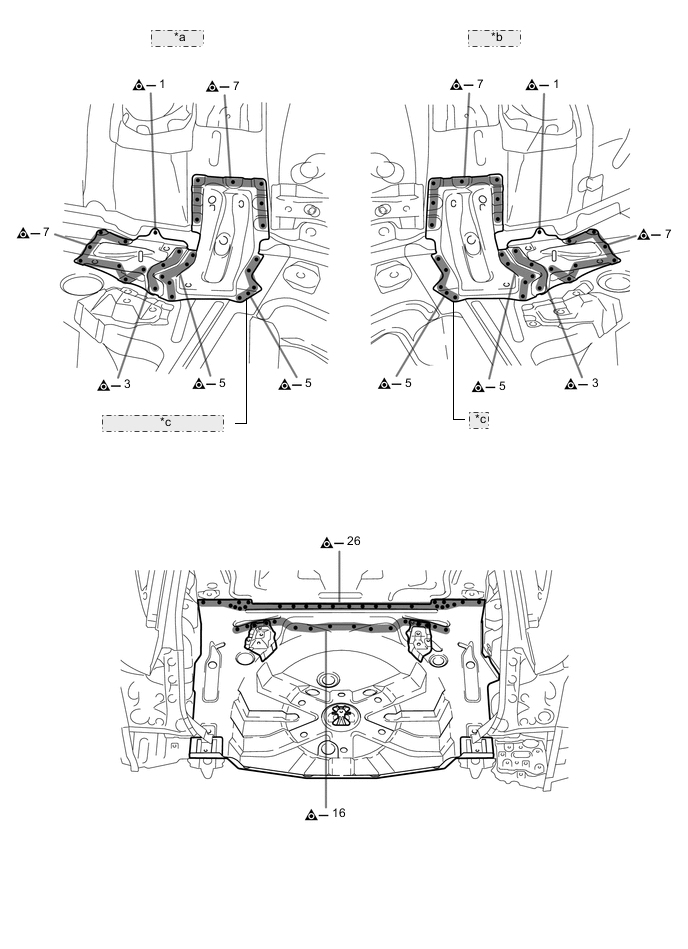
*a [LH Side] *b [RH Side] *c Rear Floor Side Panel 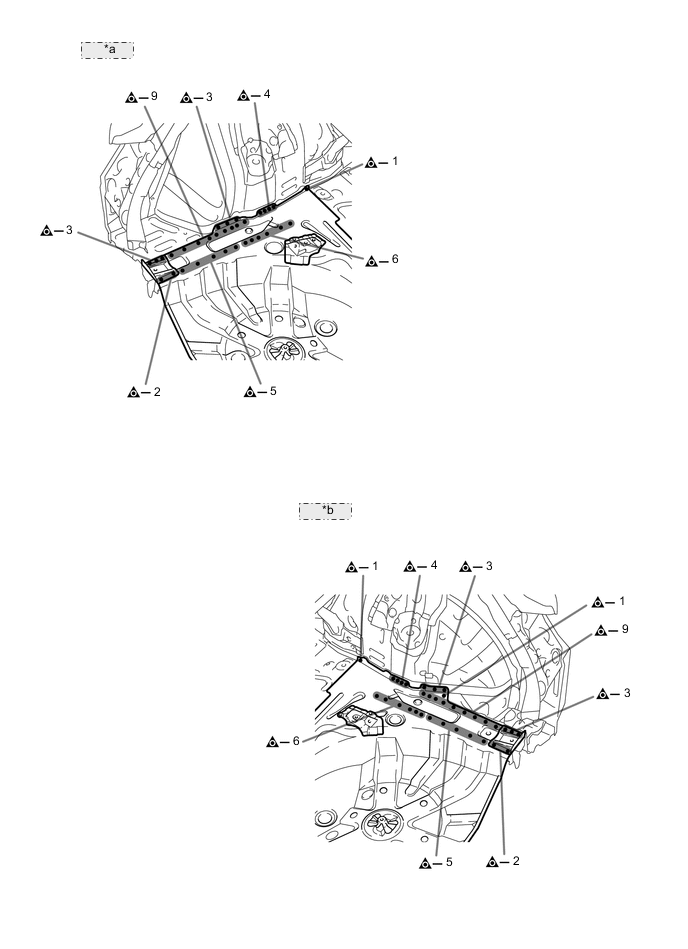
*a [LH Side] *b [RH Side] -
-
INSTALLATION
Symbol meaning 
Plug Weld 
Fillet Weld
-
Temporarily install the new parts and measure each part of the new parts in accordance with the body dimension diagram. (See the body dimension diagram)
-
Before temporarily installing the new parts, weld the spare wheel clamp bracket, rear floor pan reinforcement and weld bolts with the standard number of welding points.
-
After welding the rear floor pan to the vehicle side, install the rear floor side panel.
-
After welding, apply body sealer and undercoating to the corresponding parts. (See the paint / coating)
-
After applying the top coat, apply anti-rust agent to the internal panel portion of the closed section structural weld points.
INSTALLATION POINT
Reference Value Area Measurement Area Measurement *a 275 mm (10.83 in.) *b 806 mm (31.73 in.) *c 765 mm (30.12 in.) *d 264 mm (10.39 in.) *e 298 mm (11.73 in.) *f 858 mm (33.78 in.) *g 841 mm (33.11 in.) *h 282 mm (11.10 in.) *i 556 mm (21.89 in.) *j 601 mm (23.66 in.) *k 615 mm (24.21 in.) *l 651 mm (25.63 in.) 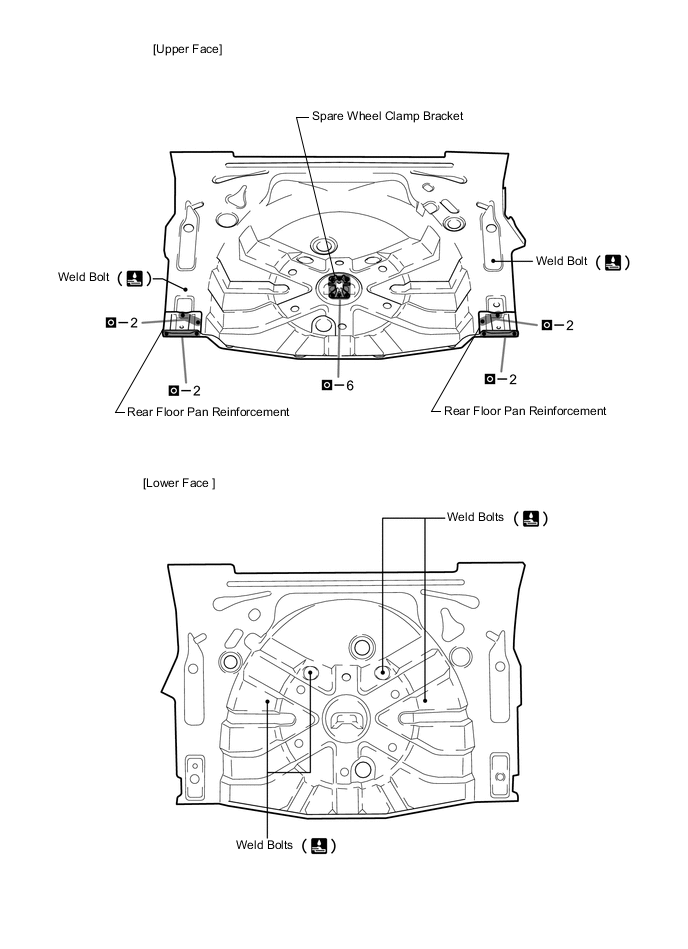
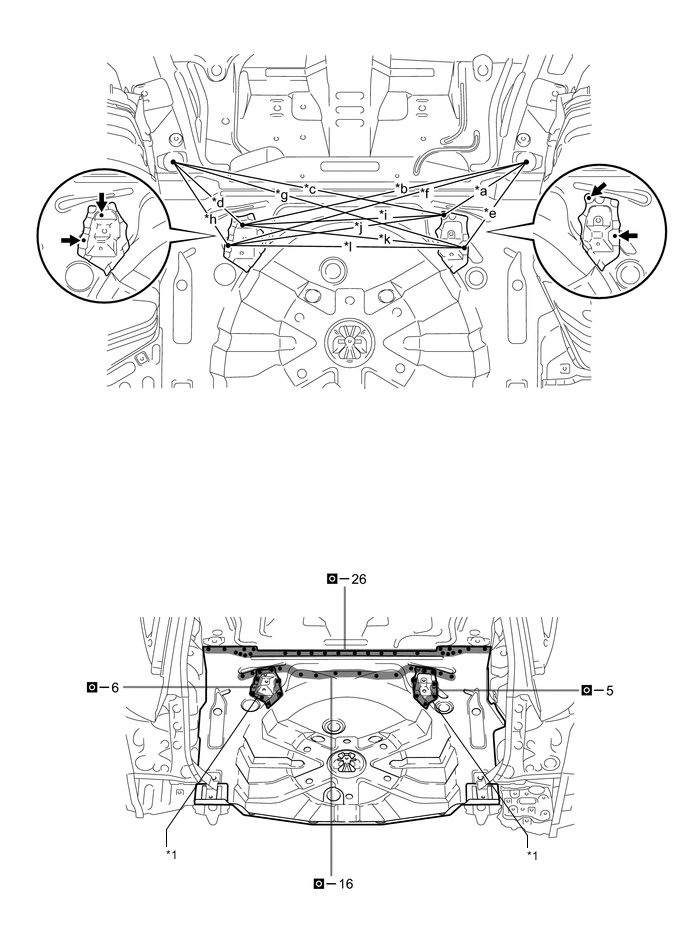
*1 Rear Floor Mounting No. 2 Bracket 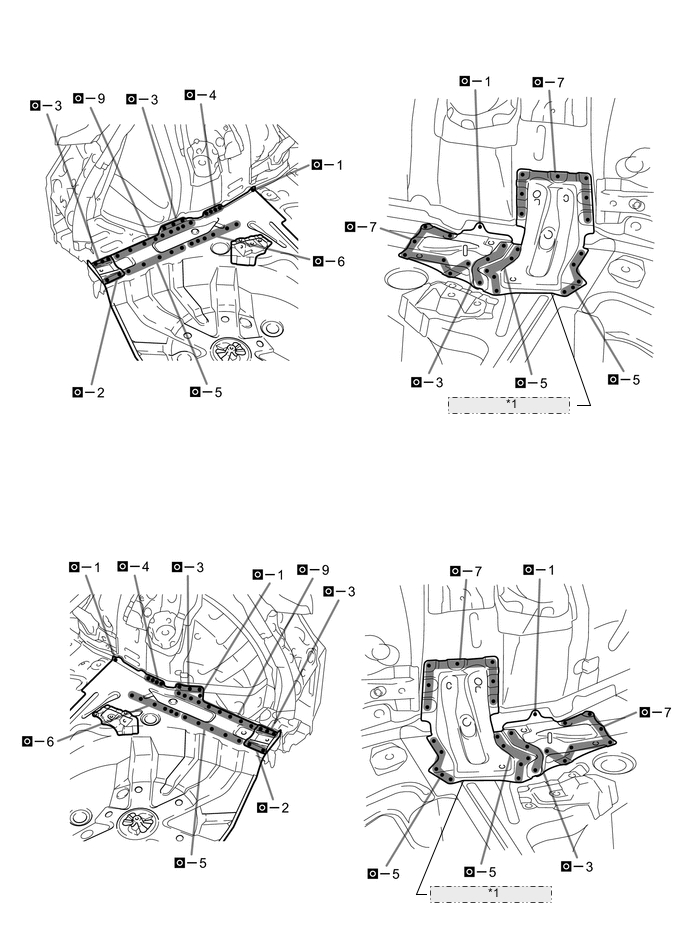
*1 Rear Floor Side Panel -