QUARTER PANEL(for TMC Made 5 Door) ASSEMBLY REPLACEMENT
-
Quarter Panel Replacement Using Adhesive
-
Cut the wheel arch portion.
-
Heat the quarter panel adhesive area and remove the quarter panel.
Tech Tips
Using an industrial heater gun or gas burner, heat the quarter panel to 110 to 140°C. Make sure the quarter panel does not warp.
-
Clean off any adhesive that remains on the vehicle.
Tech Tips
-
Using an industrial heater gun or gas burner, heat the adhesive to 110 to 140°C.
-
Using a scraper, scrape away the adhesive.
-
If adhesive remains, the strength of any subsequently applied adhesive will be weak.
-
-
Using a disc grinder or belt sander, scuff and sand any adhesive that remains on the vehicle.
Tech Tips
Scuff at a width of approximately 10 mm (0.39 in.) over the previous adhesive coating.
-
Apply adhesive to the exposed metal areas on the vehicle. Using a spatula, spread the adhesive evenly.
-
Apply adhesive to the vehicle again.
-
Using #60-120 grit sandpaper, scuff the adhesive application area on the new quarter panel.
-
Apply adhesive to the new quarter panel. Using a spatula, spread the adhesive evenly.
-
Using a vise grip or the palms of your hands, press the quarter panel so that the thickness of the adhesive is even.
-
Complete installation the new quarter panel.
-
Dry the adhesive areas of the new quarter panel.
Tech Tips
-
With dryer or equivalent (60°C): 60 minutes (complete hardening: 90 minutes)
-
Ambient temperature (25°C): 12 hours (complete hardening: 24 hours)
-
Work Procedure
-
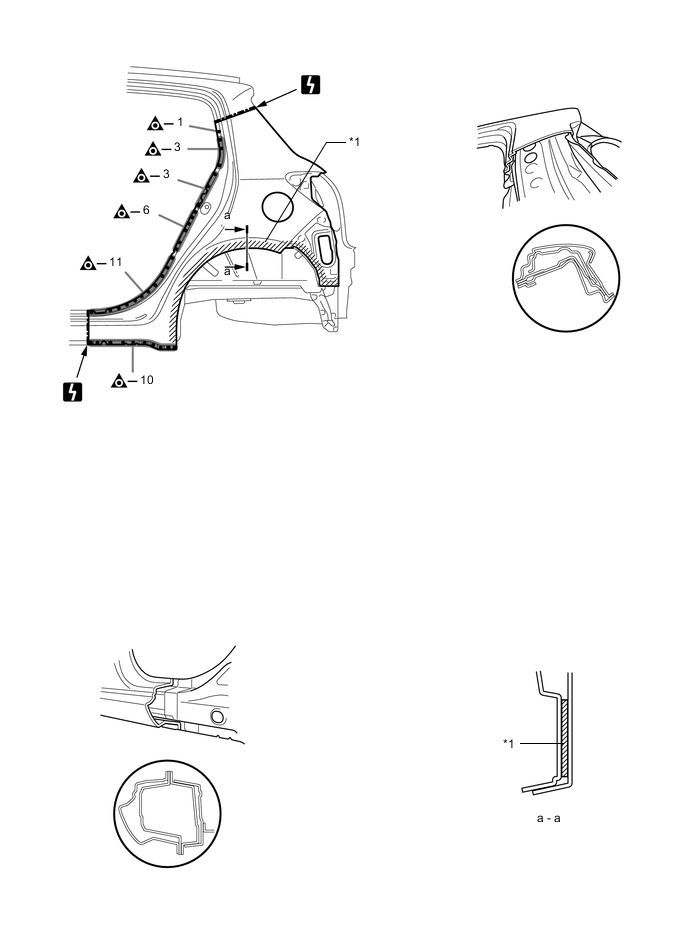
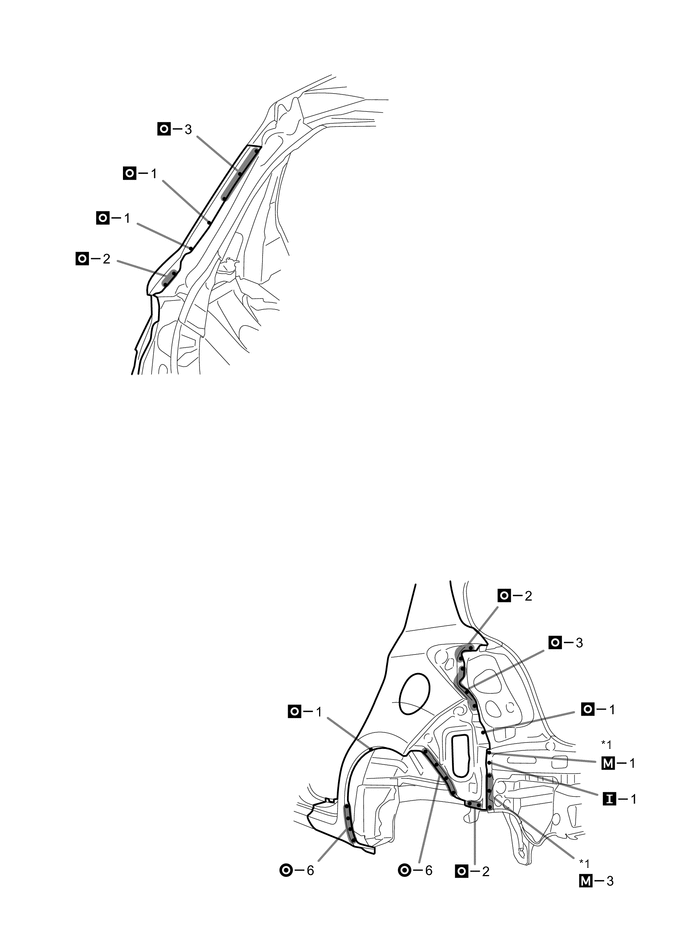
REMOVAL
Symbol meaning 
Remove Weld Points 
Remove Weld Points 
Remove Weld Points 
Cut with Disc Sander etc. 
Cut Location for Supply Parts
-
*1 in illustration above indicates where the adhesive is located.
-
Roughly cut open the panel so that the adhesive can be reached. Cut through the adhesive with a cut chisel to remove the panel.
Tech Tips
In cases where the adhesive cannot be removed with a cut chisel, heat the adhesive with an industrial heater gun or gas burner taking care not to cause panel deformation by overheating.
REMOVAL POINT
-
-
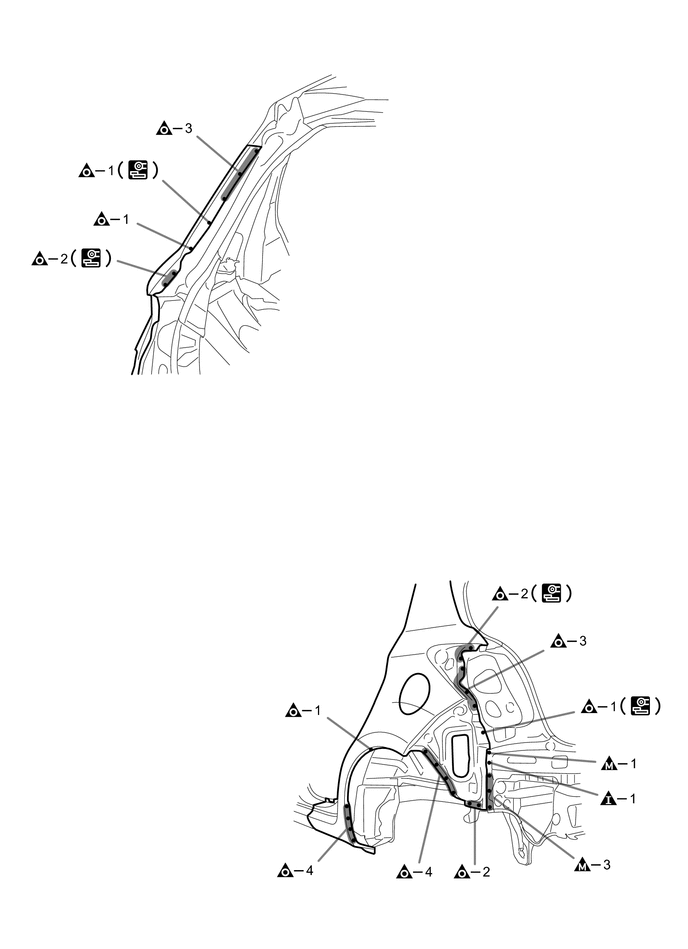
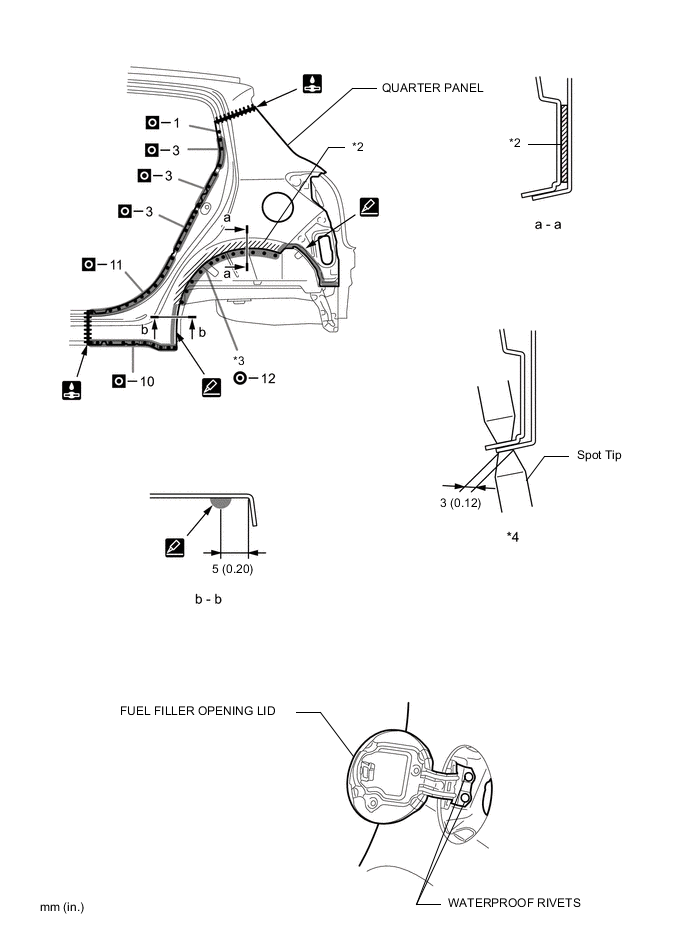
INSTALLATION
Symbol meaning 
Spot Weld 
Plug Weld 
Plug Weld 
Plug Weld 
Butt Weld 
Body Sealer
-
Inspect the fitting of the related parts around the new parts before welding. This affects the appearance of the finish.
-
Temporarily install the new parts and measure each part of the new parts in accordance with the body dimension diagram. (See the body dimensions)
-
When welding *1, make a hole on a new part for plug welding and weld the panel with the panel behind completely.
-
Before installing a new part, apply body sealer.
Tech Tips
-
Apply body sealer evenly about 5 mm (0.20 in.) from the flange, avoiding any oozing.
-
Apply body sealer evenly, about 3 to 4 mm (0.12 to 0.16 in.) in diameter.
-
-
Apply adhesive (3MTMAutomixTMPanel Bonding Adhesive #8115) to the area indicated by *2 in the illustration.
Tech Tips
Apply enough adhesive for the panels to stick to each other.
-
Areas indicated by *3 in the illustration, combine welding with adhesive. (difficult to get stable strength by one way) If use the spot welder, modify the spot tip as shown in the illustration *4 so that it can fit in the narrow flange.
-
After welding, apply foamed sealing material to the corresponding parts. (See the painting / coating)
-
After welding, apply body sealer to the corresponding parts. (See the painting / coating)
-
After applying the top coat, apply anti-rust agent to the internal panel portion of the closed section structural weld points.
INSTALLATION POINT
-