NAME PLATE ATTACHMENT POSITION
-
Heat the double-sided tape remaining on the body with an infrared lamp or equivalent.
Tech Tips
Heat the tape to 40 to 60°C for approximately 1 to 2 minutes.
-
Wipe off the remaining double-sided tape using a clean cloth or equivalent.
Note
If a name plate is installed without thoroughly removing the remaining double-sided tape from the body, the name plate will not adhere properly. Make sure to thoroughly wipe off the double-sided tape.
-
After cleaning the installation area of the body with degreasing agent, attach the name plate to the position shown in the illustration.
Tech Tips
The working environment should be 20°C when installing the name plate. If the working environment is below 20°C, heat the installation area of the body to 20 to 30°C and then install the name plate.
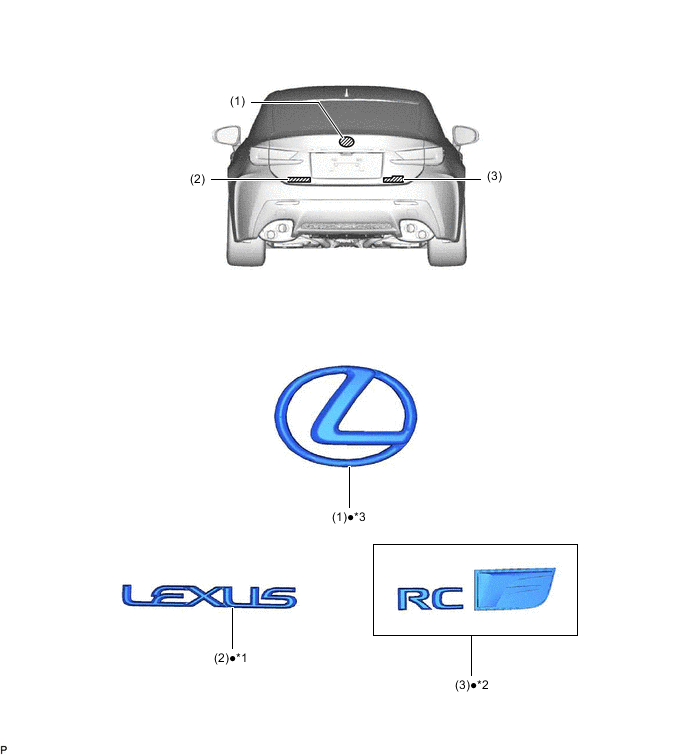
| *1 | NO. 1 LUGGAGE COMPARTMENT DOOR NAME PLATE | *2 | NO. 3 LUGGAGE COMPARTMENT DOOR NAME PLATE |
| *3 | SYMBOL EMBLEM | - | - |
| ● | Non-reusable part | - | - |
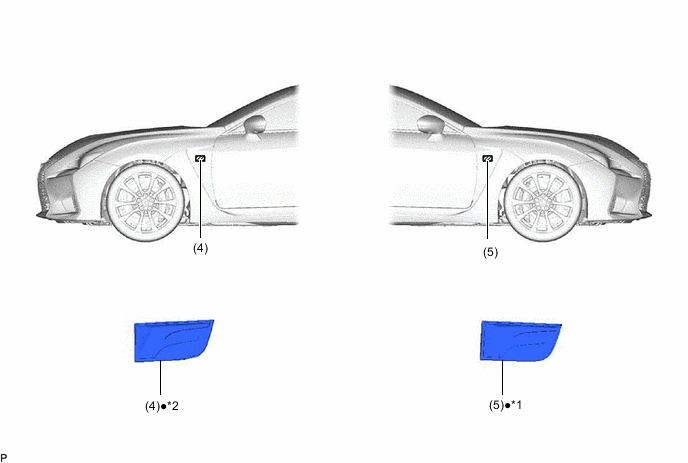
| *1 | NO. 1 FRONT FENDER NAME PLATE | *2 | NO. 2 FRONT FENDER NAME PLATE |
| ● | Non-reusable part | - | - |
-
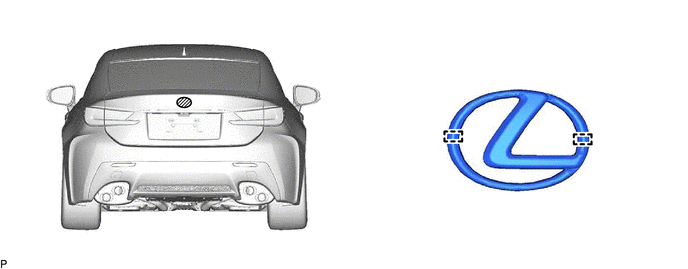
INSTALL SYMBOL EMBLEM
-
Engage the 2 pins and install the symbol emblem as shown in the illustration.
-
-
INSTALL NO. 1 LUGGAGE COMPARTMENT DOOR NAME PLATE
-
Install the No. 1 luggage compartment door name plate as shown in the illustration.
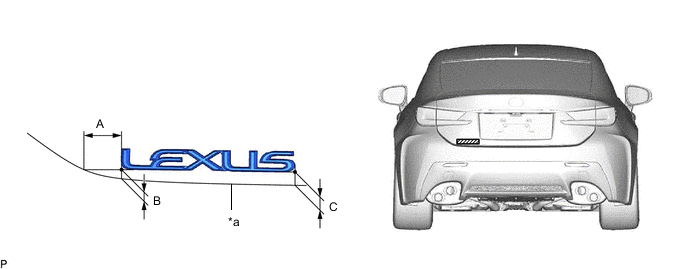
*a Profile of Luggage Compartment Door Panel - -
-
-
INSTALL NO. 3 LUGGAGE COMPARTMENT DOOR NAME PLATE
-
Install the No. 3 luggage compartment door name plate as shown in the illustration.
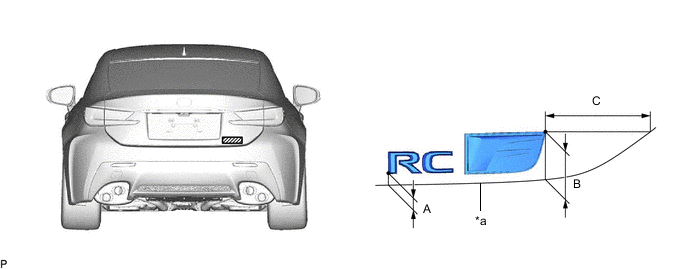
*a Profile of Luggage Compartment Door Panel - -
-
-
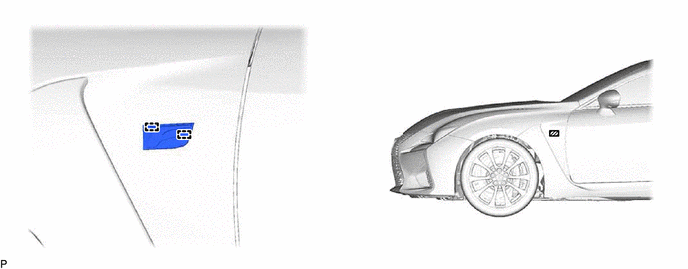
INSTALL NO. 2 FRONT FENDER NAME PLATE
-
Engage the 2 pins and install the No. 2 front fender name plate as shown in the illustration.
-
-
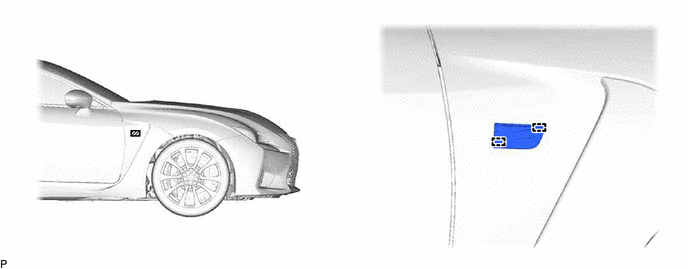
INSTALL NO. 1 FRONT FENDER NAME PLATE
-
Engage the 2 pins and install the No. 1 front fender name plate as shown in the illustration.
-