- Click here
INSTALL SLIDING ROOF CABLE GUIDE CASING
-
Install the 2 sliding roof cable guide casings.
Note:
-
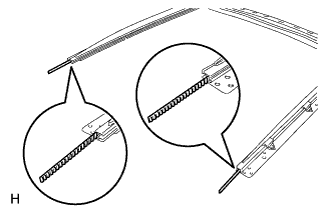
Make sure the sliding roof cable guide casing is facing as shown in the illustration.
-
Insert the sliding roof cable guide casing partway until it is as shown in the illustration.
-
-
- Click here
INSTALL NO. 3 SUNSHADE TRIM SUB-ASSEMBLY
-
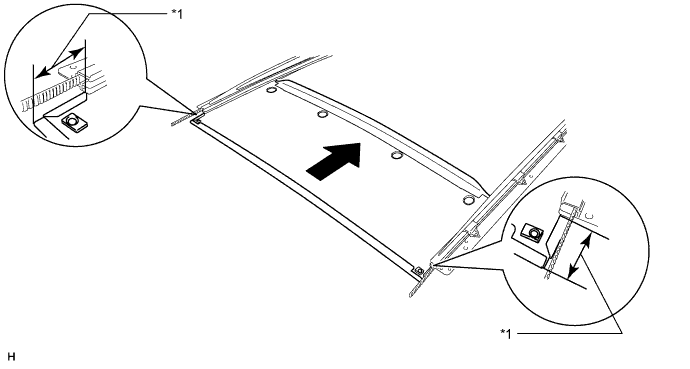
Slide the No. 3 sunshade trim in the direction indicated by the arrow in the illustration to install it.
Table 1. Text in Illustration *1 Approximately 60 mm (2.36 in.) - - Note:Make sure the sunshade trim is protruding approximately 60 mm (2.36 in.) from the housing as shown in the illustration.
-
- Click here
INSTALL NO. 2 SUNSHADE TRIM SUB-ASSEMBLY
-
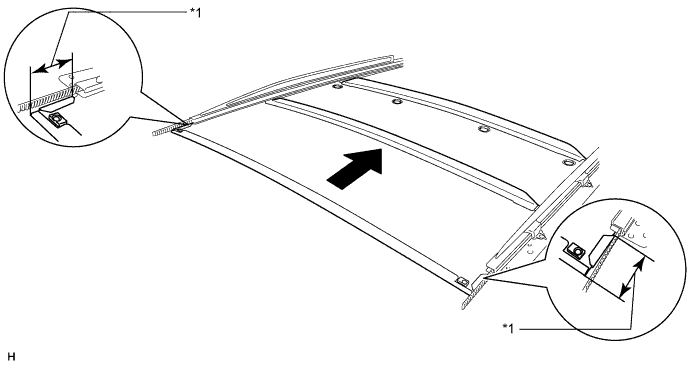
Slide the No. 2 sunshade trim in the direction indicated by the arrow in the illustration to install it.
Table 2. Text in Illustration *1 Approximately 60 mm (2.36 in.) - - Note:Make sure the sunshade trim is protruding approximately 60 mm (2.36 in.) from the housing as shown in the illustration.
-
- Click here
INSTALL NO. 1 SUNSHADE TRIM SUB-ASSEMBLY
-
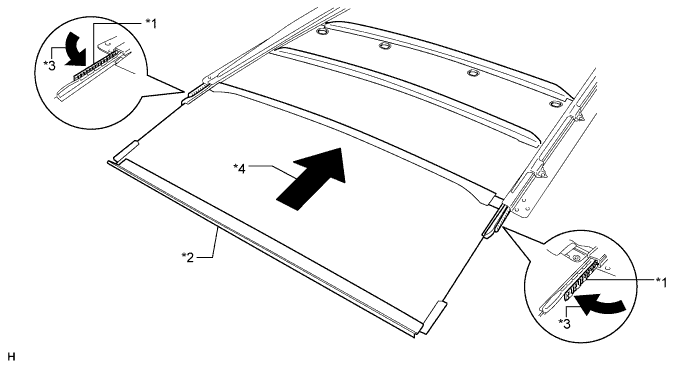
Connect the 2 sliding roof drive cables to the No. 1 sunshade trim.
Note:Do not bend or twist the sliding roof drive cable as it will damage the cable.
Table 3. Text in Illustration *1 Sliding Roof Drive Cable *2 No. 1 sunshade Trim *3 Sliding Roof Drive Cable Connection Direction *4 Sunshade Trim Sliding Direction -
Slide the No. 1 sunshade trim in the direction indicated by the arrow in the illustration to install it.
-
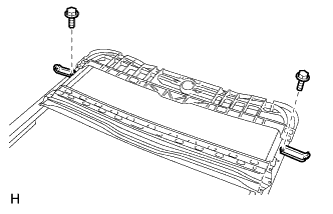
Install the 4 sliding roof guide rail stoppers with the 4 screws.
-
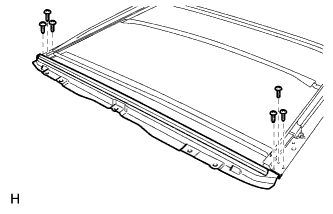
Install the sliding roof housing frame sub-assembly with the 6 screws.
-
- Click here
TEMPORARILY INSTALL NO. 2 SLIDING ROOF HOUSING BRACKET
-
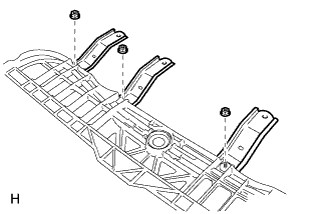
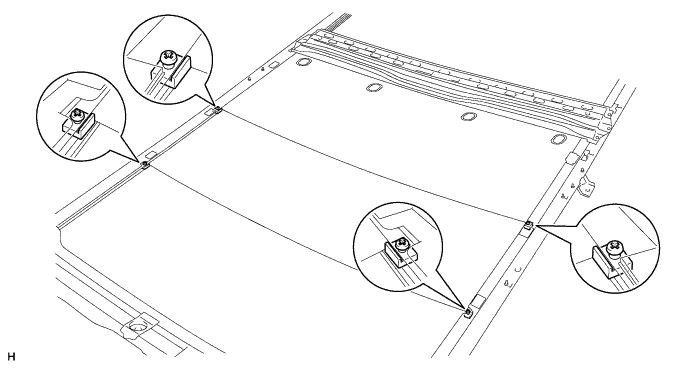
Temporarily install the 3 No. 2 sliding roof housing brackets with the 3 nuts.
-
- Click here
TEMPORARILY INSTALL NO. 1 SLIDING ROOF HOUSING BRACKET
-
Temporarily install the 2 No. 1 sliding roof housing brackets with the 2 bolts.
-
-
Click here
INSTALL SLIDING ROOF DRIVE GEAR SUB-ASSEMBLY
-
Install the drive gear with the 2 bolts.
5.4 N*m 55 kgf*cm 48 in.*lbf
-