POWER OUTLET SOCKET REMOVAL

Tech Tips
-
Use the same procedure for RHD and LHD vehicles.
-
The procedure listed below is for LHD vehicles.
-
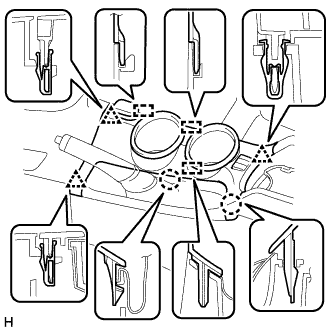
REMOVE UPPER CONSOLE PANEL
-
Detach the 2 claws, 3 clips and 3 guides.
-
Disconnect the connectors and remove the upper console panel.
-
-
REMOVE NO. 1 POWER OUTLET SOCKET COVER
-
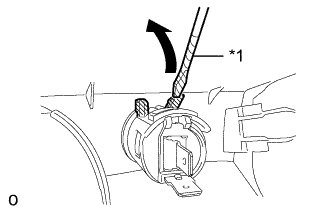
Text in Illustration *1 Protective Tape Using a screwdriver, bend the 2 upper claws in the direction indicated by the arrow in the illustration.
Tech Tips
Tape the screwdriver tip before use.
-
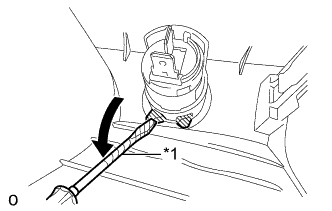
Text in Illustration *1 Protective Tape Using a screwdriver, bend the 2 lower claws in the direction indicated by the arrow in the illustration.
Tech Tips
Tape the screwdriver tip before use.
-
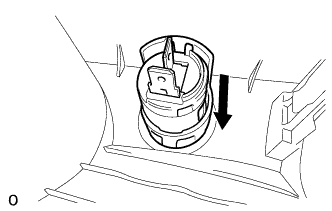
Remove the No. 1 power outlet socket cover and No. 1 power outlet socket assembly from the upper console panel.
-
-
REMOVE NO. 1 POWER OUTLET SOCKET ASSEMBLY
-
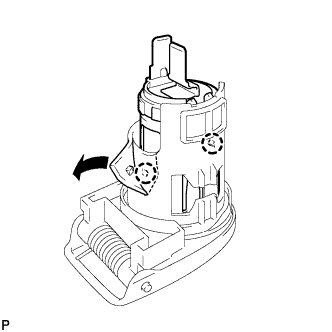
Using side cutters, cut around the 2 claws as shown in the illustration.
Note
Do not scratch the No. 1 power outlet socket assembly.
-
Pull out the No. 1 power outlet socket assembly from the cover side of the No. 1 power outlet socket cover.
-