HEATER ASSEMBLY (w/ Combustion Type Power Heater) REMOVAL

-
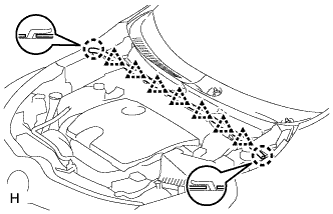
REMOVE NO. 1 ENGINE COVER
-
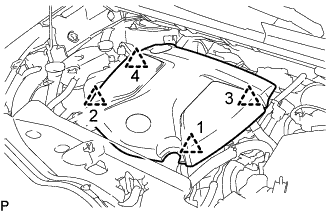
Lift the No. 1 engine cover to detach the 4 clips in the order shown in the illustration and remove the No. 1 engine cover.
Note
Attempting to disengage both front and rear clips at the same time may cause the No. 1 engine cover to break.
-
-
REMOVE FRONT WIPER ARM HEAD CAP
-
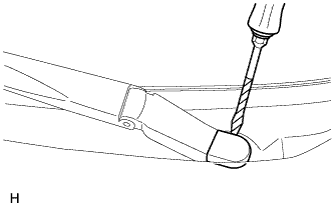
Using a screwdriver, remove the front wiper arm head cap.
Tech Tips
-
Tape the screwdriver tip before use.
-
Use the same procedure for all front wiper arm head caps.
-
-
-
REMOVE FRONT WIPER ARM AND BLADE ASSEMBLY LH
-
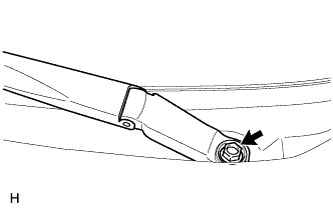
Remove the nut and front wiper arm and blade assembly LH.
-
-
REMOVE FRONT WIPER ARM AND BLADE ASSEMBLY RH
-
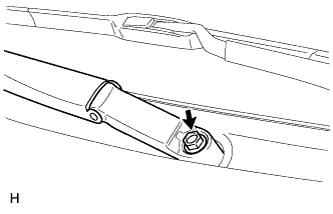
Remove the nut and front wiper arm and blade assembly RH.
-
-
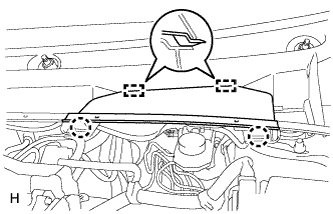
REMOVE HOOD TO COWL TOP SEAL
-
Using a clip remover, detach the 7 clips and 2 claws, and remove the hood to cowl top seal.
-
-
REMOVE COWL TOP VENTILATOR LOUVER LH
-
Detach the 2 claws and 2 guides, and remove the center cowl top ventilator louver.
-
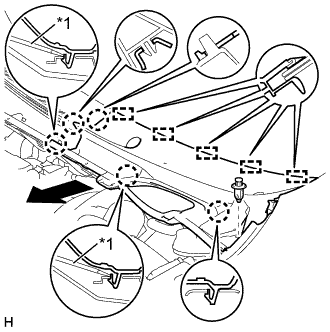
Text in Illustration *1 Screwdriver Remove the clip.
-
Using a screwdriver, detach the 2 claws as shown in the illustration.
-
Detach the 3 claws and 5 guides, and remove the cowl top ventilator louver LH.
-
-
REMOVE COWL TOP VENTILATOR LOUVER RH
-
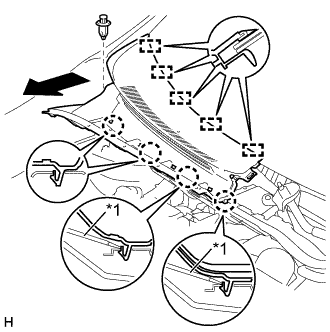
Text in Illustration *1 Screwdriver Remove the clip.
-
Using a screwdriver, detach the 2 claws as shown in the illustration.
-
Detach the 2 claws and 5 guides, and remove the cowl top ventilator louver RH.
-
-
REMOVE WINDSHIELD WIPER MOTOR AND LINK ASSEMBLY
-
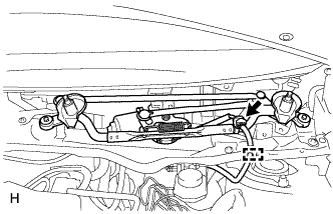
Disconnect the connector. Then detach the clamp and remove the wire harness from the cowl top panel.
-
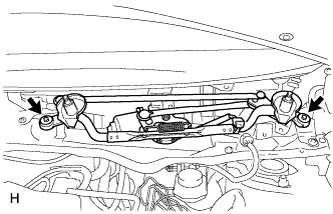
Remove the 2 bolts.
-
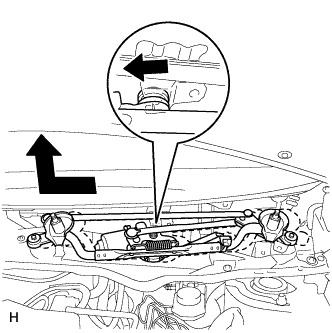
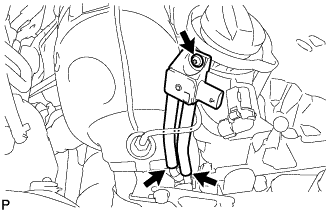
Move the wiper cushion in the direction shown by the arrow in the illustration to detach the wiper cushion from the body and remove the wiper motor and link.
-
-
REMOVE DIFFERENTIAL PRESSURE SENSOR ASSEMBLY (for DPF)
-
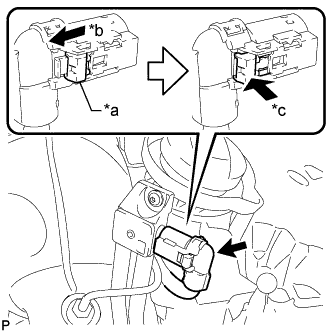
Text in Illustration *a White-colored Lock *b Slide *c Push Slide the white-colored lock of the differential pressure sensor connector as shown in the illustration to release it and disconnect the differential pressure sensor connector.
-
Using a T20 "TORX" socket wrench, remove the screw and differential pressure sensor.
-
Disconnect the 2 No. 1 vacuum transmitting hoses.
-
Remove the 2 No. 1 vacuum transmitting hoses from the differential pressure sensor.
-
-
REMOVE OUTER COWL TOP PANEL
-
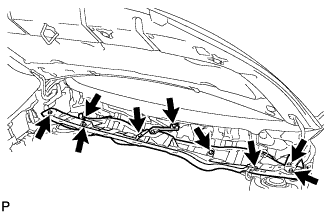
Remove the 9 bolts and outer cowl top panel.
-
-
REMOVE AIR DUCT
-
Remove the clip and air duct.
-
-
REMOVE NO. 1 EXHAUST PIPE SUB-ASSEMBLY
-
Remove the 3 nuts and No. 1 exhaust pipe sub-assembly.
-
-
REMOVE HEATER WITH EXHAUST PIPE ASSEMBLY
-
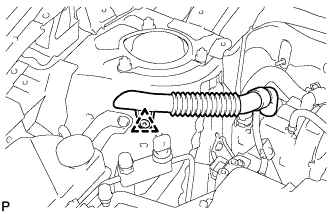
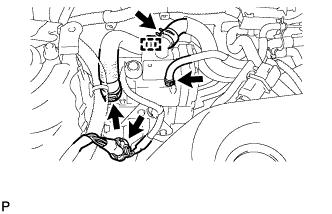
Disconnect the connector.
-
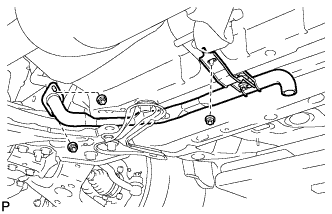
Using pliers, grip the claws of the clips, slide the 3 clips and disconnect the 3 hoses.
-
Detach the clamp.
-
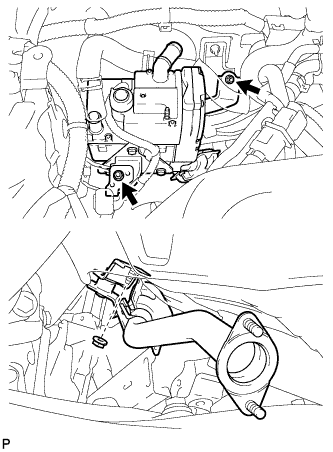
Remove the 3 nuts and heater with exhaust pipe assembly.
-