REAR NO. 2 SEAT INNER BELT ASSEMBLY INSTALLATION

-
INSTALL REAR NO. 2 SEAT INNER BELT SUB-ASSEMBLY
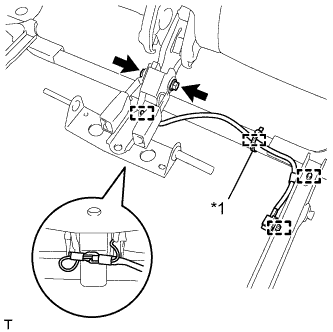
Text in Illustration *1 Cable Tie
-
Install the inner belt sub-assembly with the 2 bolts.
- Torque:
- 42 N*m { 428 kgf*cm, 31 ft.*lbf }
-
Install a new cable tie.
-
Attach the 3 clamps.
-
-
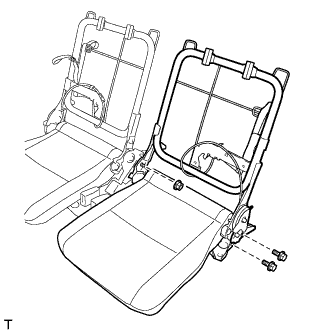
INSTALL REAR NO. 2 SEAT CUSHION ASSEMBLY LH
-
Using a T45 "TORX" socket wrench, install the rear No. 2 seat cushion assembly LH and 2 spacers with the 2 "TORX" bolts to the No. 2 seatback frame assembly LH.
- Torque:
- 14 N*m { 143 kgf*cm, 10 ft.*lbf }
-
When reusing the nut:
-
Clean the threads of the nut with non-residue solvent.
-
Apply adhesive to the threads of the nut.
Adhesive Toyota Genuine Adhesive 1324, Three Bond 1324 or equivalent -
Temporarily install the nut and 2 bolts.
-
-
When using a new nut:
-
Temporarily install a new nut and the 2 bolts.
-
-
Tighten the nut and 2 bolts.
- Torque:
- for Nut
- 20 N*m { 204 kgf*cm, 15 ft.*lbf }
- for Bolt
- 42 N*m { 428 kgf*cm, 31 ft.*lbf }
-
Install the No. 2 seat No. 2 suspension link and spacer.
-
Install the spacer with the bolts.
- Torque:
- 42 N*m { 428 kgf*cm, 31 ft.*lbf }
-
Install a new E-ring.
-
Install the No. 2 seat No. 1 suspension link and spacer.
-
Install the spacer with the bolts.
- Torque:
- 42 N*m { 428 kgf*cm, 31 ft.*lbf }
-
Install a new E-ring.
-
-
INSTALL REAR NO. 2 SEAT CUSHION ASSEMBLY RH
Tech Tips
Use the same procedure described for the LH side.
-
INSTALL REAR NO. 2 SEAT ASSEMBLY
-
Install the rear No. 2 seat assembly Click here.
-