REAR AIRBAG SENSOR (w/o Rear No. 2 Seat) INSTALLATION

Tech Tips
-
Use the same procedure for the RH and LH sides.
-
The procedure listed below is for the LH side.
-
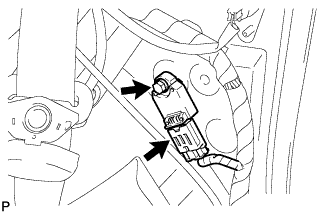
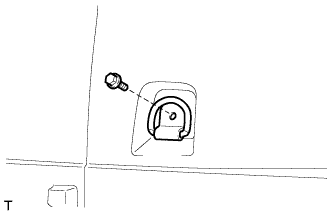
INSTALL REAR AIRBAG SENSOR LH
-
Turn the ignition switch off.
-
Disconnect the cable from the negative (-) battery terminal.
CAUTION:
Wait at least 90 seconds after disconnecting the cable from the negative (-) battery terminal to disable the SRS system.
Note
-
w/ Navigation System for HDD:
After the ignition switch is turned off, the HDD navigation system requires approximately a minute to record various types of memory and settings. As a result, after turning the ignition switch off, wait a minute or more before disconnecting the cable from the negative (-) battery terminal.
-
When disconnecting the cable, some systems need to be initialized after the cable is reconnected Click here.
-
-
Install the rear airbag sensor with the bolt.
- Torque:
- 9.0 N*m { 92 kgf*cm, 80 in.*lbf }
Note
-
If the rear airbag sensor has been dropped, or there are any cracks, dents or other defects in the case, bracket or connector, replace it with a new one.
-
When installing the rear airbag sensor, be careful that the SRS wiring does not interfere with other parts and that it is not pinched between other parts.
-
Check that the rear airbag sensor is not loose.
-
Connect the connector.
-
-
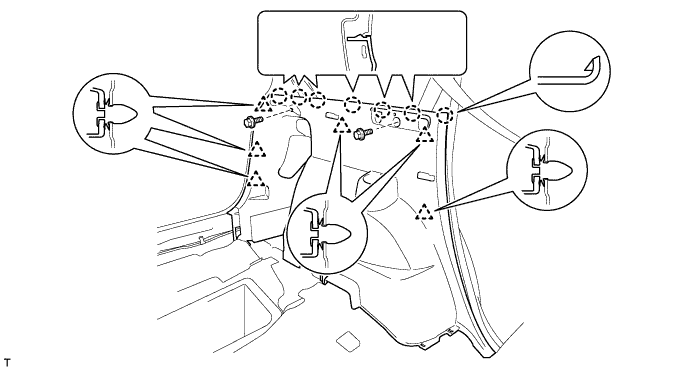
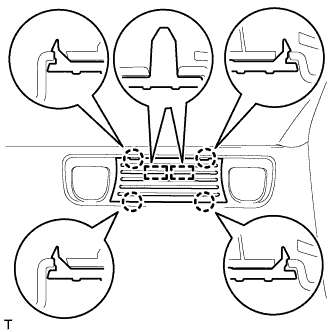
INSTALL DECK TRIM SIDE PANEL ASSEMBLY LH
-
Connect the connector.
-
Attach the 6 clips and 7 claws to install the deck trim side panel.
-
Install the 2 bolts.
-
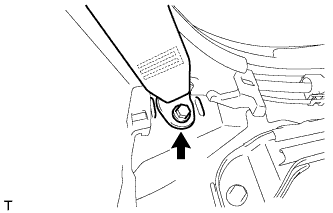
w/ Rear No. 1 Seat:
Install the rear No. 1 seat belt anchor with the bolt.
- Torque:
- 42 N*m { 428 kgf*cm, 31 ft.*lbf }
-
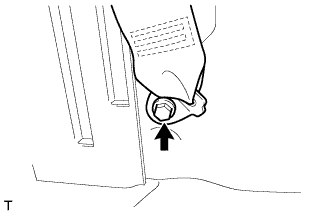
w/ Rear No. 2 Seat:
Install the rear No. 2 seat belt anchor with the bolt.
- Torque:
- 42 N*m { 428 kgf*cm, 31 ft.*lbf }
-
-
INSTALL LUGGAGE HOLD BELT STRIKER ASSEMBLY
Tech Tips
Use the same procedure for all the luggage hold belt strikers.
-
Install the luggage hold belt striker with the bolt.
-
-
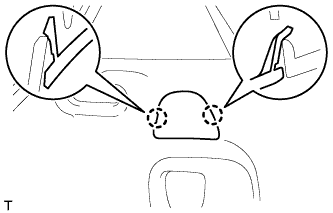
INSTALL DECK TRIM SIDE SERVICE HOLE COVER
Tech Tips
Use the same procedure to install the deck trim side service hole cover on the other side.
-
Attach the 4 claws and 2 guides to install the deck trim side service hole cover.
-
-
INSTALL FRONT DECK SIDE TRIM COVER LH
-
Attach the 2 claws to install the front deck side trim cover.
-
-
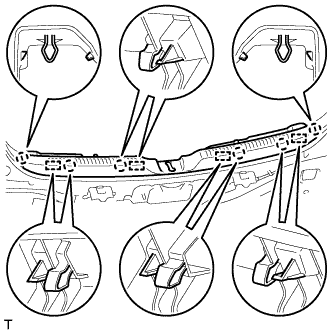
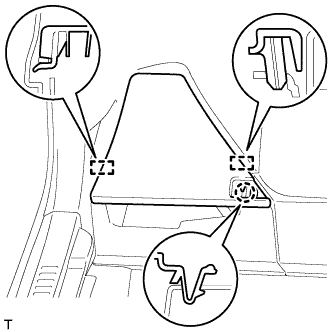
INSTALL REAR DOOR OPENING TRIM WEATHERSTRIP LH
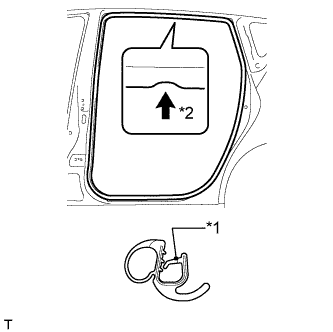
Text in Illustration *1 Paint Mark *2 Mark Position
-
Align the paint mark on the rear door opening trim weatherstrip with the mark position on the vehicle and install the weatherstrip as shown in the illustration.
-
-
INSTALL REAR DOOR SCUFF PLATE LH

-
Attach the 9 claws and 2 clips to install the rear door scuff plate.
-
-
INSTALL REAR DECK TRIM COVER
-
Attach the 6 claws and 4 guides to install the rear deck trim cover.
-
-
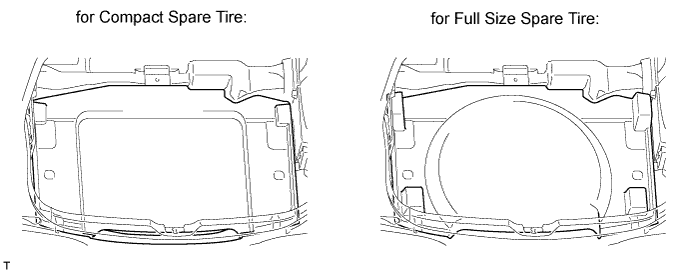
INSTALL REAR DECK FLOOR BOX (w/ Spare Tire)
-
Install the rear deck floor box.
-
-
INSTALL DECK FLOOR BOX LH

-
w/o Rear No. 2 Seat:
-
Attach the 4 claws to install the deck floor box.
-
-
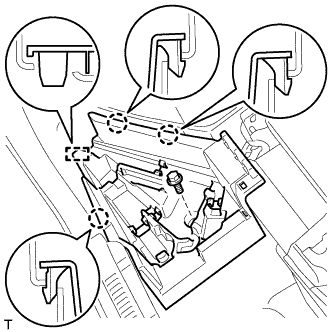
w/ Rear No. 2 Seat:
-
Attach the 3 claws and guide to install the deck floor box.
-
Install the bolt.
-
-
-
INSTALL DECK FLOOR BOX RH

-
w/o Rear No. 2 Seat:
-
Attach the 2 claws and guide to install the deck floor box.
-
-
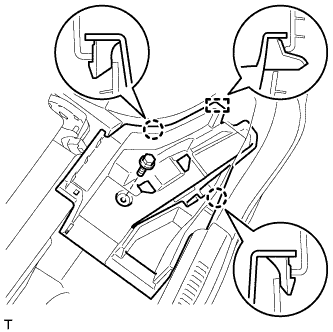
w/ Rear No. 2 Seat:
-
Attach the 2 claws and guide to install the deck floor box.
-
Install the bolt.
-
-
-
INSTALL LOWER DECK TRIM SIDE BOARD LH
-
Attach the claw and 2 guides to install the lower deck trim side board.
-
-
INSTALL LOWER DECK TRIM SIDE BOARD RH
Tech Tips
Use the same procedure described for the LH side.
-
INSTALL FRONT DECK FLOOR BOX
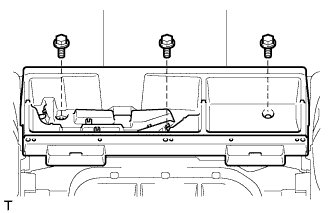
-
Install the front deck floor box with the 3 bolts.
-
-
INSTALL NO. 2 DECK BOARD
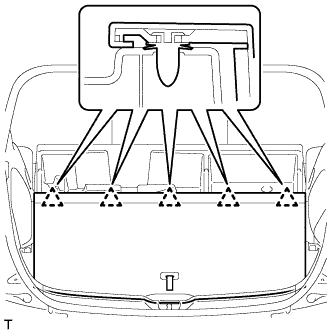
-
Attach the 5 clips to install the No. 2 deck board.
-
-
INSTALL NO. 1 DECK BOARD
-
Install the No. 1 deck board.
-
-
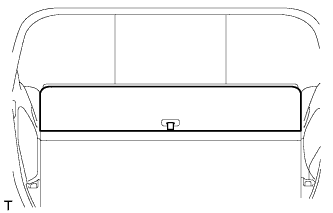
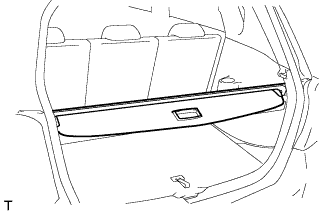
INSTALL TONNEAU COVER ASSEMBLY (w/ Tonneau Cover)
-
Install the tonneau cover.
-
-
CONNECT CABLE TO NEGATIVE BATTERY TERMINAL
CAUTION:
When disconnecting the cable, some systems need to be initialized after the cable is reconnected Click here.
-
INSTALL BATTERY SERVICE HOLE COVER
-
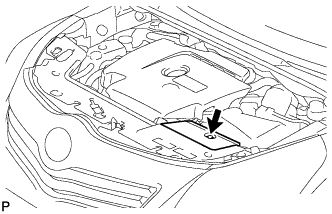
Install the battery service hole cover with the clip.
-
-
CHECK SRS WARNING LIGHT
-
Check the SRS warning light Click here.
-