LIGHT CONTROL RHEOSTAT INSTALLATION

Tech Tips
-
Use the same procedure for RHD and LHD vehicles.
-
The procedure listed below is for LHD vehicles.
-
INSTALL LIGHT CONTROL RHEOSTAT
-
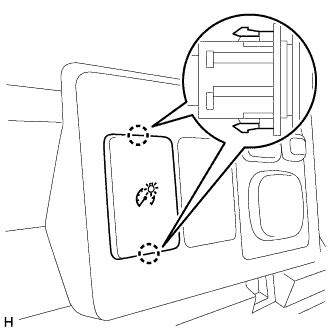
Attach the 2 claws to install the light control rheostat to the fuse box opening cover.
-
-
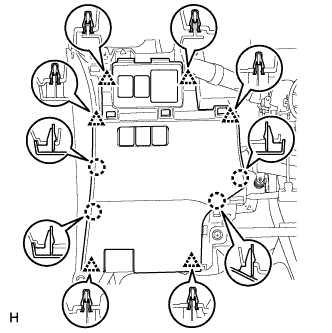
INSTALL FUSE BOX OPENING COVER
-
for LHD:
-
Connect the connectors.
-
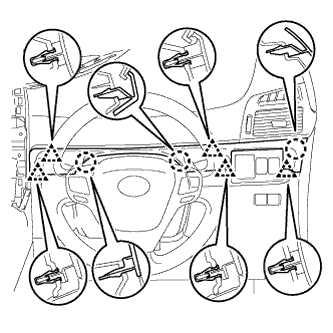
Attach the 6 clips and 4 claws to install the fuse box opening cover.
-
-
for RHD:
-
Connect the connectors.
-
Attach the 5 clips and 4 claws to install the fuse box opening cover.
-
-
-
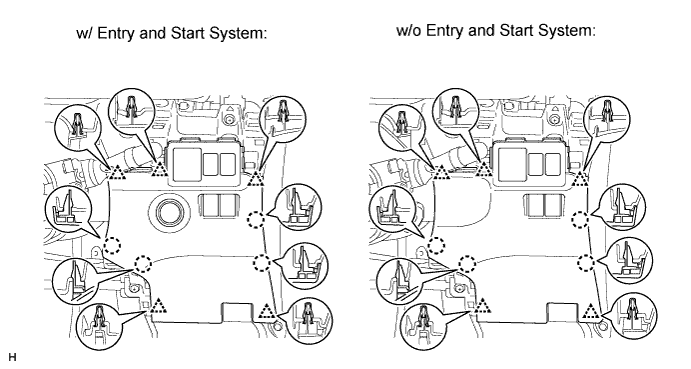
INSTALL NO. 2 SWITCH HOLE BASE
-
for LHD:
Attach the 5 claws and 5 clips to install the No. 2 switch hole base.
-
for RHD:
Attach the 3 claws and 5 clips to install the No. 2 switch hole base.
-
-
INSTALL COWL SIDE TRIM BOARD LH
-
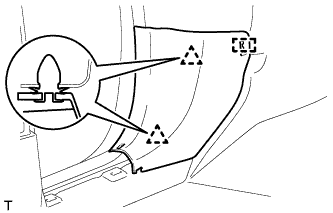
Attach the 2 clips and guide to install the cowl side trim board.
-
-
INSTALL FRONT DOOR SCUFF PLATE LH
-
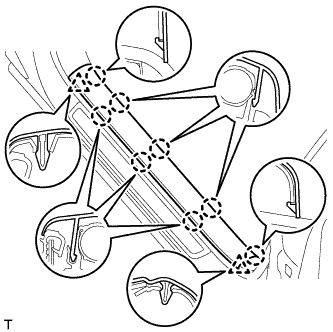
Attach the 8 claws and 2 clips to install the front door scuff plate.
-