- Click here
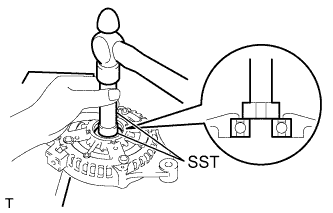
REMOVE GENERATOR PULLEY CAP
-
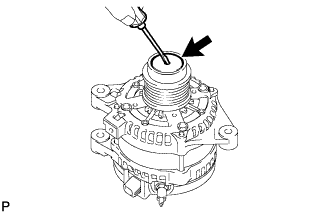
Using a screwdriver, puncture the center of the generator pulley cap and pry it off.
Note:Do not reuse the generator pulley cap.
-
- Click here
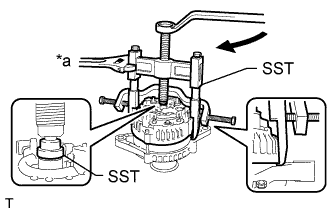
REMOVE GENERATOR PULLEY WITH CLUTCH
-
Mount the generator in a vise between aluminum plates.
-
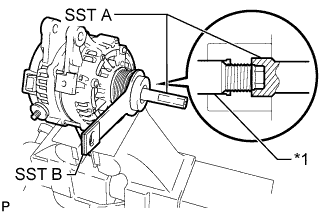
Install SST A and B to the generator pulley as shown in the illustration.
09820-63021 Table 1. Text in Illustration *1 Rotor Shaft Note:Securely attach SST to the generator pulley with clutch and rotor shaft.
-
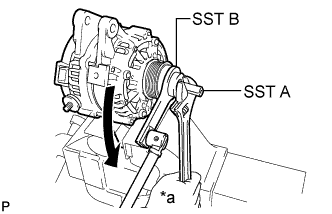
Using a wrench to hold SST A, turn SST B counterclockwise to loosen the generator pulley with clutch.
Table 2. Text in Illustration *a Hold 
Turn Note:Be careful as the generator pulley with clutch or rotor shaft may be damaged if the position of SST is not securely maintained while performing this operation.
-
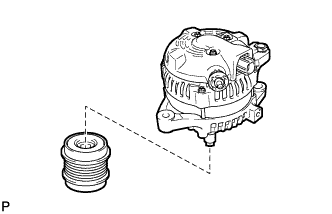
Remove SST from the generator.
-
Remove the generator pulley with clutch from the rotor shaft.
-
- Click here
REMOVE GENERATOR REAR END COVER
-
Place the generator on the generator pulley with clutch.
-

Remove the 3 bolts and generator rear end cover.
-
- Click here
REMOVE TERMINAL INSULATOR
-
Remove the terminal insulator from the generator coil.
-
- Click here
REMOVE GENERATOR BRUSH HOLDER ASSEMBLY
-
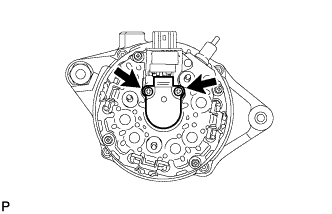
Remove the 2 screws and generator brush holder from the generator coil.
-
- Click here
REMOVE GENERATOR COIL ASSEMBLY
-
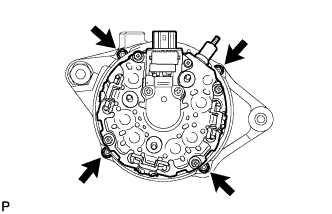
Remove the 4 bolts.
-
Using SST, remove the generator coil.
09950-40011 09951-04020 09952-04010 09953-04020 09954-04010 09955-04071 09957-04010 09958-04011 Table 3. Text in Illustration *a Hold Turn
-
- Click here
REMOVE GENERATOR ROTOR ASSEMBLY
-
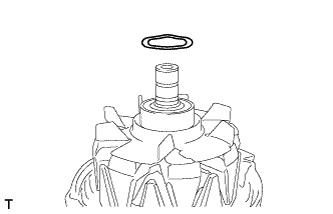
Remove the washer.
-

Remove the generator rotor.
-
- Click here
INSPECT GENERATOR DRIVE END FRAME BEARING
-
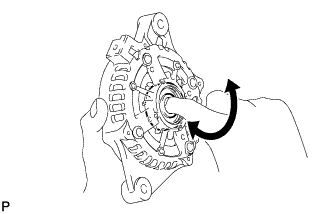
Check that the bearing is not rough or worn and that it rotates smoothly.
If necessary, replace the generator drive end frame bearing.
-
- Click here
REMOVE GENERATOR DRIVE END FRAME BEARING
-
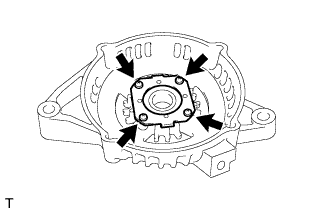
Remove the 4 screws and retainer plate from the generator drive end frame.
-
Using SST and a hammer, tap out the generator drive end frame bearing from the generator drive end frame.
09950-60010 09951-00250 09950-70010 09951-07100
-