ULTRASONIC SENSOR (for Rear) INSTALLATION

-
INSTALL ULTRASONIC SENSOR RETAINER
Tech Tips
-
Align the slit of the ultrasonic sensor retainer with the protrusion of the rear bumper cover and install the ultrasonic sensor retainer.
-
Pay attention to the protrusions of the rear bumper cover as the orientation of the retainer changes depending on the installation position.
-
Use the same procedure for both ultrasonic sensor retainers.
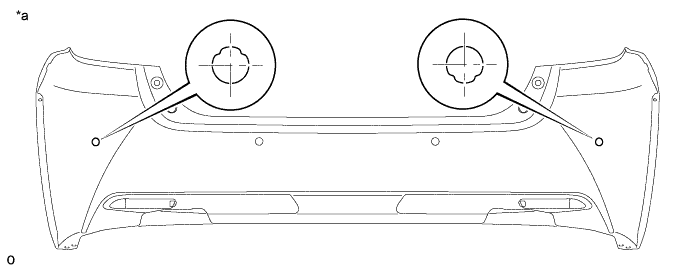
Text in Illustration *a Rear View of Rear Bumper - -
-
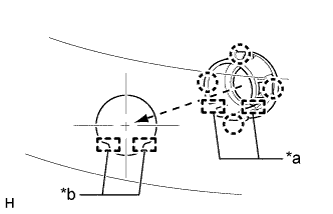
Text in Illustration *a Slit *b Protrusion Attach the 4 claws to install the ultrasonic sensor retainer to the rear bumper cover.
Note
Do not damage the bumper cover with the protrusion when installing the retainer.
-
-
INSTALL ULTRASONIC SENSOR CLIP
Tech Tips
Use the same procedure for both ultrasonic sensor clips.
-
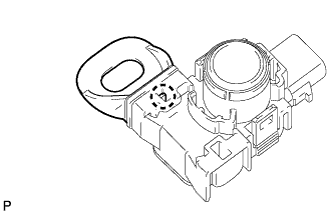
Attach the claw to install the ultrasonic sensor clip.
-
-
INSTALL NO. 1 ULTRASONIC SENSOR
Tech Tips
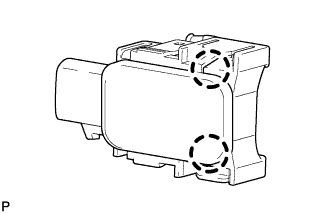
Use the same procedure for all ultrasonic sensors.
-
Attach the 2 claws to install the ultrasonic sensor.
-
-
INSTALL NO. 4 FLOOR WIRE
-
When using a new rear bumper cover:
Clean the rear bumper cover surface.
-
When reusing the rear bumper cover:
Wipe off any tape adhesive residue with cleaner.
-
Attach the 2 clamps to install the No. 4 floor wire.
-
Connect the 4 connectors.
-
Install 3 new pieces of tape as shown in the illustration.
Tech Tips
Align the tape with the mark-off line of the rear bumper.
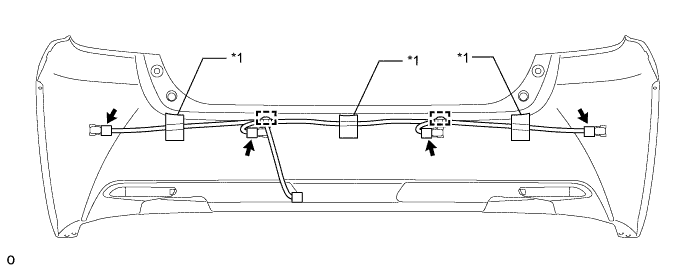
Text in Illustration *1 Tape - -
-
-
INSTALL REAR BUMPER COVER
-
w/ TOYOTA Parking Assist-sensor System:
Connect the No. 4 floor wire connector.
-
Attach the 10 claws to install the rear bumper cover.
-
Install the 5 clips and 2 bolts.
-
Install the screw.
Tech Tips
Use the same procedure for the RH and LH sides.
-
-
INSTALL NO. 1 FLOOR UNDER COVER
-
Install the No. 1 floor under cover with the 5 clips.
-