- Click here
INSTALL NO. 1 ULTRASONIC SENSOR RETAINER
Tip: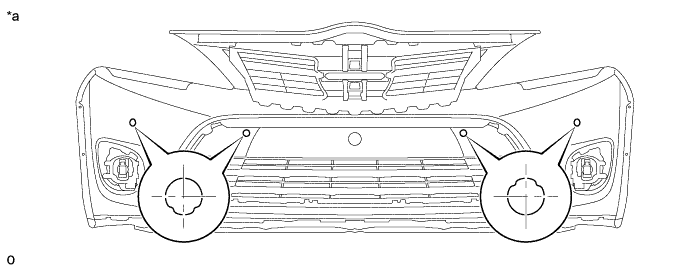
-
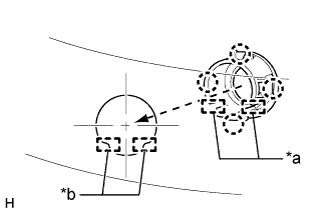
Align the slit of the No. 1 ultrasonic sensor retainer with the protrusion of the front bumper cover and install the No. 1 ultrasonic sensor retainer.
-
Pay attention to the protrusions of the front bumper cover as the orientation of the retainer changes depending on the installation position.
-
Use the same procedure for all No. 1 ultrasonic sensor retainers.
Table 1. Text in Illustration *a Rear View of Front Bumper - -
-
Attach the 4 claws to install the No. 1 ultrasonic sensor retainer to the front bumper cover.
Note:Do not damage the bumper cover with the protrusion when installing the retainer.
Table 2. Text in Illustration *a Slit *b Protrusion
-
- Click here
INSTALL NO. 1 ULTRASONIC SENSOR
Tip:Use the same procedure for all No. 1 ultrasonic sensors.
-
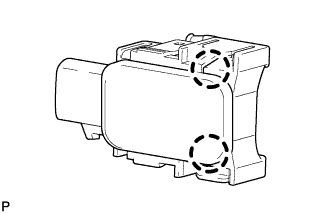
Attach the 2 claws to install the No. 1 ultrasonic sensor.
-
- Click here
INSTALL NO. 4 ENGINE ROOM WIRE
-
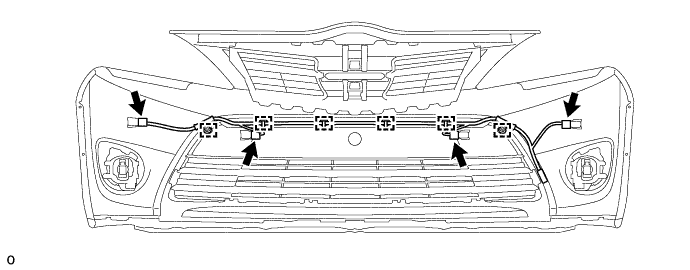
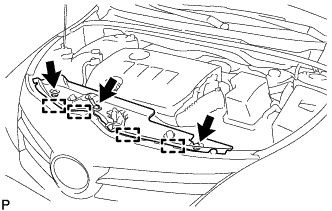
Attach the 6 clamps to install the No. 4 engine room wire.
-
Connect the 4 connectors.
-
- Click here
INSTALL FRONT BUMPER COVER
-
Install the front bumper cover.
-
w/ Headlight Cleaner System:
Connect the headlight cleaner hose.
-
Connect the 2 fog light connectors.
-
w/ TOYOTA Parking Assist-sensor System:
Connect the No. 4 engine room wire connector.
-
Attach the 6 claws to install the front bumper cover.
-
-
Install the bolt and 2 clips.
-
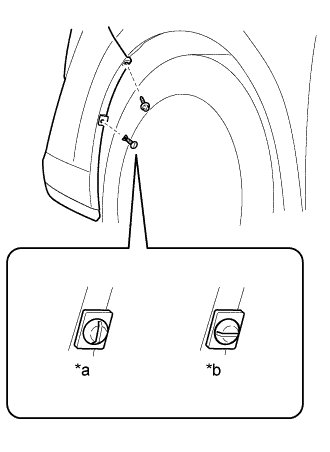
Install the pin hold clip.
Note:Insert the pin hold clip with the slot aligned vertically. Do not rotate the clip after inserting it. After installation, confirm that the slot is vertical.
Tip:Use the same procedure for the RH and LH sides.
Table 3. Text in Illustration *a CORRECT *b INCORRECT -
Install the screw.
Tip:Use the same procedure for the RH and LH sides.
-
- Click here
INSTALL RADIATOR GRILLE PROTECTOR
-
Install the 2 radiator grille protectors.
-
- Click here
INSTALL RADIATOR SUPPORT OPENING COVER
-
Attach the 4 hooks to install the radiator support opening cover.
-
Install the 3 clips.
-
- Click here
ADJUST FOG LIGHT ASSEMBLY