REAR WIPER MOTOR INSTALLATION

-
INSTALL REAR WIPER MOTOR GROMMET
-
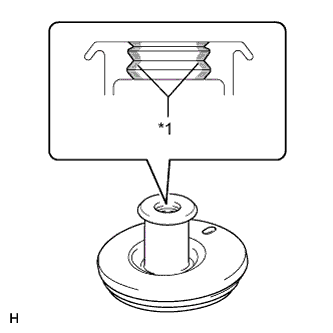
Text in Illustration *1 MP grease Apply MP grease to the entire inner surface of the wiper motor grommet.
Tech Tips
Make sure that the hole does not get clogged with grease and the grooves in the grommet are filled with grease.
-
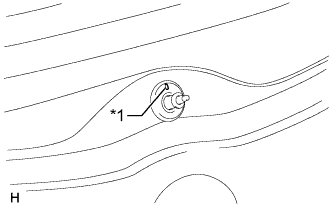
Text in Illustration *1 Position Mark Install the rear wiper motor grommet with the position mark facing upward as shown in the illustration.
-
-
INSTALL REAR WIPER MOTOR AND BRACKET ASSEMBLY
-
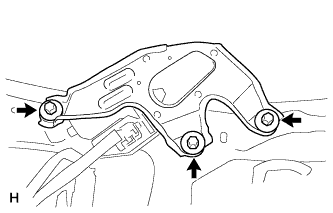
Temporarily install the rear wiper motor and bracket assembly with the 3 bolts.
-
Tighten the 3 bolts.
- Torque:
- 5.5 N*m { 56 kgf*cm, 49 in.*lbf }
-
Connect the connector.
-
-
CONNECT CABLE TO NEGATIVE BATTERY TERMINAL
Note
When disconnecting the cable, some systems need to be initialized after the cable is reconnected Click here.
-
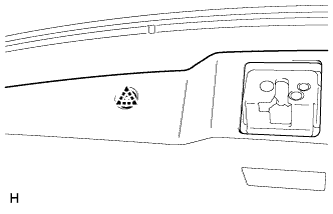
INSTALL BATTERY SERVICE HOLE COVER
-
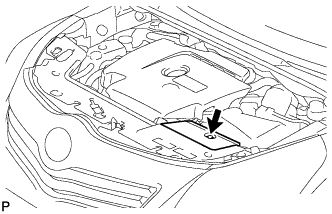
Install the battery service hole cover with the clip.
-
-
INSTALL REAR WIPER ARM
-
Operate the rear wiper, and stop the rear wiper motor at the automatic stop position.
-
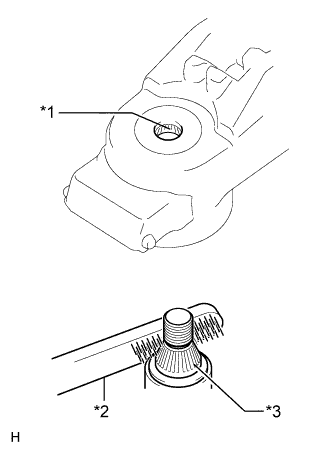
Text in Illustration *1 Wiper Arm Pivot Serrations *2 Wire Brush *3 Wiper Pivot Serrations Clean the serrations with a wire brush.
-
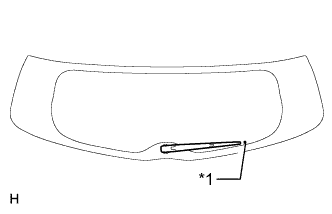
Text in Illustration *1 Mark for Blade Position Align the blade tip with the mark on the glass, as shown in the illustration.
-
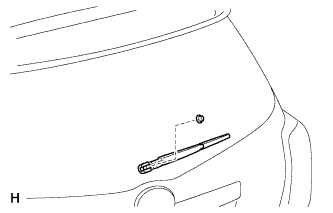
Install the rear wiper arm with the nut.
- Torque:
- 5.5 N*m { 56 kgf*cm, 49 in.*lbf }
-
Close the wiper arm head cap.
-
-
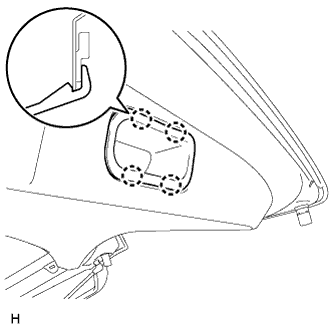
INSTALL BACK DOOR TRIM PANEL ASSEMBLY
-
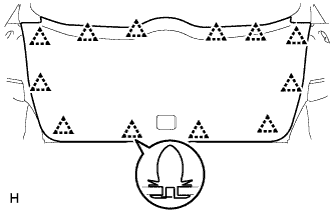
Attach the 12 clips to install the back door trim.
-
Attach the clip.
-
-
INSTALL BACK DOOR INSIDE HANDLE
-
Attach the 4 claws to install the door inside handle.
-
-
INSTALL BACK DOOR SIDE GARNISH LH
-
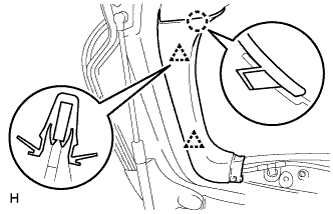
Attach the 2 clips and claw to install the back door side garnish.
-
-
INSTALL BACK DOOR SIDE GARNISH RH
-
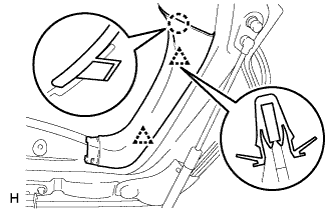
Attach the 2 clips and claw to install the back door side garnish.
-
-
INSTALL CENTER BACK DOOR GARNISH
-

Attach the 4 claws and 4 clips to install the center back door garnish.
-