OIL COOLER REMOVAL

-
REMOVE RADIATOR SUPPORT OPENING COVER
-
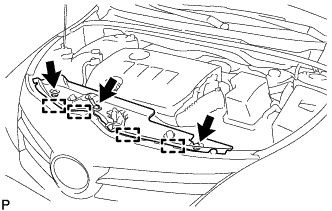
Remove the 3 clips.
-
Detach the 4 hooks and remove the radiator support opening cover.
-
-
DISCONNECT CABLE FROM NEGATIVE BATTERY TERMINAL
Note
-
w/ Navigation System for HDD:
After the ignition switch is turned off, the HDD navigation system requires approximately a minute to record various types of memory and settings. As a result, after turning the ignition switch off, wait a minute or more before disconnecting the cable from the negative (-) battery terminal.
-
When disconnecting the cable, some systems need to be initialized after the cable is reconnected Click here.
-
-
REMOVE BATTERY CLAMP SUB-ASSEMBLY
-
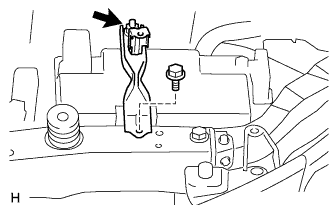
Disconnect the cable from the positive (+) battery terminal.
-
Remove the bolt and loosen the nut.
-
Remove the battery clamp.
-
-
REMOVE BATTERY
-
REMOVE BATTERY TRAY
-
DISCONNECT RADIATOR PIPE
-
Remove the 2 bolts and disconnect the radiator pipe from the battery carrier.
-
-
REMOVE BATTERY CARRIER
-
Disconnect the 2 wire harness clamps from the battery carrier.
-
Remove the 2 bolts and disconnect the radiator pipe from the battery carrier.
-
Remove the 4 bolts and battery carrier.
-
-
REMOVE NO. 1 ENGINE UNDER COVER
-
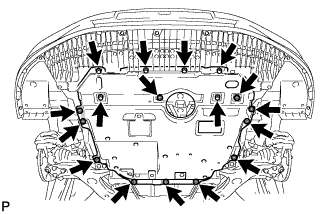
Remove the 11 clips, 6 bolts and under cover.
-
-
REMOVE REAR ENGINE UNDER COVER LH
-
Remove the 5 clips and under cover.
-
-
DRAIN CONTINUOUSLY VARIABLE TRANSAXLE FLUID
-
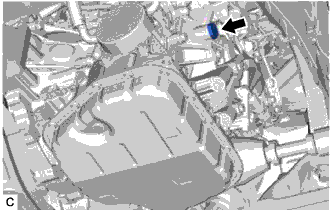
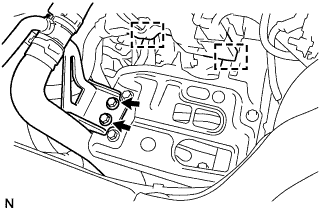
Remove the refill plug and gasket from the continuously variable transaxle assembly.
-
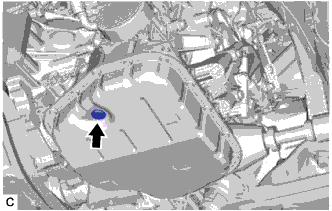
Using a 6 mm hexagon socket wrench, remove the overflow plug and gasket from the continuously variable transaxle assembly.
-
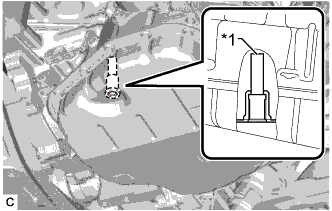
Text in Illustration *1 No. 1 Transmission Oil Filler Tube Using a 6 mm hexagon socket wrench, remove the No. 1 transmission oil filler tube from the transaxle oil (CVT) pan sub-assembly.
Tech Tips
Removing the No. 1 transmission oil filler tube will drain all oil in the transaxle oil (CVT) pan sub-assembly.
-
Using a 6 mm hexagon socket wrench, install the No. 1 transmission oil filler tube to the transaxle oil (CVT) pan sub-assembly.
- Torque:
- 1.7 N*m { 17 kgf*cm, 15 in.*lbf }
-
Using a 6 mm hexagon socket wrench, temporarily install the overflow plug and gasket to the continuously variable transaxle assembly.
Tech Tips
Reuse the old gasket as the overflow plug will be removed again to adjust the fluid level.
-
Temporarily install the gasket and refill plug to the continuously variable transaxle assembly.
Tech Tips
Reuse the old gasket as the refill plug will be removed again to adjust the fluid level.
-
-
DRAIN ENGINE COOLANT
-
Loosen the radiator drain cock plug.
Tech Tips
Collect the coolant in a container and dispose of it according to the regulations in your area.
-
Remove the radiator reservoir cap.
CAUTION:
Do not remove the radiator reservoir cap while the engine and radiator are still hot.
Pressurized, hot engine coolant and steam may be released and cause serious burns.
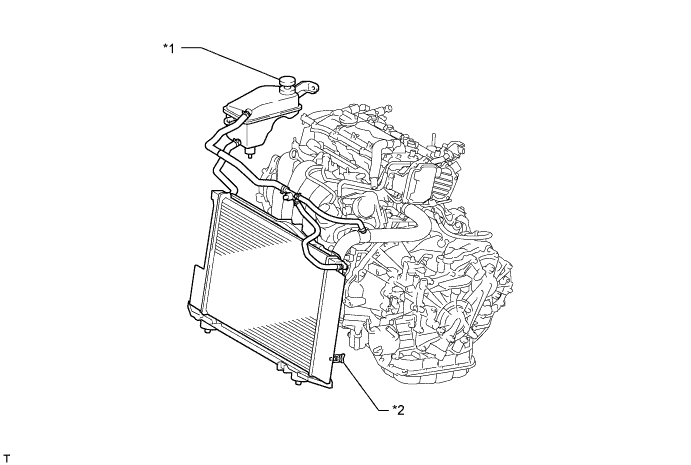
Text in Illustration *1 Radiator Reservoir Cap *2 Radiator Drain Cock Plug
-
-
DISCONNECT WATER BY-PASS HOSE
-
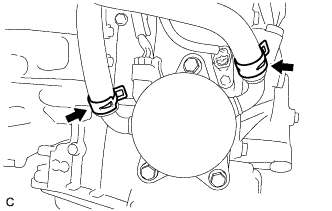
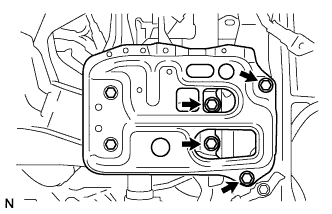
Slide the 2 clips and disconnect the water by-pass hose from the transmission oil cooler.
-
-
REMOVE TRANSMISSION OIL COOLER
-
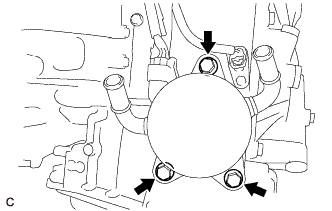
Remove the 3 bolts and transmission oil cooler from the continuously variable transaxle assembly.
-
Remove the 2 O-rings from the transmission oil cooler.
-