PARK / NEUTRAL POSITION SWITCH REMOVAL

-
DISCONNECT CABLE FROM NEGATIVE BATTERY TERMINAL
Note
When disconnecting the cable, some systems need to be initialized after the cable is reconnected Click here.
-
REMOVE NO. 2 CYLINDER HEAD COVER
-
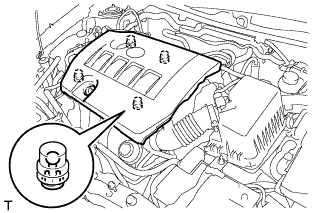
Hold the rear of the cover and raise it to detach the 2 clips on the rear of the cover. Continue to raise the cover to detach the 2 clips on the front of the cover and remove the cover.
Note
Attempting to detach both front and rear clips at the same time may cause the cover to break.
-
-
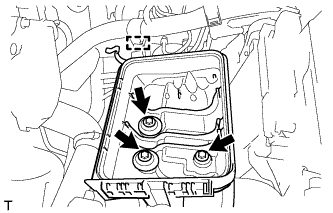
REMOVE AIR CLEANER CAP SUB-ASSEMBLY
-
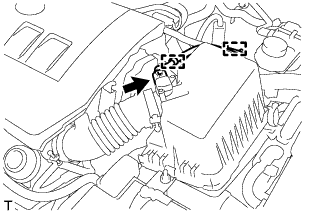
Disconnect the mass air flow meter connector.
-
Detach the 2 clamps and disconnect the wire harness.
-
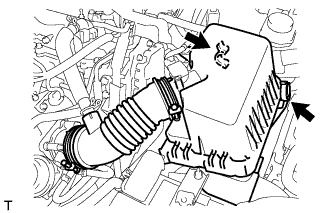
Disconnect the 2 clamps.
-
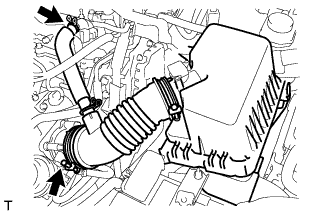
Disconnect the PCV hose.
-
Loosen the band and remove the air cleaner cap.
-
-
REMOVE AIR CLEANER FILTER ELEMENT SUB-ASSEMBLY
-
REMOVE AIR CLEANER CASE SUB-ASSEMBLY
-
Detach the wire harness clamp from the air cleaner case.
-
Remove the 3 bolts and air cleaner case.
-
-
REMOVE BATTERY CLAMP SUB-ASSEMBLY
-
Disconnect the cable from the positive (+) battery terminal.
-
Remove the bolt and loosen the nut.
-
Remove the battery clamp.
-
-
REMOVE BATTERY
-
REMOVE BATTERY TRAY
-
DISCONNECT RADIATOR PIPE
-
Remove the 2 bolts and disconnect the radiator pipe from the battery carrier.
-
-
REMOVE BATTERY CARRIER
-
Disconnect the 2 wire harness clamps from the battery carrier.
-
Remove the 2 bolts and disconnect the radiator pipe from the battery carrier.
-
Remove the 4 bolts and battery carrier.
-
-
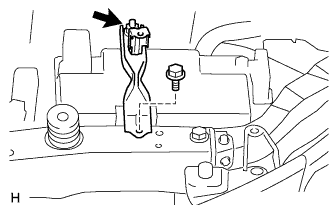
DISCONNECT TRANSMISSION CONTROL CABLE ASSEMBLY
-
Move the shift lever to N.
-
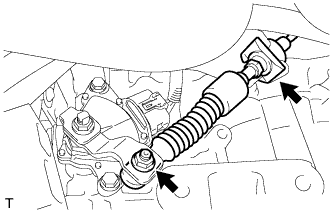
Remove the nut and disconnect the transmission control cable assembly from the control shaft lever.
-
Remove the clip and separate the transmission control cable assembly from the No. 1 transmission control cable bracket.
-
-
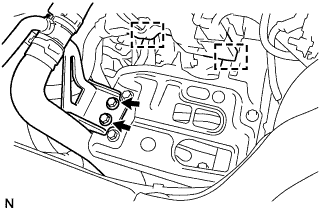
REMOVE PARK/NEUTRAL POSITION SWITCH ASSEMBLY
-
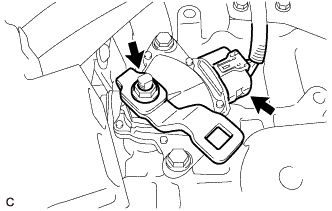
Remove the nut, washer and control shaft lever from the park/neutral position switch assembly.
-
Disconnect the park/neutral position switch assembly connector.
-
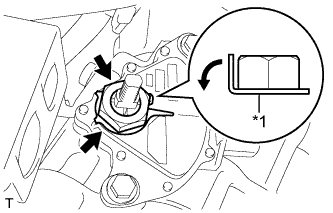
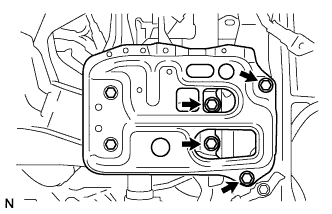
Text in Illustration *1 Lock Plate Using a screwdriver, pry out the lock plate and remove the lock nut and lock plate from the park/ neutral position switch assembly.
-
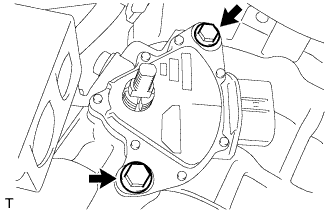
Remove the 2 bolts and park/neutral position switch assembly from the continuously variable transaxle assembly.
-