REAR CRANKSHAFT OIL SEAL REMOVAL

-
REMOVE MANUAL TRANSAXLE ASSEMBLY
-
REMOVE CLUTCH COVER ASSEMBLY
-

Text in Illustration *a Matchmark Place matchmarks on the clutch cover and flywheel.
-
Loosen each set bolt 180° at a time until the spring tension is released.
Note
Be sure to uniformly loosen the bolts 180° at a time according to the order in the illustration.
-
Remove the set bolts and pull off the clutch cover to remove it.
Note
Do not drop the clutch disc.
-
-
REMOVE CLUTCH DISC ASSEMBLY
Note
Keep the lining part of the clutch disc, the pressure plate, and the surface of the flywheel away from oil and foreign matter.
-
REMOVE FLYWHEEL WITH DAMPER ASSEMBLY
-
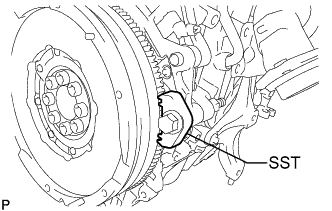
Using SST, fix the flywheel with damper assembly.
SST PZ4TB-04939-38 -
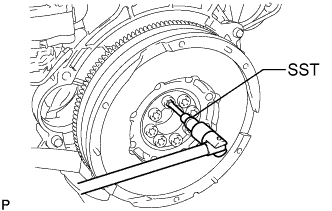
Using SST, remove the 8 bolts and flywheel with damper assembly.
SST PZ4TB-04910-18 -
Remove SST.
-
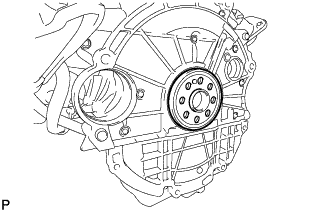
Remove the crankshaft position sensor plate from the crankshaft.
-
-
REMOVE REAR ENGINE OIL SEAL
-
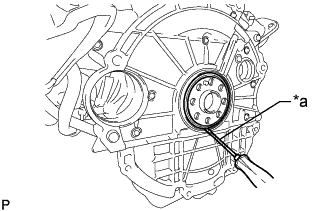
Text in Illustration *a Protective Tape Using a screw driver, pry out the rear engine oil seal.
Note
Do not damage the rear engine oil seal press fit hole, crankshaft or the surface of the timing chain cover plate.
Tech Tips
Tape the screw driver tip before use.
-