FRONT CONSOLE BOX REASSEMBLY

-
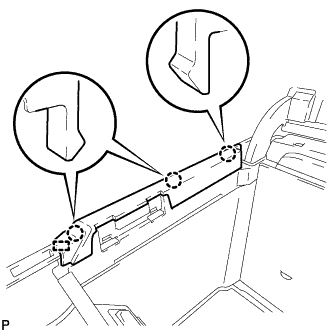
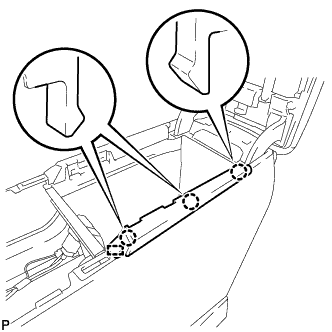
INSTALL REAR CONSOLE BOX WIRE
-
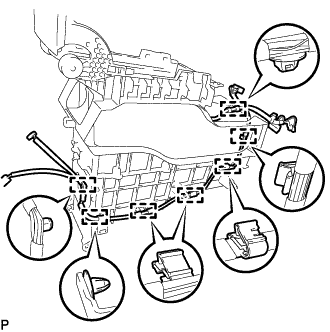
Engage the 7 clamps and install the rear console box wire.
-
-
INSTALL NO. 1 POWER OUTLET SOCKET COVER
-
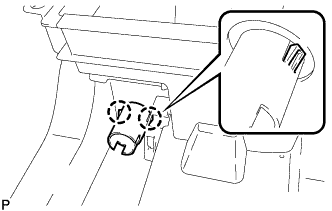
Engage the 2 claws to install the No. 1 power outlet socket cover.
-
-
INSTALL NO. 1 POWER POINT SOCKET ASSEMBLY
-
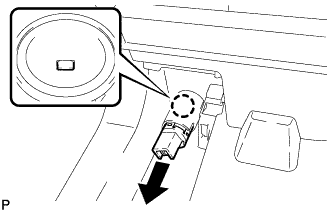
Engage the claw to install the No. 1 power outlet socket assembly as shown in the illustration.
-
Connect the connector.
-
-
INSTALL CONSOLE BOX ILLUMINATION LIGHT ASSEMBLY
-
Connect the connector.
-
Engage the 2 claws to install the console box illumination light assembly.
-
-
INSTALL NO. 3 BOX UPPER PLATE
-
Engage the 2 guide and 2 claws, and install the No. 3 box upper plate as shown in the illustration.
-
-
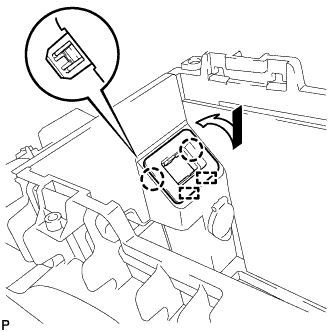
INSTALL NO. 1 STEREO JACK ADAPTER ASSEMBLY
-
Connect the connector.
-
Engage the 2 claws to install the No. 1 stereo jack adapter assembly.
-
-
INSTALL CONSOLE COMPARTMENT DOOR CUSHION
-
Clean the installation surface of the console compartment door cushion.
-
Using a piece of cloth, clean and remove any foreign matter from the upper console box.
Note
-
If any foreign matter remains on the upper console box when the console compartment door cushion is installed, adhesion failure may occur.
-
If a screwdriver is used to remove any foreign matter, the installation surface of the console compartment door cushion may be damaged, and adhesion failure may occur.
Tech Tips
Use the same procedure for the RH side.
-
-
-
Install 2 new console compartment door cushions to the upper console box.
Tech Tips
Use the same procedure for the RH side.
-
-
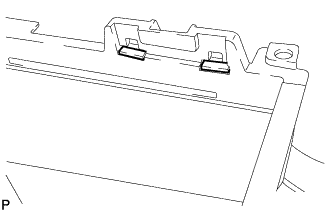
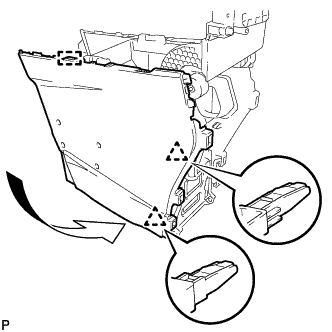
INSTALL NO. 2 BOX SIDE PANEL
-
Engage the guide and 2 clips as shown in the illustration.
-
Install the No. 2 box side panel with the 6 screws.
-
-
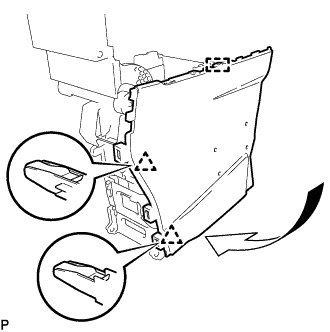
INSTALL NO. 1 BOX SIDE PANEL
-
Engage the guide and 2 clips as shown in the illustration.
-
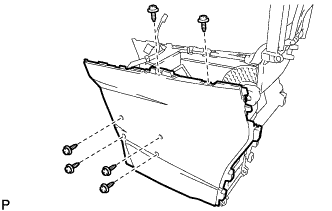
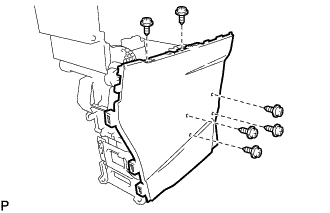
Install the No. 1 box side panel with the 6 screws.
-
-
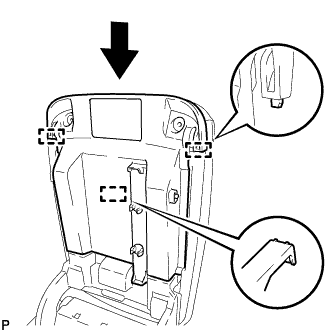
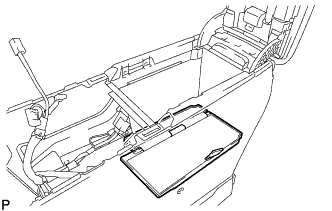
INSTALL CONSOLE COMPARTMENT DOOR SUB-ASSEMBLY
-
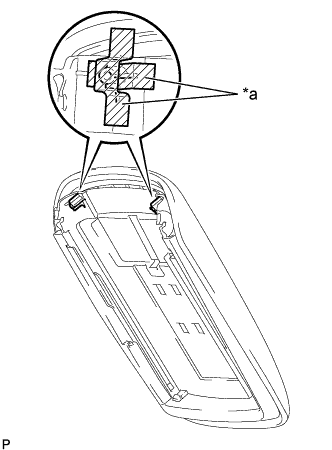
Text in Illustration *a Protective Tape Apply protective tape to the console compartment door lock sub-assembly screw installation areas as shown in the illustration.
-
While pressing the stopper (A), pull the console compartment door sub-assembly in the direction shown by the arrow in the illustration to install it.
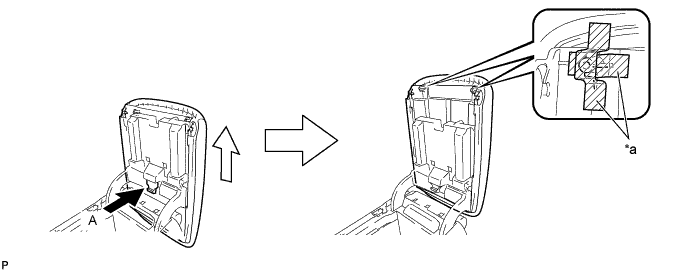
Text in Illustration *a Protective Tape - - -
Remove the protective tape.
-
-
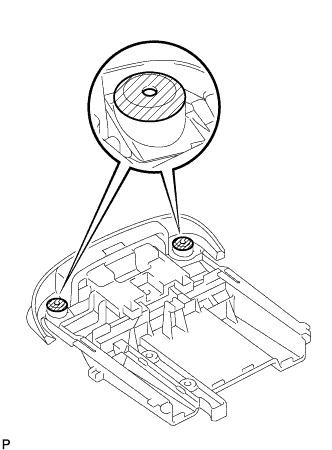
INSTALL CONSOLE BOX CUSHION
-
Install the 2 console box cushions to the console compartment door sub-assembly.
-
-
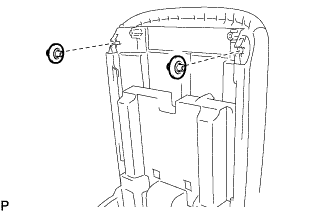
INSTALL GLOVE COMPARTMENT BOX BAND
-
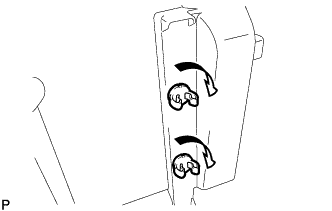
Turn the 2 glove compartment box bands in the direction indicated by the arrow shown in the illustration and install them as a console compartment door lock sub-assembly.
-
-
INSTALL CONSOLE COMPARTMENT DOOR LOCK SUB-ASSEMBLY
-
Clean the areas shown in the illustration with a clean piece of cloth.
-
Slide the console compartment door lock sub-assembly in the direction indicated by the arrow and engage the 3 guides.
-
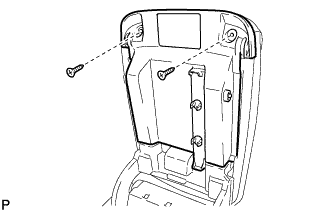
Install the console compartment door lock sub-assembly with the 2 new screws.
-
-
INSTALL FRONT CONSOLE UPPER PANEL GARNISH
-
Engage the 3 claws and guide to install the front console upper panel garnish.
-
-
INSTALL REAR CONSOLE UPPER PANEL GARNISH
-
Engage the 3 claws and guide to install the rear console upper panel garnish.
-
-
INSTALL REAR CONSOLE END PANEL
-
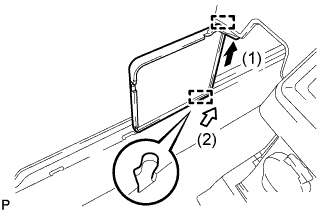
Engage the guide (1) as shown in the illustration.
-
Push the rear console end panel in the direction by the arrow (2) to engage the guide and install the rear console end panel.
-
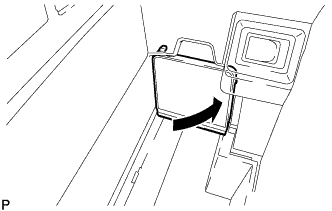
Close the rear console end panel as shown in the illustration.
-
-
INSTALL BOX PANEL SUB-ASSEMBLY
-
Install the box panel sub-assembly.
-
-
INSTALL CONSOLE COIN BOX
-
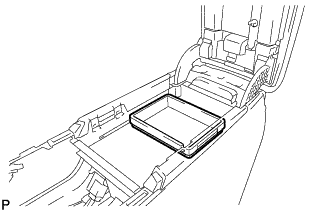
Install the console coin box.
-