REAR SHOCK ABSORBER REMOVAL

Tech Tips
-
Use the same procedure for the RH side and LH side.
-
The procedure listed below is for the LH side.
-
PRECAUTION (w/ Air Suspension)
Note
Be sure to read Precaution thoroughly before servicing Click here.
-
REMOVE REAR WHEEL
-
REMOVE REAR SUSPENSION ARM COVER (w/o Air Suspension)
-
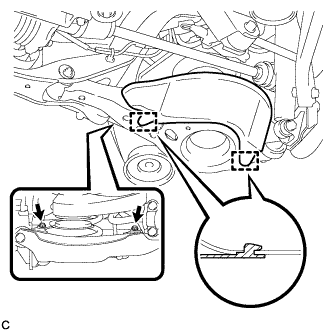
Remove the 2 bolts.
-
Disengage the 2 guides and remove the rear suspension arm cover from the rear No. 2 suspension arm assembly.
-
-
REMOVE REAR SUSPENSION ARM COVER (w/ Air Suspension)
-
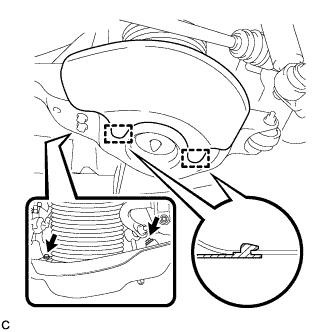
Remove the 2 bolts.
-
Disengage the 2 guides and remove the rear suspension arm cover from the rear No. 2 suspension arm assembly.
-
-
REMOVE REAR SHOCK ABSORBER ASSEMBLY
-
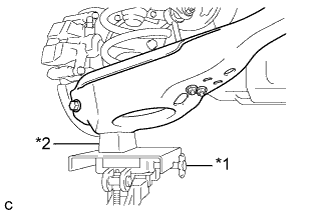
Text in Illustration *1 Jack *2 Wooden Block Support the rear No. 2 suspension arm assembly with a jack using a wooden block.
CAUTION:
Do not jack up the rear No. 2 suspension arm assembly too high as the vehicle may fall.
Note
Keep supporting the rear No. 2 suspension arm assembly with a jack until the installation of the rear shock absorber assembly has been completed.
Tech Tips
Support the rear No. 2 suspension arm assembly so that the rear shock absorber assembly is compressed by 20 to 30 mm (0.787 to 1.18 in.).
-
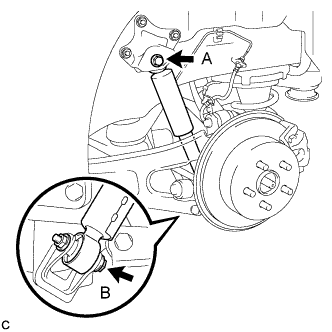
Remove the bolt (A), bolt (B), nut and rear shock absorber assembly.
-