FRONT SHOCK ABSORBER REMOVAL

Tech Tips
-
Use the same procedure for the RH side and LH side.
-
The procedure listed below is for the LH side.
-
REMOVE FRONT WHEEL
-
REMOVE COWL TOP SILENCER PAD
-
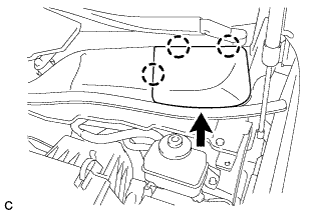
Disengage the 3 claws and remove the cowl top silencer pad.
-
-
LOOSEN FRONT SUPPORT TO FRONT SHOCK ABSORBER NUT
-
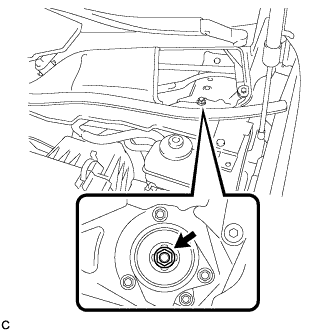
Loosen the front support to front shock absorber nut of the front shock absorber.
Note
-
Do not remove the front support to front shock absorber nut.
-
Loosen the nut only when the front shock absorber with coil spring needs to be disassembled.
-
-
-
SEPARATE FRONT SPEED SENSOR
-
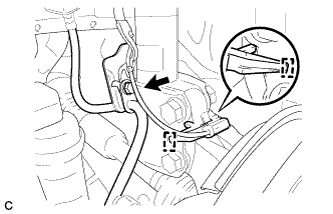
Remove the bolt and clamp, and separate the front speed sensor and front flexible hose.
-
-
SEPARATE FRONT STABILIZER LINK ASSEMBLY
-
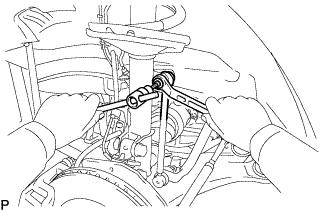
Remove the nut and separate the front stabilizer link assembly from the front shock absorber.
Tech Tips
If the ball joint turns together with the nut, use a hexagon wrench (6 mm) to hold the stud bolt.
-
-
REMOVE FRONT SHOCK ABSORBER WITH COIL SPRING
-
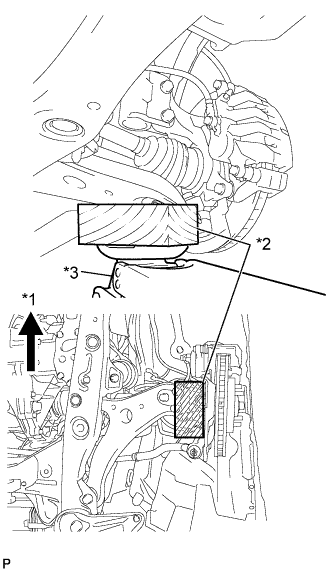
Text in Illustration *1 Front of the Vehicle *2 Wooden Block *3 Jack Support the front axle using a jack and wooden block.
-
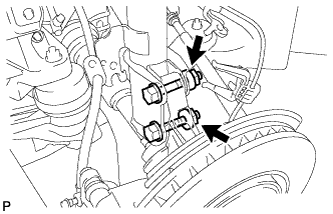
Loosen the 2 bolts, remove the 2 nuts and separate the front shock absorber with coil spring (lower side) from the steering knuckle.
Note
-
When removing the nuts, keep the bolts from rotating.
-
Do not remove the 2 bolts.
-
-
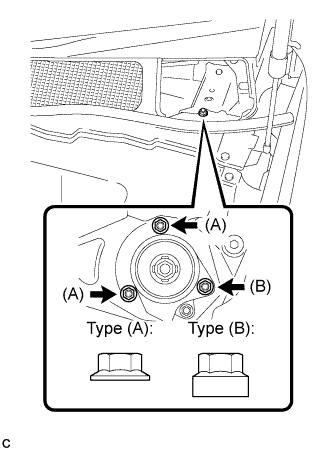
Slowly lower the jack and remove the 3 nuts (upper side), 2 bolts (lower side) and front shock absorber with coil spring.
Note
Make sure that the front speed sensor is completely separated from the front shock absorber with coil spring.
-
-
REMOVE FRONT SUPPORT TO FRONT SHOCK ABSORBER NUT
-
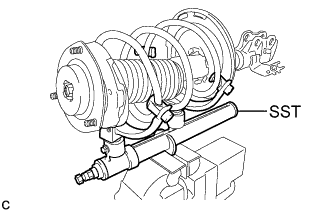
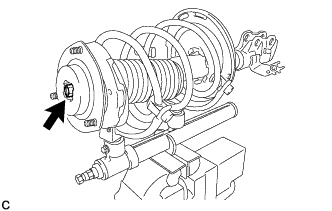
Secure SST in a vise.
- SST
- 09727-00050
- 09727-30021 ( 09727-00010, 09727-00031 )
-
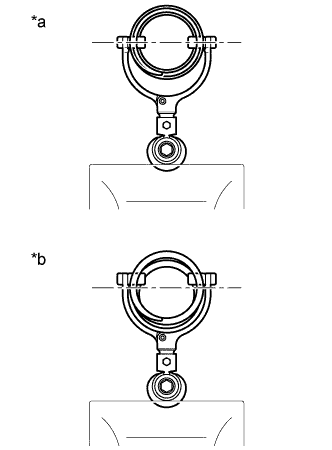
Text in Illustration *a Correct *b Incorrect Attach the arms of SST to the diameter of the front coil spring.
CAUTION:
-
Make sure that the front coil spring is installed so that the distance between the upper and lower arms of SST is at the maximum.
-
Make sure that the claws of the arms are securely attached.
-
-
Using SST, compress the front coil spring.
CAUTION:
-
If the front coil spring bends during compression, immediately stop compression and reinstall SST.
-
Do not excessively compress the front coil spring so that the coils contact each other.
-
Do not use an impact wrench. It will damage SST.
-
-
Confirm that the front coil spring is free and remove the front support to front shock absorber nut.
CAUTION:
Do not remove the front support to front shock absorber nut when the front coil spring is not free.
-
-
REMOVE FRONT SUSPENSION SUPPORT SUB-ASSEMBLY
-
REMOVE FRONT SUSPENSION SUPPORT BEARING
-
REMOVE FRONT COIL SPRING UPPER SEAT
-
REMOVE FRONT COIL SPRING UPPER INSULATOR
-
REMOVE FRONT COIL SPRING
-
REMOVE FRONT SPRING BUMPER
-
REMOVE FRONT COIL SPRING LOWER INSULATOR