EXHAUST PIPE REMOVAL

Note
When removing or installing the center exhaust pipe assembly, do not subject the temperature switch to impacts.
-
REMOVE ENGINE ROOM SIDE COVER (w/ Exhaust Heat Recirculation System)
-
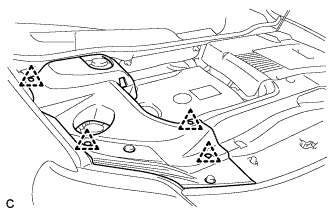
Remove the 4 clips and engine room side cover.
-
-
REMOVE ENGINE ROOM SIDE COVER LH (w/ Exhaust Heat Recirculation System)
-
Remove the 4 clips and engine room side cover LH.
-
-
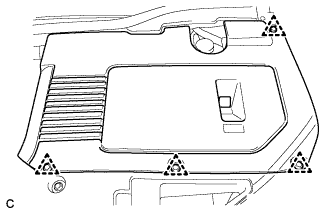
REMOVE COOL AIR INTAKE DUCT SEAL (w/ Exhaust Heat Recirculation System)
-
Remove the 6 clips and cool air intake duct seal.
-
-
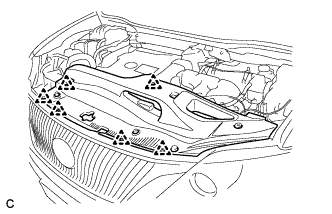
REMOVE V-BANK COVER SUB-ASSEMBLY (w/ Exhaust Heat Recirculation System)
-
Hold the front of the V-bank cover sub-assembly and raise it to disengage the 2 retainers on the front of the V-bank cover sub-assembly. Continue to raise the V-bank cover sub-assembly to disengage the 2 retainers on the rear of the V-bank cover sub-assembly and remove the V-bank cover sub-assembly.
Note
Attempting to disengage both front and rear retainers at the same time may cause the V-bank cover sub-assembly to break.
-
-
REMOVE NO.1 ENGINE UNDER COVER (w/ Exhaust Heat Recirculation System)
-
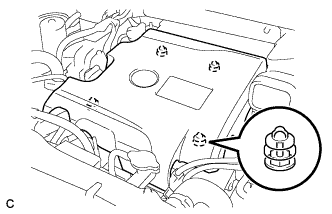
DRAIN ENGINE COOLANT (for Engine with Exhaust Heat Recirculation System)
Note
Do not remove the radiator cap, cylinder block drain cock plugs and radiator drain cock plug while the engine and radiator are still hot. Pressurized hot engine coolant and steam may be released and cause serious burns.
-
Loosen the radiator drain cock plug and drain the coolant.
Tech Tips
Collect the coolant in a container and dispose of it according to the regulations in your area.
-
Remove the radiator cap from the radiator assembly.
-
Loosen the 2 cylinder block drain cock plugs.
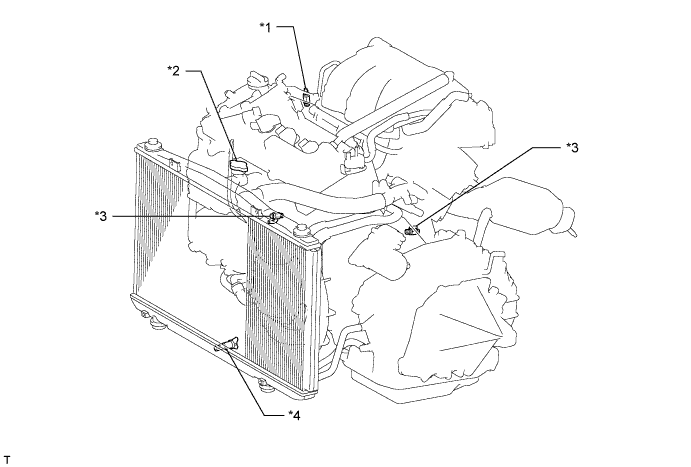
Text in Illustration *1 Air Drain Cock Plug *2 Radiator Cap *3 Cylinder Block Drain Cock Plug *4 Radiator Drain Cock Plug
-
-
REMOVE FRONT FLOOR COVER LH (w/ Exhaust Heat Recirculation System)
-
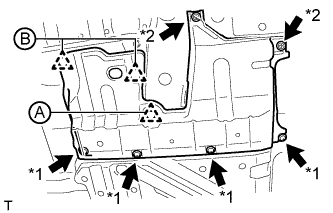
Text in Illustration *1 Bolt *2 Screw Remove the clip (A).
-
Disconnect the 2 clips (B).
-
Remove the 2 screws, 4 bolts and front floor cover LH.
-
-
REMOVE TAIL EXHAUST PIPE ASSEMBLY
-
Remove the 2 bolts and 2 compression springs.
-
Remove the tail exhaust pipe assembly from the 2 exhaust pipe supports.
-
Remove the gasket from the center exhaust pipe assembly.
-
-
REMOVE EXHAUST PIPE DAMPER
-
Remove the 2 bolts and exhaust pipe damper.
-
-
REMOVE HEATER COVER (w/ Exhaust Heat Recirculation System)
-
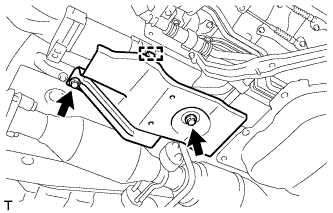
Disconnect the clamp.
-
Remove the 2 bolts and heater cover.
-
-
REMOVE CENTER EXHAUST PIPE ASSEMBLY (w/ Exhaust Heat Recirculation System)
Note
When removing or installing the center exhaust pipe assembly, do not subject the temperature switch to impacts.
-
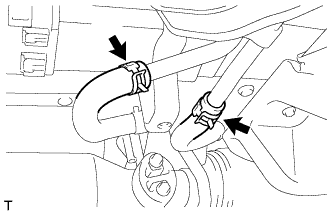
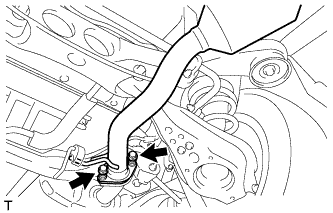
Disconnect the 2 heater water hoses.
-
Remove the 2 bolts and 2 compression springs.
-
Remove the center exhaust pipe assembly from the 4 exhaust pipe supports.
-
Remove the gasket from the front No. 3 exhaust pipe sub-assembly.
-
-
REMOVE CENTER EXHAUST PIPE ASSEMBLY (w/o Exhaust Heat Recirculation System)
-
Remove the 2 bolts and 2 compression springs.
-
Remove the center exhaust pipe assembly from the 4 exhaust pipe supports.
-
Remove the gasket from the front No. 3 exhaust pipe sub-assembly.
-
-
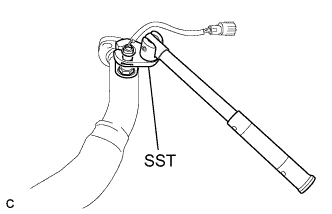
REMOVE OXYGEN SENSOR (for Bank 1 Sensor 2)
-
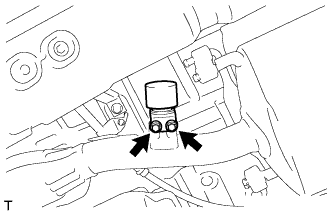
Disconnect the 2 wire harness clamps and oxygen sensor connector.
-
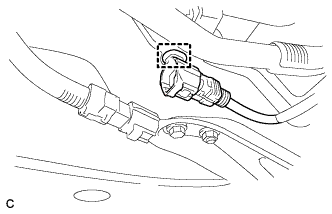
Disconnect the wire harness clamp.
-
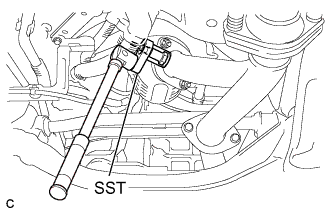
Using SST, remove the oxygen sensor from the No. 3 front exhaust pipe sub-assembly.
- SST
- 09224-00010
-
-
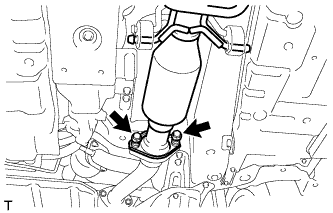
REMOVE FRONT NO. 3 EXHAUST PIPE SUB-ASSEMBLY
-
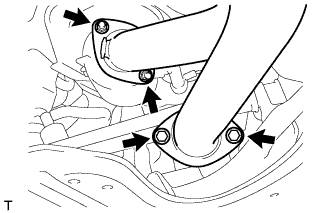
Remove the 2 bolts, 2 nuts and front No. 3 exhaust pipe sub-assembly.
-
Remove the 2 gaskets from the front No. 3 exhaust pipe sub-assembly.
-
-
REMOVE FRONT EXHAUST PIPE ASSEMBLY
-
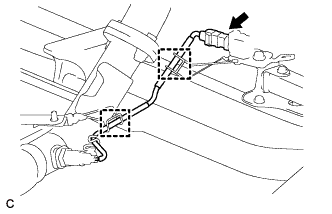
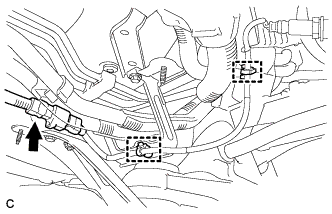
Disconnect the 2 clamps and No. 2 oxygen sensor connector (for Bank 2 Sensor 2).
-
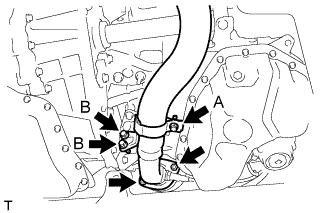
Loosen the bolt (A).
-
Remove the 2 bolts (B), 2 nuts and front exhaust pipe assembly.
-
Remove the gasket from the front exhaust pipe assembly.
-
-
REMOVE NO. 2 OXYGEN SENSOR (for Bank 2 Sensor 2)
-
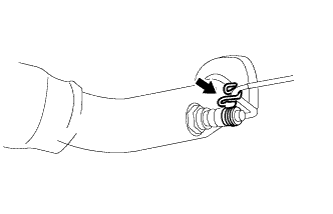
Remove the wire harness clamp bracket.
-
Using SST, remove the No. 2 oxygen sensor from the front exhaust pipe assembly.
- SST
- 09224-00010
-