NOISE FILTER INSTALLATION

-
INSTALL RADIO SETTING CONDENSER
-
Engage the claw to install a new terminal cover to wire harness.
-
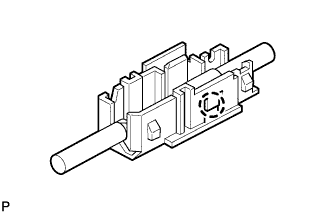
Engage the 3 claws to install the new terminal cover with wire harness to a new condenser.
-
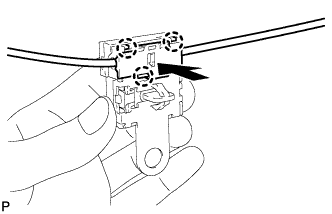
Engage the clamp to temporarily install the new radio setting condenser with wire harness to the back door.
-
Install the new radio setting condenser with the bolt.
- Torque:
- 8.4 N*m { 86 kgf*cm, 74 in.*lbf }
-
-
INSTALL BACK DOOR TRIM PANEL ASSEMBLY
-
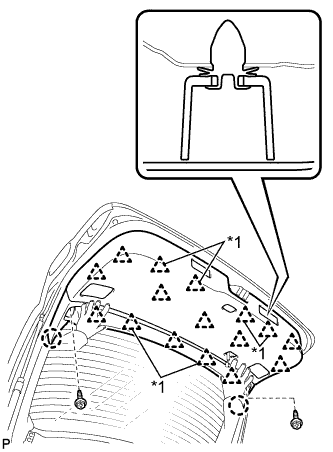
Text in Illustration *1 2-piece Type Clip Engage the 2 claws and 16 clips to install the back door trim panel assembly.
-
Install the 2 screws.
-
-
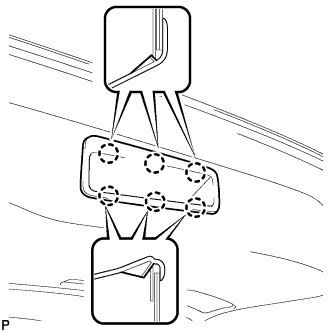
INSTALL BACK DOOR SERVICE HOLE COVER RH
-
Engage the 5 claws to install the back door service hole cover RH.
-
-
INSTALL BACK DOOR SERVICE HOLE COVER LH
-
Engage the 5 claws to install the back door service hole cover LH.
-
-
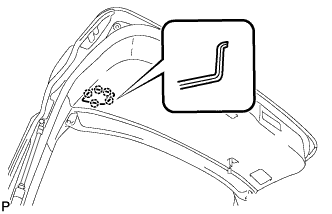
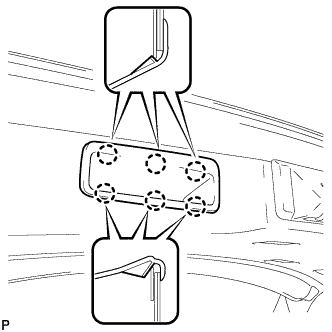
INSTALL BACK DOOR UPPER TRIM COVER RH
-
Engage the 2 claws to install the back door upper trim cover RH.
-
-
INSTALL BACK DOOR UPPER TRIM COVER LH
-
Engage the 2 claws to install the back door upper trim cover LH.
-
-
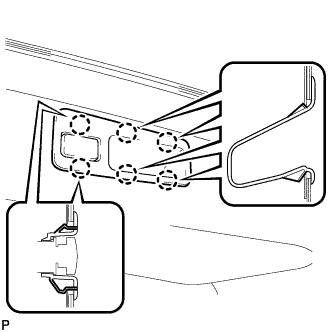
INSTALL NO. 2 ROOM LIGHT ASSEMBLY
-
Connect the connector.
-
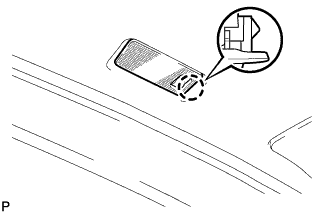
Engage the claw to install the No. 2 room light assembly.
-
-
INSTALL BACK DOOR LOCK COVER
-

Engage the 4 claws to install the back door lock cover.
-
-
INSTALL DOOR PULL HANDLE WITH SWITCH (w/ Power Back Door)
-
Connect the connector.
-
Engage the 6 claws to install the door pull handle with switch.
-
-
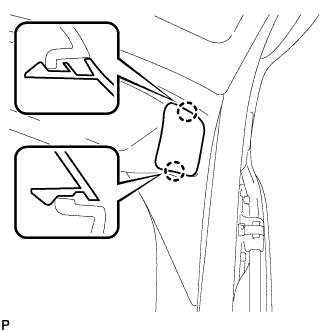
INSTALL BACK DOOR FINISH COVER RH (w/o Power Back Door)
-
Engage the 6 claws to install the back door finish cover RH.
-
-
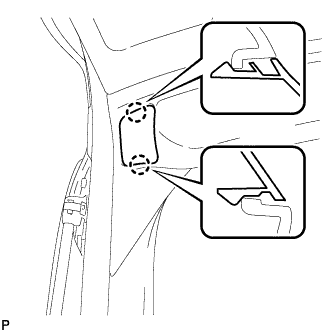
INSTALL BACK DOOR TRIM BASE (w/ Power Back Door)
-

Engage the 4 claws to install the back door trim base.
-
-
INSTALL BACK DOOR FINISH COVER LH (w/o Power Back Door)
-
Engage the 6 claws to install the back door finish cover LH.
-
-
INSTALL TONNEAU COVER SUB-ASSEMBLY