RADIO ANTENNA CORD REMOVAL

-
REMOVE INSTRUMENT PANEL SAFETY PAD
-
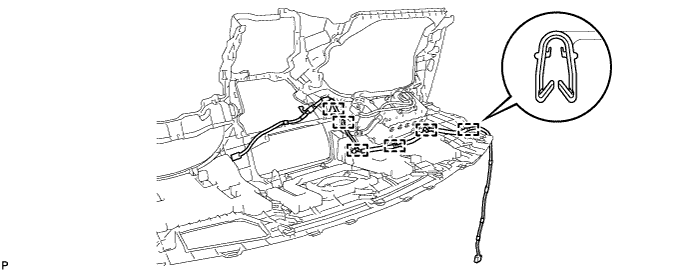
REMOVE ANTENNA CORD SUB-ASSEMBLY (for LHD)
-
Disengage the 6 clamps and remove the antenna cord sub-assembly.
-
-
REMOVE ANTENNA CORD SUB-ASSEMBLY (for RHD)
-
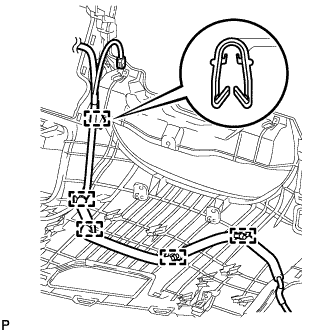
Disengage the 5 clamps and remove the antenna cord sub-assembly.
-
-
REMOVE ROOF HEADLINING ASSEMBLY
-
REMOVE NO. 2 ANTENNA CORD SUB-ASSEMBLY
-
Peel the strips of the tape used to secure the antenna cord only to the extent that allows removal of the antenna cord.
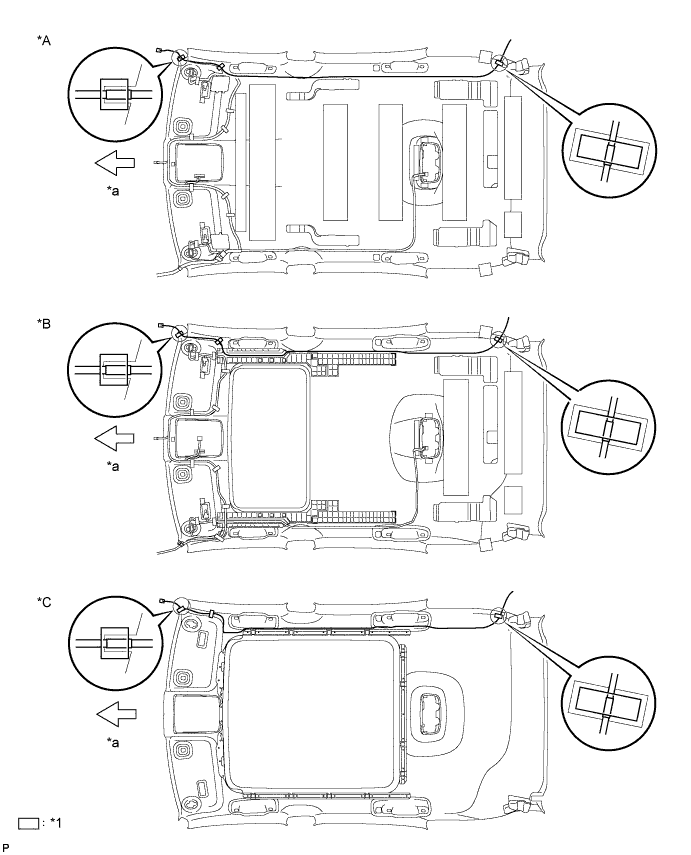
Text in Illustration *A for Standard Roof *B for Sliding Roof *C for Glass Roof - - *1 Adhesive tape - - *a Front - - -
Remove the No. 2 antenna cord sub-assembly.
-
-
REMOVE UPPER BACK WINDOW PANEL TRIM
-
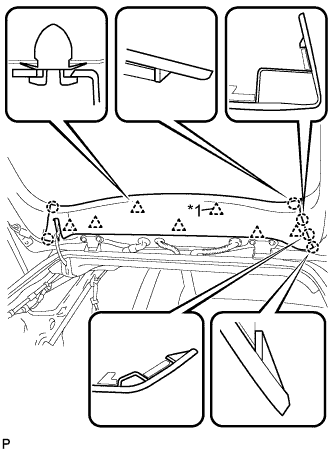
Text in Illustration *1 2-piece Type Clip Disengage the 7 clips and 6 claws, and remove the upper back window panel trim.
Tech Tips
If any clips remain on the back door panel after the upper back window panel trim is removed, remove the clips and install them to the upper back window panel trim.
-
-
REMOVE DIGITAL AUDIO BROADCASTING ANTENNA ASSEMBLY
-
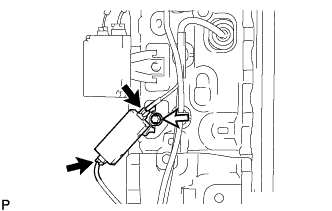
Disconnect the 2 connectors.
-
Remove the bolt and the digital audio broadcasting antenna assembly.
-
-
REMOVE NO. 3 ANTENNA CORD SUB-ASSEMBLY (w/o Digital Audio Broadcasting Antenna)
-
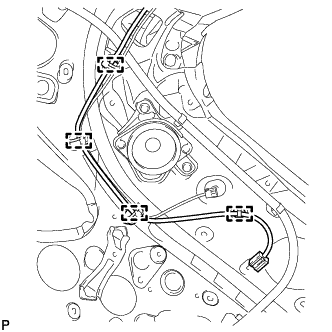
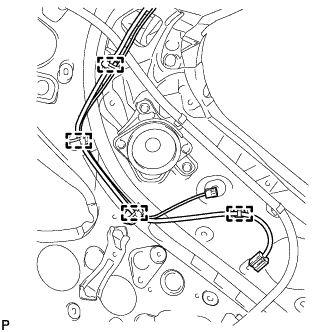
Disengage the 4 clamps.
-
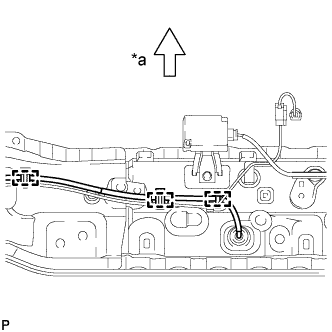
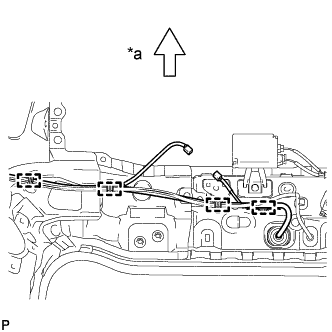
Text in Illustration *a Front Disengage the 3 clamps.
-
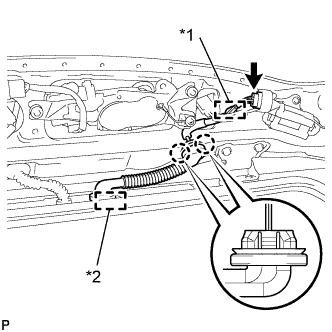
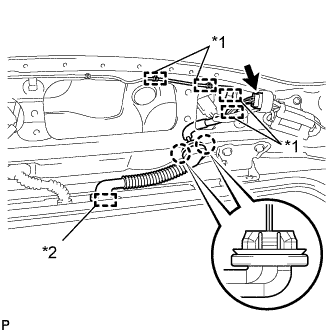
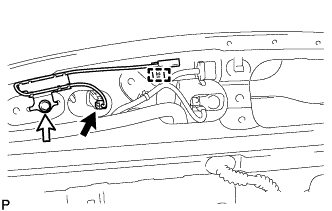
Text in Illustration *1 Clamp *2 Grommet Disconnect the connector.
-
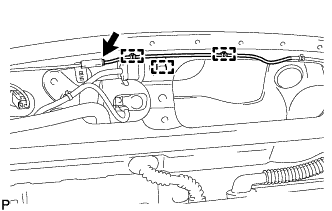
Disengage the clamp.
-
Disconnect the grommet.
-
Disengage the 2 claws and remove the No. 3 antenna cord sub-assembly.
-
-
REMOVE NO. 3 ANTENNA CORD SUB-ASSEMBLY (w/ Digital Audio Broadcasting Antenna)
-
Disengage the 4 clamps.
-
Text in Illustration *a Front Disengage the 3 clamps.
-
Disconnect the connector.
-
Disengage the 3 clamps.
-
Text in Illustration *1 Clamp *2 Grommet Disconnect the connector.
-
Disengage the 4 clamps.
-
Disconnect the grommet.
-
Disengage the 2 claws and remove the No. 3 antenna cord sub-assembly.
-
-
REMOVE ANTENNA CORD SUB-ASSEMBLY (w/ Digital Audio Broadcasting Antenna)
-
Disconnect the connector.
-
Remove the bolt.
-
Disengage the clamp and remove the antenna cord sub-assembly.
-