HEADLIGHT ASSEMBLY REMOVAL

Tech Tips
-
Use the same procedure for the RH and LH sides.
-
The procedure described below is for the LH side.
-
PRECAUTION
Note
After turning the engine switch off, waiting time may be required before disconnecting the cable from the negative (-) battery terminal. Therefore, make sure to read the disconnecting the cable from the negative (-) battery terminal notices before proceeding with work Click here.
-
DISCONNECT CABLE FROM NEGATIVE BATTERY TERMINAL
Note
When disconnecting the cable, some systems need to be initialized after the cable is reconnected Click here.
-
REMOVE FRONT BUMPER ASSEMBLY (for Standard)
-
REMOVE FRONT BUMPER ASSEMBLY (for Sport Package)
-
REMOVE FRONT FENDER TOP REINFORCEMENT SUB-ASSEMBLY
-
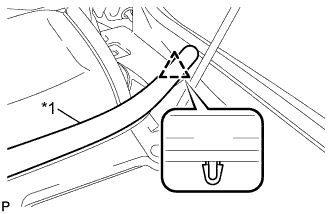
Text in Illustration *1 Hood to Cowl Top Seal Disengage the clip and the hood to cowl top seal to the front fender top reinforcement sub-assembly LH.
-
Remove the clip.
-
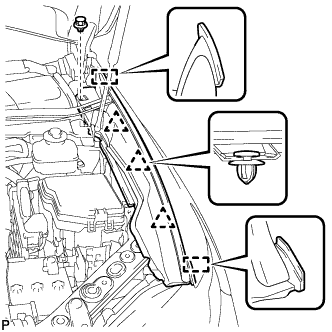
Disengage the 3 clips and 2 guides, and remove the front fender top reinforcement sub-assembly LH.
-
-
REMOVE HEADLIGHT ASSEMBLY
CAUTION:
for HID Headlight:
The headlight light control ECU sub-assembly may be hot when the light control switch is in the HEAD position or right after it is turned off. Check that the headlight light control ECU sub-assembly is not hot before starting work.
-
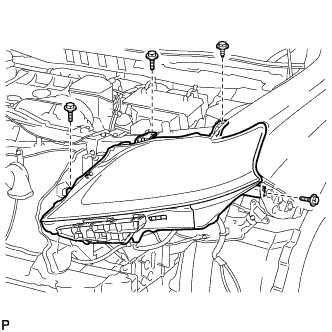
Remove the 3 bolts and screw.
-
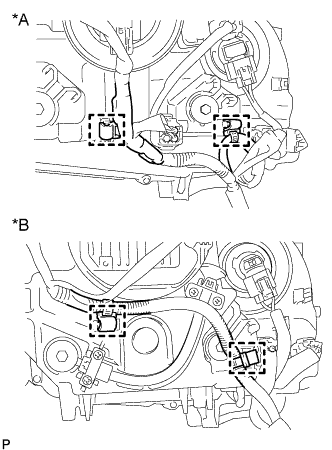
Text in Illustration *A for Halogen Headlight *B for HID Headlight Disengage each clamp.
-
Disconnect each connector and remove the headlight assembly.
-