HEIGHT CONTROL SENSOR (for Rear Side) REMOVAL

CAUTION:
Be sure to read Precaution thoroughly before servicing Click here.
Note
Before removal, make sure to disable vehicle height control by pressing the absorber control switch (height control OFF switch) and confirming that the height control OFF indication is displayed on the meter.
Tech Tips
-
Use the same procedure for the RH side and LH side.
-
The procedure listed below is for the LH side.
-
PRECAUTION (w/ Navigation System for HDD)
Note
After the engine switch is turned off, the display and navigation module display (HDD navigation system) records various types of memory and settings. As a result, after turning the engine switch off, make sure to wait for the time specified in the following table before disconnecting the cable from the negative (-) battery terminal.
Waiting Time before Disconnecting Cable from Negative (-) Battery Terminal Specification Waiting Time w/o Telematics transceiver 60 sec. w/ Telematics transceiver 120 sec. -
DISCONNECT CABLE FROM NEGATIVE BATTERY TERMINAL
Note
When disconnecting the cable, some systems need to be initialized after the cable is reconnected Click here.
-
REMOVE REAR WHEEL
-
REMOVE REAR HEIGHT CONTROL SENSOR SUB-ASSEMBLY
-
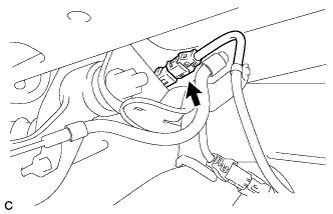
Disconnect the connector.
-
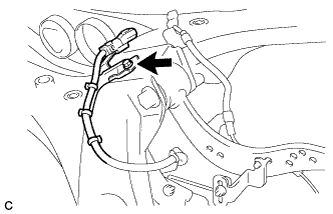
Remove the bolt and separate the height control sensor wire harness bracket.
-
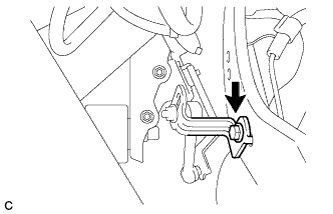
Remove the bolt and separate the height control sensor link from the rear upper control arm.
-
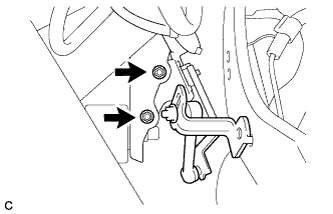
Remove the 2 nuts and rear height control sensor sub-assembly from the rear suspension member.
Note
Do not drop the height control sensor. If it is dropped, replace it with a new one.
-