PROPELLER SHAFT ASSEMBLY REASSEMBLY

-
INSTALL NO. 2 CENTER SUPPORT BEARING ASSEMBLY (for Front Side)
-
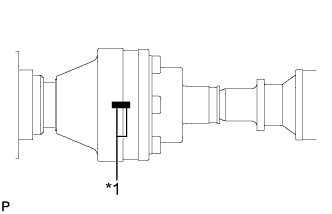
Set the No. 2 center support bearing assembly on the intermediate shaft as shown in the illustration.
Note
Make sure to install the bearing in the correct position.
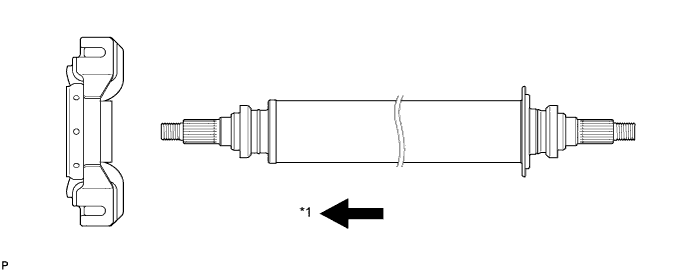
Text in Illustration *1 Front -
Install a new washer to the intermediate shaft.
-

Text in Illustration *1 Matchmark Align the matchmarks on the front flange and shaft, and place the front flange on the shaft.
-

Text in Illustration *1 Turn *2 Hold Using SST to hold the front flange, press the No. 2 center support bearing assembly into position by tightening a new nut and the washer.
- SST
- 09330-00021
- Torque:
- 182 N*m { 1852 kgf*cm, 134 ft.*lbf }
-
Loosen the nut.
-
Tighten the nut again.
- Torque:
- 69 N*m { 701 kgf*cm, 51 ft.*lbf }
-
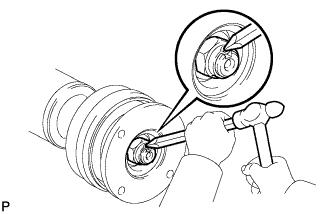
Using a chisel and a hammer, stake the nut.
-
-
INSTALL NO. 2 CENTER SUPPORT BEARING ASSEMBLY (for Rear Side)
-
Set the No. 2 center support bearing assembly on the shaft as shown in the illustration.
Note
Make sure to install the bearing in the correct position.
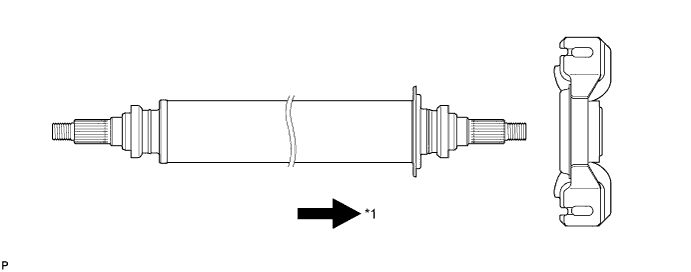
Text in Illustration *1 Rear -
Install a new washer to the intermediate shaft.
-
Text in Illustration *1 Matchmark Align the matchmarks on the rear flange and intermediate shaft, and place the flange on the shaft.
-

Text in Illustration *1 Turn *2 Hold Using SST to hold the front flange, press the No. 2 center support bearing assembly into position by tightening a new nut and the washer.
- SST
- 09330-00021
- Torque:
- 182 N*m { 1852 kgf*cm, 134 ft.*lbf }
-
Loosen the nut.
-
Tighten the nut again.
- Torque:
- 69 N*m { 701 kgf*cm, 51 ft.*lbf }
-
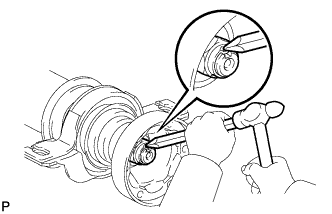
Using a chisel and a hammer, stake the nut.
-
-
INSTALL REAR PROPELLER SHAFT
-
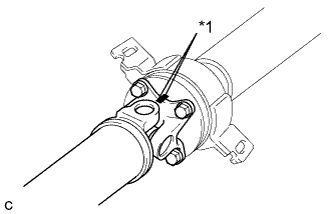
Text in Illustration *1 Matchmark Align the matchmarks on the intermediate shaft and rear propeller shaft, and then install the 2 washers and 6 bolts.
-
Using a hexagon wrench (6 mm), temporarily tighten the 6 bolts.
-
-
INSTALL PROPELLER SHAFT
-
Text in Illustration *1 Matchmark Align the matchmarks on the propeller shaft and front flange.
-
Install the propeller shaft to the front flange with the 4 bolts, 4 washers and 4 nuts.
- Torque:
- 74 N*m { 750 kgf*cm, 54 ft.*lbf }
-
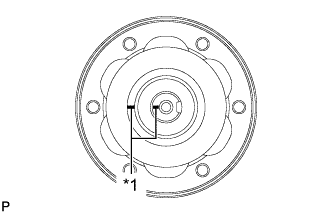
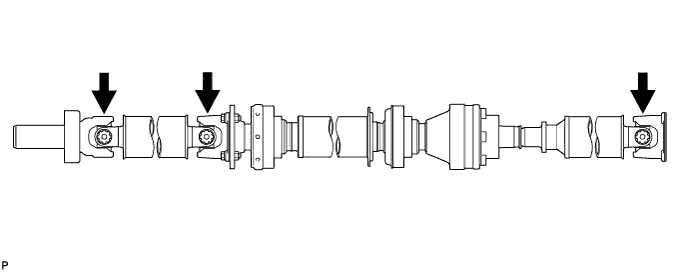
Check that each joint of the propeller with center bearing shaft assembly is facing the direction shown in the illustration.
-