REAR DRIVE SHAFT ASSEMBLY REMOVAL

Tech Tips
-
Use the same procedure for the RH side and LH side.
-
The procedure listed below is for the LH side.
-
PRECAUTION (w/ Air Suspension)
Note
Be sure to read Precaution thoroughly before servicing Click here.
-
REMOVE REAR AXLE CARRIER SUB-ASSEMBLY
Tech Tips
Refer to the instructions for Removal of the rear axle carrier sub-assembly Click here.
-
DRAIN DIFFERENTIAL OIL
-
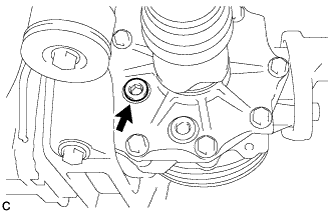
Using a hexagon wrench (10 mm), remove the differential inspection plug and gasket.
-
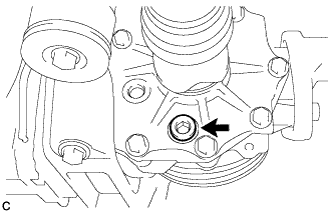
Using a hexagon wrench (10 mm), remove the rear differential drain plug and gasket to drain the differential oil.
-
Using a hexagon wrench (10 mm), install the rear differential drain plug with a new gasket.
- Torque:
- 39 N*m { 398 kgf*cm, 29 ft.*lbf }
-
Using a hexagon wrench (10 mm), temporarily install the differential inspection plug.
Tech Tips
Add differential oil before installing a new gasket and fully tightening the differential inspection plug.
-
-
REMOVE REAR DRIVE SHAFT ASSEMBLY
-
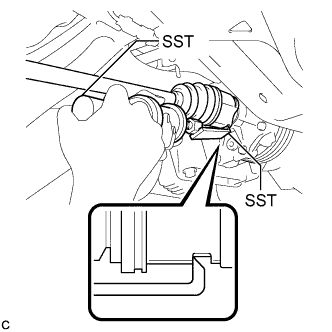
Using SST, remove the rear drive shaft assembly as shown in the illustration.
- SST
- 09520-00031
- 09520-01010
Note
When removing the rear drive shaft assembly, keep it level.
-